I’ll never forget the moment that pushed me to start composting. I was scraping dinner plates into the trash—potato peels, broccoli stems, eggshells, coffee grounds from the morning—and I watched as a full bag of food waste went into the bin. Again. This happened every two days. I stood there doing the mental math: roughly 180 bags of mostly food scraps going to landfill annually from just my household.
The guilt was immediate and uncomfortable. Here I was, growing microgreens and herbs, trying to be more connected to my food and more environmentally conscious, yet I was throwing away the exact materials that could feed my small garden. The cognitive dissonance was glaring.
That was about two years ago. I’m Polly, and I live in a cottage-style house with a small garden and paved patio area. I’ve been an indoor gardening enthusiast for about five years now—growing microgreens, herbs, and whatever vegetables I can coax into thriving in containers on my patio. But until two years ago, I was completely disconnected from the other half of the food cycle: what happens to food waste.
I’d heard about composting, obviously. I had vague notions of backyard compost heaps that smelled bad and attracted rats. My small garden didn’t seem like it had space for a traditional compost bin, and honestly, the whole thing seemed complicated, messy, and time-consuming. So I did nothing.
But that moment at the trash bin nagged at me. I started researching. What I discovered surprised me: indoor composting exists, it doesn’t smell if done correctly, and some methods (particularly Bokashi) can handle things traditional composting can’t—like meat, dairy, and cooked foods.
I started with a simple kitchen compost bin on my counter and a Bokashi bucket under my sink. The transformation was immediate and profound. Within a month, my household trash volume dropped by approximately 40%. Food scraps that used to go to landfill were now becoming rich compost for my garden. Coffee grounds that once filled bin bags were now feeding my vegetables.
Two years later, I’ve tried multiple indoor composting methods, made plenty of mistakes, learned what works (and what definitely doesn’t), and developed a system that fits my lifestyle perfectly. My small garden is healthier and more productive than ever, my vegetable plants in containers on the patio are thriving on homemade compost, and I’ve reduced my household waste dramatically.
This guide covers everything I’ve learned about indoor composting, with a particular focus on Bokashi fermentation—the method that revolutionized my relationship with kitchen waste. Whether you live in an apartment with no outdoor space, a house with a small garden like mine, or anywhere in between, there’s an indoor composting solution that will work for you.
The journey from throwing away food scraps to transforming them into garden gold has been one of the most satisfying changes I’ve made. It’s closed the loop on my food system in ways that growing vegetables alone couldn’t achieve. If you’re feeling that same guilt I felt standing at the trash bin, or if you’re simply curious about whether indoor composting is realistic and worth the effort, this guide is for you.
What is Indoor Composting? Understanding Your Options
Before diving into specific methods, let’s clarify what indoor composting actually means, because there’s genuine confusion about this.
Traditional Outdoor Composting vs Indoor Methods
Traditional outdoor composting is what most people picture: a bin or pile in the garden where you throw vegetable scraps, grass clippings, and yard waste. Microorganisms break down the organic matter over several months through aerobic decomposition (requiring oxygen). You turn it occasionally, monitor moisture, and eventually get finished compost.
This works brilliantly if you have space, don’t mind the time investment, and can manage the physical aspect of turning compost. But it has limitations:
- Requires outdoor space (garden, yard, balcony minimum)
- Takes 3-6 months to produce finished compost
- Can attract pests if not managed properly
- Doesn’t handle meat, dairy, or cooked foods (these attract animals and smell terrible)
- Can smell if the carbon/nitrogen ratio is off
- Requires regular physical maintenance (turning, aerating)
Indoor composting is fundamentally different. You’re working with smaller volumes, controlled conditions, and methods specifically designed for indoor use without odor or pests. The decomposition or fermentation happens in contained systems—often on your kitchen counter or under your sink.
Why Indoor Composting Makes Sense (Even With a Garden)
I have a garden. I could do traditional outdoor composting. But I still use indoor composting as my primary method. Here’s why:
Convenience is unmatched. My kitchen compost bin sits right next to my food prep area. Scraps go directly in while I’m cooking. No trips outside to a compost bin in the rain, in winter, or when I’m cooking dinner at 8 PM in the dark.
Year-round processing works regardless of weather. Traditional outdoor compost bins slow down dramatically in cold weather. Microbial activity nearly stops below 4°C (40°F). Indoor composting happens at room temperature year-round, maintaining consistent processing speed.
I can compost things traditional composting can’t handle. Bokashi (which I’ll explain in detail shortly) ferments rather than decomposes organic matter. This means I can compost meat scraps, cheese, fish, dairy, cooked foods with oil—materials that would be disastrous in a traditional outdoor compost bin.
Volume and speed suit my lifestyle. I cook most meals at home. I generate food scraps daily in manageable amounts. Indoor composting processes these small, steady volumes perfectly. A Bokashi bucket handles 2-3 weeks of kitchen waste, ferments it in 2 weeks, and I’m ready for the next cycle. This rhythm matches how I actually generate waste.
No pest issues indoors. My properly managed indoor composting systems have never attracted fruit flies, rats, raccoons, or any other pests. Everything is sealed. Traditional outdoor bins, even well-managed ones, occasionally attract unwanted visitors.
Odor control is superior indoors. This sounds counterintuitive, but properly managed indoor composting systems (especially Bokashi) have virtually no smell. They’re sealed, controlled environments. My outdoor compost, by contrast, sometimes smells—not terrible, but definitely present—when conditions aren’t perfect.
Space efficiency for small gardens. My small garden space is precious. I don’t want to dedicate 1-2 square meters to a compost bin when I could grow vegetables there. Indoor composting happens in kitchen space (under sink, corner of counter) that wasn’t being used productively anyway.
Overview of Main Indoor Composting Methods
There are four primary indoor composting approaches. Each has distinct characteristics, advantages, and ideal use cases.
1. Bokashi Composting (Fermentation)
This is my primary method and the focus of this guide. Bokashi is a Japanese method that ferments organic waste using beneficial microorganisms (effective microorganisms, or EM).
How it works: You place food scraps in a sealed bucket, sprinkle with Bokashi bran (wheat bran inoculated with beneficial microbes), and seal it. The microorganisms ferment the waste anaerobically (without oxygen) over 2 weeks. The result is pickled, pre-composted material that can be buried in soil or added to a traditional compost to break down rapidly.
Key characteristics:
- Handles ALL food waste including meat, dairy, cooked food, citrus, onions
- Fermentation process, not decomposition
- Takes 2 weeks in the bucket, then 2-4 weeks buried in soil
- Produces “Bokashi tea”—liquid fertilizer for plants
- Virtually no smell when managed correctly (mild pickled/fermented smell when opened)
- Requires purchasing Bokashi bran (ongoing cost)
- End product must be buried or composted further (not finished compost straight from bucket)
Best for: People who eat meat/dairy, want to compost everything, have some outdoor space (even small) for burial, and want a hands-off method.
2. Vermicomposting (Worm Composting)
This method uses specific composting worms (usually red wigglers) to eat and process food scraps, producing worm castings (incredibly rich compost) and liquid fertilizer.
How it works: Worms live in a bin with bedding material (shredded newspaper, cardboard, coconut coir). You feed them food scraps regularly. They eat the scraps, and their castings accumulate in the bin. After 3-6 months, you harvest the castings.
Key characteristics:
- Produces high-quality vermicompost (worm castings)
- Worms are living creatures requiring care
- Cannot handle meat, dairy, citrus (in large amounts), onions, garlic, spicy foods
- Temperature sensitive (worms die if too hot or cold)
- Can smell if overfed or moisture balance is wrong
- Occasional fruit flies if not managed carefully
- Produces both solid compost and liquid fertilizer
Best for: People who don’t eat much meat/dairy, enjoy caring for living systems, want finished compost without needing outdoor space, and have stable indoor temperatures.
3. Electric Composters
These are machines (brands like Lomi, FoodCycler, Vitamix FoodCycler) that heat, grind, and dehydrate food waste, reducing it to a dry, soil-like material in hours.
How it works: You place food scraps in the machine, press a button, and 3-8 hours later (depending on model and cycle), you get dried, ground material.
Key characteristics:
- Extremely fast (hours, not weeks)
- Handles most food waste
- Requires electricity (cost and environmental consideration)
- Expensive initial investment ($300-500 / £250-420 / €280-470)
- Output is dehydrated food waste, not true compost (still needs soil microbes to break down fully)
- Some noise during operation
- No ongoing supply costs
Best for: People who want maximum convenience, can afford the upfront cost, don’t mind electricity usage, and have counter space for an appliance.
4. Simple Collection Bins (Countertop Compost Bins)
These aren’t composting systems—they’re collection containers. You store food scraps in them temporarily before taking them to an outdoor compost bin, municipal composting, or community compost drop-off.
How it works: Attractive, often charcoal-filtered containers sit on your counter. You collect scraps for a few days, then empty the bin into your final composting destination.
Key characteristics:
- Not actually composting—just collecting
- Requires somewhere to take the collected scraps
- Odor control via charcoal filters
- Aesthetically designed for countertop display
- Inexpensive ($20-60 / £17-50 / €20-55)
- No processing happens—just storage
Best for: People with access to outdoor compost bins or municipal pickup who want a tidy, attractive way to collect scraps rather than trips outside after every meal.
Which Method is Right for You?
Choose Bokashi if:
- You eat meat, dairy, and varied foods
- You want to compost literally everything
- You have even small outdoor space (garden, patio, large pots)
- You want minimal daily effort
- You’re okay with a two-stage process (ferment, then bury)
Choose vermicomposting if:
- You’re mostly vegetarian or plant-based
- You’re interested in caring for worms (sounds weird, but some people love this)
- You want finished compost without outdoor space
- You’re patient with slower processing
- You want the highest quality compost possible
Choose electric composter if:
- You have budget for the investment
- You want maximum speed and convenience
- You don’t mind electricity usage and noise
- You want a hands-off, appliance-like solution
Choose collection bins if:
- You already have somewhere to compost (outdoor bin, municipal service)
- You just need interim storage
- You want something attractive for your kitchen
- You don’t want to manage an actual composting process
My choice: I use Bokashi as my primary method (handles everything, fits my lifestyle) with a simple countertop collection bin for day-to-day convenience. Scraps go in the attractive countertop bin throughout the day, then I transfer to my Bokashi bucket once daily or when the collection bin is full. This combination gives me the aesthetics of a nice kitchen container plus the processing power of Bokashi.
I also have a small traditional outdoor compost bin where I add garden waste (weeds, plant trimmings) and where I sometimes bury finished Bokashi material when I don’t want to dig holes in my garden beds.
The beauty of indoor composting: You’re not locked into one method. You can try different approaches, combine methods, or switch as your needs change. Start with what seems most accessible and adjust from there.
Bokashi Composting: My Primary Method
Let me explain why Bokashi has become my go-to composting method and why, after trying multiple approaches, this is the one I recommend most enthusiastically.
What Bokashi Actually Is
Bokashi is a Japanese term meaning “fermented organic matter.” Unlike traditional composting, which is an aerobic process (requires oxygen) where microorganisms break down organic matter through decomposition, Bokashi is an anaerobic fermentation process (happens without oxygen).
Think of it like pickling or fermenting vegetables—sauerkraut, kimchi—except you’re fermenting all your food waste. The beneficial microorganisms don’t decompose the material in the bucket; they ferment and preserve it. The actual decomposition happens later, after you bury the fermented material in soil.
The process in simple terms:
- Collect food scraps in a sealed Bokashi bucket
- Sprinkle Bokashi bran (beneficial microbes) on each layer
- Keep sealed for 2 weeks while fermentation occurs
- Drain liquid (Bokashi tea) periodically
- Bury fermented material in soil or add to traditional compost
- Material breaks down rapidly (2-4 weeks) in soil into nutrient-rich compost
The key innovation: Because it’s fermentation rather than decomposition, you can process materials that traditional composting cannot handle—meat, fish, dairy, cooked foods, oils, citrus, onions. Everything.
How It’s Different From Traditional Composting
The differences are fundamental, not just technical details:
Traditional composting:
- Aerobic (needs oxygen and regular turning)
- Microorganisms decompose waste into compost directly in the bin
- Takes 3-6 months to produce finished compost
- Cannot handle meat, dairy, oils, cooked food (they rot, smell terrible, attract pests)
- Requires carbon/nitrogen balance (browns and greens)
- Generates heat as microbes work
- Best done outdoors at larger scale
Bokashi composting:
- Anaerobic (sealed bucket, no oxygen)
- Microorganisms ferment waste but don’t fully decompose it in the bucket
- Takes 2 weeks in bucket + 2-4 weeks in soil for finished compost
- Handles ALL food waste including meat, dairy, oils, cooked food
- No carbon/nitrogen balancing needed
- No heat generated (stays room temperature)
- Perfect for indoor use at small scale
The implications: Bokashi lets you compost your actual kitchen waste—the remnants of real meals with meat, cheese, oils, leftovers—not just the limited subset of vegetable scraps that traditional composting accepts.
For me, this was transformative. Traditional composting would handle maybe 40% of my kitchen waste (vegetable peelings, coffee grounds, eggshells). Bokashi handles 95%+ of everything I’d otherwise throw away. That’s the difference between a partial solution and a comprehensive one.
Why It Works for Kitchens
No smell (when done correctly). This was my biggest concern starting out. How could fermenting food waste inside my house not smell terrible?
The answer: Bokashi is a controlled fermentation using beneficial microorganisms that out-compete putrefying bacteria. When sealed and managed properly, the bucket has virtually no smell. When I open it to add scraps, there’s a mild pickled smell—slightly sour, fermented, similar to sourdough or kimchi. It’s not unpleasant, and it doesn’t permeate the kitchen.
Compare this to a traditional compost bin outside that sometimes smells notably bad, or a trash can with rotting food scraps (which absolutely reeks), and Bokashi is remarkably neutral.
Handles meat and dairy safely. I eat meat several times weekly. Fish occasionally. Cheese regularly. Before Bokashi, these scraps went in the trash, contributing to that terrible trash smell and requiring frequent trash removal.
Now, chicken bones go in Bokashi. Fish skin and bones go in Bokashi. That piece of moldy cheese I discovered in the back of the fridge goes in Bokashi. Leftover pasta with meat sauce goes in Bokashi. Everything.
The fermentation process preserves these materials rather than letting them rot. When I bury the fermented bucket contents in my garden, they break down rapidly without smell or pest issues because the fermentation has already begun breaking them down.
Fits kitchen workflow perfectly. My Bokashi bucket sits under my kitchen sink. When I’m cooking, scraps go into my countertop collection bin. Once daily (usually after dinner cleanup), I open the Bokashi bucket, dump the day’s scraps in, sprinkle Bokashi bran, press down, close lid. Takes 45 seconds.
Every 3-4 days, I drain the Bokashi tea (liquid that accumulates) through the spigot at the bottom of the bucket. Takes 30 seconds. I dilute it and water my plants with it immediately.
Every 2 weeks, when the bucket is full and has fermented, I empty it into my garden. Takes 15 minutes to dig a trench, bury contents, cover with soil.
Total time investment: maybe 5 minutes weekly for daily maintenance + 15 minutes every two weeks for emptying. Completely manageable alongside normal cooking and cleaning routines.
Compact size suits small kitchens. My Bokashi bucket is roughly 40cm tall and 30cm diameter (16 inches tall, 12 inches diameter). It sits under my sink next to cleaning supplies. It doesn’t take up counter space, doesn’t occupy garden space, and doesn’t require its own dedicated area.
For my cottage with a small kitchen, this space efficiency matters. I couldn’t accommodate a large worm bin or multiple collection containers, but one Bokashi bucket fits perfectly in existing kitchen storage.
Speed is reasonable. Two weeks to ferment a bucket of scraps, then 2-4 weeks buried in soil for full decomposition. Total time: 4-6 weeks from food scrap to finished compost.
That’s slower than electric composters (hours) but much faster than traditional composting (months) or vermicomposting (3-6 months). For me, it’s the sweet spot—fast enough to feel satisfying, slow enough to require minimal active management.
The Science Behind It: Effective Microorganisms
Bokashi bran is wheat bran (or sometimes rice bran, sawdust, or other carrier material) that’s been inoculated with effective microorganisms (EM). These are specific strains of beneficial bacteria, yeasts, and fungi that work together to ferment organic matter.
The primary microorganisms include:
- Lactic acid bacteria (like in yogurt and sauerkraut)—produce lactic acid that lowers pH and preserves material
- Yeasts—ferment sugars and produce enzymes
- Phototrophic bacteria—support other microbes and help break down complex compounds
When you sprinkle Bokashi bran on food scraps and seal the bucket, these microorganisms multiply rapidly in the anaerobic environment. They ferment the food scraps, producing:
- Lactic acid—lowers pH, preserves material, prevents putrefaction
- Enzymes—begin breaking down proteins, fats, and carbohydrates
- Vitamins and beneficial compounds—some research suggests EM produce B vitamins and other beneficial substances during fermentation
The fermented material that results is:
- Acidic (pH around 3.5-4)—this acidity prevents pathogenic bacteria from growing
- Pre-digested—much easier for soil microbes to break down quickly
- Nutrient-rich—nitrogen, phosphorus, and other nutrients are preserved rather than lost to volatilization (as can happen in hot composting)
When you bury this fermented material in soil, soil microorganisms finish the decomposition rapidly because the material has been pre-processed. It’s like the difference between giving soil microbes raw ingredients versus partially cooked ingredients—the partially processed material is far easier and faster to break down completely.
Why this matters practically: The science explains why Bokashi doesn’t smell (fermentation vs putrefaction), why it can handle meat/dairy (preserved by acidity), why it breaks down fast in soil (pre-processing), and why the end product is so nutrient-rich (preservation rather than loss of compounds).
You don’t need to understand the science to use Bokashi successfully, but I find it helps explain why this method works when logic suggests fermenting meat indoors should be a disaster. The microorganisms make all the difference.
My Experience: Why I Choose Bokashi
I tried vermicomposting first. I set up a worm bin, bought red wigglers, carefully managed it for four months. The worms were fascinating, the compost produced was exceptional quality, but the limitations frustrated me. I couldn’t compost any meat or dairy. Citrus had to be limited. Worms required specific temperature ranges and careful feeding schedules. When I traveled for a week, I worried about the worms. When summer temperatures spiked, worms started dying.
Vermicomposting works brilliantly for some people, but it wasn’t the right fit for my lifestyle and diet.
I looked at electric composters. The speed was appealing—finished “compost” in hours. But the price ($400-500) was steep for what amounts to a dehydrator producing material that still needs time in soil to become true compost. The electricity usage bothered me environmentally. And reviews were mixed—some people loved them, others found them noisy, smelly, or underwhelming in output quality.
Then I discovered Bokashi. I bought a basic two-bucket system ($70) and a bag of Bokashi bran ($15). I was skeptical but willing to try.
The first bucket filled over 10 days. I was amazed at what I could put in: chicken bones from Sunday roast, cheese rinds, fish skin, spoiled leftovers, vegetable scraps, coffee grounds, eggshells, fruit peels—everything mixed together. I sprinkled bran, kept it sealed, and waited nervously for terrible smells that never came.
After two weeks, I opened the bucket. The contents looked largely unchanged—recognizable scraps, but subdued colors and slightly compressed. The smell was pleasantly sour, like opening a jar of sauerkraut. No rot, no putrefaction, no horrible odors.
I dug a trench in my garden bed, buried the contents, covered with soil. Four weeks later, I dug in the same spot to plant tomatoes. The material had completely disappeared—fully broken down into dark, rich soil that earthworms were enthusiastically inhabiting.
That first success convinced me. Two years later, I’ve processed probably 50+ Bokashi buckets. The method works consistently, fits my routine effortlessly, and has transformed my kitchen waste from guilt-inducing trash to valuable garden resource.
The breakthrough for me: Bokashi doesn’t require perfection. Traditional composting needs the right carbon-nitrogen ratio, proper moisture, regular turning. Vermicomposting requires careful feeding and temperature management. Bokashi is remarkably forgiving—sprinkle bran, keep sealed, drain tea occasionally. That’s essentially it. For someone who’s busy and wants results without fussiness, Bokashi delivers.
Choosing a Kitchen Compost Bin for Your Countertop
Before diving deeper into Bokashi systems, let’s talk about the first point of contact in kitchen composting: the collection bin on your counter.
Even if you’re doing Bokashi, vermicomposting, or using an electric composter as your processing method, you likely want a convenient container on your countertop for collecting scraps throughout the day. Transferring scraps constantly to a bucket under the sink or a worm bin in another room interrupts cooking workflow.
This is where countertop compost bins come in—they’re the staging area between food prep and final processing.
Types of Kitchen Compost Bins and Containers
Ceramic compost bins are attractive, heavy, and often designed to match kitchen décor. They typically have charcoal filters in the lid to control odor and come in various sizes (2-8 liters / 0.5-2 gallons).
Pros:
- Aesthetically pleasing—look like intentional kitchen items, not utilitarian buckets
- Heavy base prevents tipping
- Easy to clean (many are dishwasher safe)
- Charcoal filters control odor effectively
- Available in many colors and styles
Cons:
- More expensive ($30-70 / £25-60 / €30-65)
- Can crack or chip if dropped
- Filters need replacing periodically ($8-15 / £7-12 / €8-15 for pack of replacements)
- Heavy to carry when full
Stainless steel compost bins are durable, modern-looking, and popular for contemporary kitchens.
Pros:
- Very durable—won’t break if dropped
- Easy to clean
- Often include charcoal filters
- Doesn’t stain or absorb odors
- Sleek, modern appearance
Cons:
- Can show fingerprints
- More expensive ($25-60 / £20-50 / €25-55)
- Some cheaper models can dent
- Filters need replacing
Bamboo or wood compost bins appeal to people wanting sustainable, natural materials.
Pros:
- Attractive, warm aesthetic
- Sustainable material
- Often include charcoal filters
- Lightweight
Cons:
- Can absorb odors over time
- Some moisture damage possible with extended use
- Require more careful cleaning (can’t soak)
- Moderate price ($25-50 / £20-42 / €25-47)
Plastic compost bins are the budget option—functional if not beautiful.
Pros:
- Inexpensive ($12-30 / £10-25 / €12-28)
- Lightweight
- Easy to clean
- Durable (won’t break if dropped)
- Some include filters
Cons:
- Less attractive
- Can stain over time
- May absorb odors eventually
- Often look utilitarian rather than decorative
Simple bowls or containers (repurposed) are the zero-cost option. Any bowl, jar, or container with a lid can function as a compost collector.
Pros:
- Free (use what you have)
- Completely customizable
- No commitment—try composting before investing
Cons:
- No odor control (no filters)
- May not look intentional/attractive
- Might not have tight-fitting lid
What to Look For in a Countertop Compost Bin
After using several different options over two years, here’s what actually matters:
Size appropriate to your routine. I empty my countertop bin once daily (usually after dinner). A 3-4 liter (0.75-1 gallon) bin holds one day’s scraps for me comfortably without overflowing.
If you cook less frequently or generate fewer scraps, a smaller 2-liter bin might suffice. If you cook large meals or have a family, you might want 5-6 liters or plan to empty twice daily.
Don’t go too large—bigger bins sit longer before emptying, increasing odor risk. I’d rather empty a smaller bin daily than a larger bin every 3-4 days.
Effective odor control. Charcoal filters work. They’re not magic, but they genuinely reduce odor between emptying. I’ve used bins with and without filters, and filtered bins are noticeably better.
The filter sits in the lid (usually removable for replacement) and absorbs odors as they rise from decomposing scraps. Filters last 3-6 months depending on usage before needing replacement.
Alternatively, tight-fitting lids without filters still control odor reasonably well if you empty daily. The key is minimizing air exchange.
Easy to clean. You’ll wash this container regularly (I rinse mine every time I empty it, deep clean weekly). It needs to be simple to clean inside and out.
Smooth interiors (no crevices or textured surfaces) are easiest. Wide openings let you reach inside easily. Dishwasher-safe is convenient but not essential—I hand-wash mine in 30 seconds under hot water.
Appropriate aesthetic for your kitchen. This sits on your counter. You’ll see it every day. If it’s ugly or doesn’t match your kitchen, you’ll resent it, hide it, and eventually stop using it.
I have a cream-colored ceramic bin that matches my cottage kitchen aesthetic. It looks intentional and attractive, not like trash on my counter. This matters more than I initially realized—the psychological difference between something that looks good and something functional-but-ugly affects whether you actually use it consistently.
Handle or easy grip. When full, compost bins can be heavy. A handle or indented grips make carrying to your Bokashi bucket or outdoor compost easier.
My ceramic bin has a handle on top. I grab it, walk to the sink, lift the Bokashi bucket lid, dump contents, done. Without a handle, I’d need two hands and more awkward maneuvering.
Lid that stays put but opens easily. The lid should fit securely enough that cats, dogs, or toddlers can’t knock it off, but not so tight that opening it while your hands are messy from cooking is difficult.
I prefer lids that lift straight off rather than hinged lids. Hinged lids can get in the way when scraping scraps in, and the hinge is one more place for gunk to accumulate.
Bokashi Bins vs Regular Compost Collection Bins
It’s worth clarifying the difference because this confuses newcomers:
Regular countertop compost bins (what I’ve been describing) are collection containers. They don’t process anything—they just hold scraps temporarily until you transfer them to your processing system (Bokashi bucket, worm bin, outdoor compost, municipal bin).
Bokashi bins/buckets are processing containers. These are the sealed buckets (usually 15-20 liters / 4-5 gallons) with tight-fitting lids and spigots at the bottom. You don’t put these on your counter—they’re too large and too utilitarian. They sit under the sink, in a utility closet, or in a corner.
Many people (including me) use both: a small attractive collection bin on the counter for convenience during cooking, and a larger Bokashi bucket out of sight for the actual fermentation process.
Think of it like a two-stage system:
- Stage 1 (countertop bin): Collect scraps throughout the day conveniently
- Stage 2 (Bokashi bucket): Transfer scraps once daily for fermentation
You don’t need a countertop collection bin—you could walk to your Bokashi bucket every time you have scraps. But it’s less convenient, interrupts cooking flow, and means more trips to wherever you store the Bokashi bucket. The small investment in a nice countertop bin improves the whole experience significantly.
Where to Position Your Countertop Bin
On the counter near food prep is ideal. Mine sits in the corner of my counter about 30cm (1 foot) from my cutting board. Scraps go directly from cutting board to bin with minimal movement.
Avoid placing it:
- Too far from main prep area (you won’t use it—too inconvenient)
- Next to the stove (heat accelerates decomposition and odor)
- In direct sunlight (same issue—heat)
- Where it gets knocked frequently (annoying and risks spills)
Under the sink is an alternative if counter space is extremely limited. But this means opening the cabinet every time you have scraps, which reduces convenience significantly. I tried this initially and found I’d pile scraps on the counter “temporarily” rather than opening the cabinet constantly. The whole point of a countertop bin is accessibility.
On a small cart or shelf nearby works if your counter is genuinely too crowded. As long as it’s within arm’s reach of your main food prep area, it’ll get used.
Polly’s Recommendations and What I Use
I use a 3.8-liter (1-gallon) ceramic compost bin in cream with a bamboo handle. It cost $45 / £38 / €42 two years ago and has been worth every penny. The charcoal filter does its job, it’s beautiful enough that I’m happy to have it on display, and it holds exactly the right amount for my daily routine.
I replace the charcoal filter every 4-5 months ($10 for a 3-pack, so about $3.30 per replacement). Over two years, I’ve spent maybe $8 on replacement filters. The bin itself has shown zero wear—ceramic is durable.
If I were starting fresh today, here’s what I’d consider:
Budget-conscious (under $20 / £17 / €20): Simple stainless steel bin without charcoal filter, 3-liter size. Available from various brands. Won’t be as odor-controlled, but if you empty daily and rinse after each use, it’s perfectly functional. Or honestly, just use a large bowl with a plate as a lid to start—prove to yourself you’ll actually compost before investing.
Mid-range ($30-50 / £25-42 / €30-47): Ceramic or quality stainless bin with charcoal filter, 3-4 liter size. This is the sweet spot—attractive enough for permanent kitchen display, functional enough for daily use, affordable enough not to stress about the investment.
Premium ($50-80+ / £42-67+ / €47-75+): Designer ceramic bins in specific colors to match kitchen décor, or high-end stainless with advanced filter systems. These are beautiful and work well, but the functionality isn’t dramatically better than mid-range options. Buy these if aesthetics matter greatly to you and budget allows.
DIY/free: Large bowl or jar with lid, or repurpose any container you already own. I started with a large ceramic bowl with a dinner plate as a lid. It worked fine for two months while I decided if composting was something I’d stick with. Once I confirmed I was committed, I invested in a proper bin. There’s zero shame in starting with what you have.
My actual recommendation: Don’t overthink this decision. Any container that holds scraps and has a lid will work. The important thing is starting, not having the perfect bin. I’ve seen people spend weeks researching the “best” compost bin and never actually start composting. Buy something reasonable, or use what you have, and begin. You can always upgrade later if you want.
The countertop bin is the most visible part of your composting system, but it’s not the most important. The Bokashi bucket (or worm bin, or whatever processing method you choose) does the actual work. The countertop bin is just convenient staging—helpful but not essential.
Setting Up Your Bokashi System (Step-by-Step)
Now let’s get into the practical details of actually setting up and using a Bokashi system. This is where theory becomes practice.
Equipment You Need
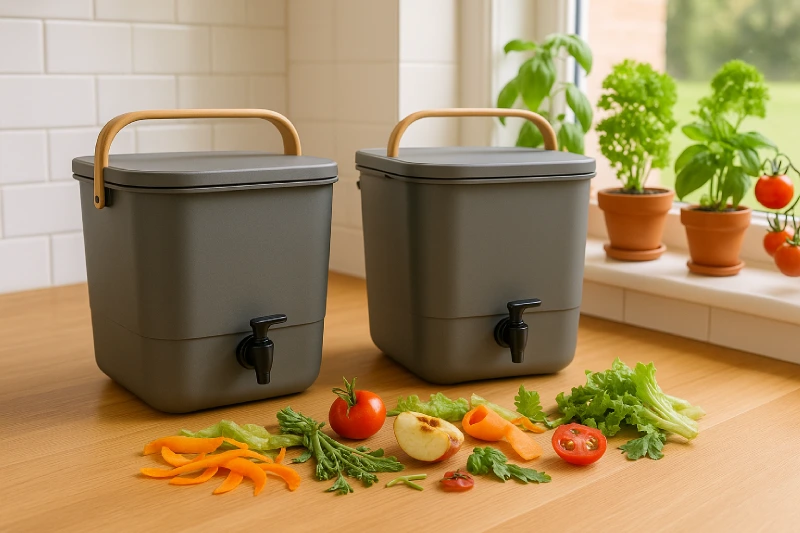
1. Bokashi bucket(s)
This is your primary equipment—the container where fermentation happens.
Capacity: Most Bokashi buckets are 15-20 liters (4-5 gallons). This size handles about 2-3 weeks of kitchen scraps for one person, or 1-2 weeks for a family of 3-4.
Features to look for:
- Tight-sealing lid: Essential for anaerobic fermentation. The lid should create an airtight seal. Most good Bokashi buckets have rubber gaskets or sealing mechanisms.
- Spigot/tap at bottom: Necessary for draining Bokashi tea (liquid that accumulates). The spigot should be sturdy and easy to open/close.
- Internal grate or false bottom: Separates solid scraps from liquid at the bottom, preventing scraps from sitting in liquid (which would cause rot instead of fermentation).
- Sturdy construction: You’ll be pressing down on contents regularly. The bucket needs to withstand pressure without cracking.
One bucket or two? I strongly recommend starting with a two-bucket system ($50-90 / £42-75 / €47-85 for the pair). Here’s why:
With one bucket: You fill it over 2 weeks, seal it for 2 more weeks to ferment, then empty it. During those 2 fermentation weeks, you have nowhere to put new scraps unless you start a traditional compost pile or trash them. The system breaks down.
With two buckets: While bucket #1 is fermenting (sealed), you’re filling bucket #2 with fresh scraps. When bucket #2 is full and needs to ferment, bucket #1 is ready to empty, and you start filling it again. Continuous, uninterrupted processing.
I started with one bucket and immediately regretted it. I bought the second bucket within three weeks. Save yourself the hassle and start with two.
2. Bokashi bran
This is the active ingredient—wheat bran (or similar carrier) inoculated with effective microorganisms (EM).
How much you need: You’ll use roughly 20-30 grams (a small handful, about 1-2 tablespoons) per layer of scraps. One 15-20 liter bucket requires about 200-300 grams of bran total from empty to full.
A typical 2kg bag of Bokashi bran ($15-25 / £12-20 / €15-24) lasts me about 6-8 buckets, or approximately 3-4 months of continuous use.
Buying considerations:
- Buy from reputable suppliers (ensure fresh, active microorganisms)
- Check expiration/manufacture dates (microorganisms lose viability over time)
- Store in cool, dry place in sealed container (moisture or heat kills microbes)
- Some brands are more expensive but not necessarily better—I’ve had success with mid-range options
Can you make your own Bokashi bran? Yes, but it requires buying EM concentrate, mixing with molasses and bran, fermenting for 2 weeks, and drying. I tried this once. It worked but wasn’t worth the effort compared to buying ready-made bran. Unless you’re processing huge volumes and cost savings matter significantly, buy pre-made bran.
3. Optional but helpful: Bokashi tea container
You’ll drain liquid (Bokashi tea) from the spigot every 3-4 days. I keep a 1-liter jar next to my Bokashi bucket specifically for collecting this liquid. Then I dilute and use it immediately on plants.
Any jar or bottle works. You just need something to catch the liquid as it drains.
4. Optional: Countertop collection bin
As discussed in the previous section, this is convenient but not essential. If you’re willing to walk to your Bokashi bucket every time you have scraps, you can skip this.
Total startup cost:
Minimal setup:
- One Bokashi bucket: $25-45 / £20-38 / €25-42
- Bokashi bran (2kg): $15-25 / £12-20 / €15-24
- Total: $40-70 / £32-58 / €40-66
Recommended setup:
- Two Bokashi buckets: $50-90 / £42-75 / €47-85 (often sold as a set)
- Bokashi bran (2kg): $15-25 / £12-20 / €15-24
- Countertop collection bin: $30-50 / £25-42 / €30-47
- Total: $95-165 / £79-137 / €92-156
This is significantly less than electric composters ($400-500) and comparable to or cheaper than worm bin setups ($80-150). For what you get—the ability to compost everything, minimal maintenance, years of use—it’s a modest investment.
Where to Buy Bokashi Supplies
Bokashi buckets:
- Online retailers (Amazon, specialized composting sites)
- Garden centers (increasingly common as Bokashi gains popularity)
- Direct from Bokashi brands (many companies sell directly)
Bokashi bran:
- Same sources as buckets
- Some garden centers carry it (though selection may be limited)
- Online is usually easiest for finding fresh, well-reviewed bran
My experience: I bought my buckets online (a two-bucket starter kit) and my first bag of bran came with it. I’ve since bought replacement bran from a few different suppliers. Quality varies slightly—some brands seem more vigorous (fermentation happens faster, smells better)—but all have worked adequately.
Initial Setup (First-Time Use)
1. Choose location for your Bokashi bucket(s)
The bucket needs to live somewhere accessible but out of the way. Options:
Under the kitchen sink: Most common. Easy access, out of sight, near where scraps are generated. This is where mine lives.
In a utility closet or pantry: Works if you have space and it’s still convenient to kitchen.
In a garage or covered patio area: Only if you’re committed to walking there regularly. I tried this initially—lasted one week before I moved the bucket under my sink because walking outside every day was too inconvenient.
Basement or utility room: Same issue as garage—only viable if you’re very disciplined about routine.
Temperature considerations: Bokashi works best at 15-25°C (60-77°F). Normal indoor temperatures are perfect. Avoid locations that get very cold (<10°C / 50°F, where fermentation slows dramatically) or very hot (>30°C / 86°F, where wrong types of bacteria might proliferate).
Under the sink at room temperature has been perfect for me year-round.
2. Prepare the bucket
New buckets should be clean but don’t need sterilization. Rinse with water, dry completely.
Place the internal grate/false bottom inside the bucket (this usually sits 5-10cm / 2-4 inches from the bottom, creating a space for liquid to collect below the scraps).
Ensure the spigot at the bottom is closed (turn it to off position).
Put the lid nearby where you can easily access it.
3. Add first layer of bran
Before adding any scraps, sprinkle a thin layer of Bokashi bran across the bottom of the bucket (above the grate). Use about 1-2 tablespoons. This inoculates the environment and gets fermentation started immediately when scraps are added.
Daily Routine (How to Use Your Bokashi Bucket)
Step 1: Collect scraps throughout the day
As you cook and eat, place scraps in your countertop collection bin (or directly in Bokashi bucket if you don’t use a collection bin). Everything goes in:
- Vegetable and fruit scraps
- Meat and fish scraps (cooked or raw)
- Bones (small ones; large bones take longer but work)
- Dairy products
- Bread, pasta, rice, grains
- Coffee grounds and tea bags
- Eggshells
- Wilted flowers
- Paper napkins or paper towels (small amounts)
What NOT to put in:
- Large amounts of liquid (drain excess liquid from food first)
- Already moldy food (small amounts okay, but large moldy masses can disrupt fermentation)
- Non-compostables (plastic, metal, glass, obviously)
- Pet waste (not designed for this)
- Large bones (beef leg bones, etc.—too slow to break down)
Step 2: Transfer to Bokashi bucket (once daily)
Once daily—I do this after dinner cleanup—open your Bokashi bucket, dump your day’s collected scraps in, spread them in a relatively even layer (doesn’t need to be perfect), and press down firmly with your hand or a potato masher to compress and remove air pockets.
Step 3: Sprinkle Bokashi bran
Take a small handful of bran (1-2 tablespoons, roughly 20-30 grams) and sprinkle it evenly over the scraps layer you just added. The goal is light, even coverage—not every millimeter needs bran, but most of the surface should be dusted.
When you first start, you’ll probably use too much bran (I did). You’ll learn what “a handful” looks like after a few days. Using slightly more than necessary isn’t a problem—just wasteful. Using too little means fermentation won’t be as vigorous.
Step 4: Press down again and seal
After adding bran, press the whole layer down once more to compact everything and minimize air pockets. Then immediately replace the lid and ensure it’s sealed tightly.
Speed matters here—you want minimal air exposure. I open the bucket, dump scraps, sprinkle bran, press, close lid in under 60 seconds.
Step 5: Drain Bokashi tea every 3-4 days
Every few days (I do this every 3-4 days, some people do it daily), open the spigot at the bottom of the bucket and drain the liquid that’s accumulated into a container.
The amount varies—sometimes 100-200ml (a few ounces), sometimes more. In the first week of a bucket, there’s usually minimal liquid. By week 2-3, there’s more as scraps break down and release moisture.
Important: Drain regularly. If liquid accumulates and scraps sit in it, you’ll get rot instead of fermentation. The internal grate prevents this mostly, but draining regularly is insurance.
What to do with Bokashi tea:
- Dilute 1:100 (1 part tea to 100 parts water) and use as liquid fertilizer on plants
- Use undiluted poured down drains—it helps break down organic matter in pipes and reduces odors
- Some people use it diluted as a garden spray, though I’ve not tried this
I collect it in a jar, immediately dilute 1:100 in a watering can, and water my houseplants, microgreens, or vegetables on the patio. The plants love it—I’ve noticed faster growth and deeper green color since I started using Bokashi tea regularly.
Don’t store Bokashi tea undiluted—it’s highly acidic and can start smelling foul within a day or two. Use it immediately or diluted.
The Two-Week Timeline (What to Expect)
Days 1-3 (Beginning):
- Bucket is mostly empty, you’re adding layers daily
- Minimal smell when you open it—just fresh scraps
- Little to no liquid yet
- Scraps look normal and fresh
Days 4-7 (Early fermentation):
- Bucket is 30-50% full
- Slight pickled/sour smell when opened (this is good)
- Starting to see some liquid accumulation—drain for the first time
- Scraps near bottom are beginning to look subdued in color
Days 8-14 (Active fermentation):
- Bucket is 60-100% full
- Definite sour/pickled smell when opened—should be pleasant if fermentation is working
- Regular liquid production—drain every 3-4 days
- Scraps are compressed, colors are muted, everything looks “pickled”
- Some white mold might appear on surface (this is beneficial mold, part of fermentation—not fuzzy gray/green mold which would indicate problems)
Days 15-28 (Sealed fermentation):
- Bucket is full—stop adding scraps
- Seal it and let it sit for 2 more weeks while fermentation completes
- Continue draining liquid every 3-4 days
- By end of this period, material is fully fermented and ready to bury
When is it “done”? After 2 weeks sealed. The material should be:
- Uniformly pickled-looking—subdued colors, compressed
- Pleasant sour smell (like sauerkraut or pickles)
- Recognizable—food scraps still look like food scraps, just preserved
- Possibly with white mold on surface (good sign)
If you see/smell:
- Gray or black mold (fuzzy)—something went wrong (usually too much air or not enough bran)
- Putrid, rotting smell (like garbage, not pickles)—fermentation failed, probably due to air exposure or insufficient bran
- Very wet, sludgy material—too much liquid wasn’t drained
I’ve had fermentation “failures” three times in two years. Each time, I identified the problem (didn’t seal lid properly once, forgot to drain tea for 10 days once, used old bran with dead microorganisms once), adjusted, and the next bucket succeeded. Bokashi is forgiving, but the basics matter: seal well, add bran, drain tea.
Troubleshooting During Setup and First Use
“My bucket smells terrible (rotting, not pickled).”
This means fermentation isn’t happening—putrefying bacteria are working instead of EM.
Causes:
- Insufficient Bokashi bran (use more—be generous)
- Lid not sealing properly (check gasket, ensure you’re closing firmly)
- Too much air exposure (minimize time bucket is open)
- Old/inactive bran (buy fresh bran from reputable source)
Fix: Empty the bucket (contents go to trash or outdoor compost if you have one), clean thoroughly, start fresh with more attention to bran quantity and sealing.
“I see black or gray fuzzy mold.”
This is bad mold (not the beneficial white mold that’s normal).
Causes: Usually air getting in, or too-wet conditions.
Fix: Remove the moldy layer if it’s just surface-level, add extra bran, ensure tight seal. If mold is throughout, start over.
“Nothing’s happening—no smell, no liquid, scraps look unchanged.”
Could be normal if it’s only been a few days. Fermentation starts slowly.
If it’s been a week with zero signs of activity:
- Check bran is fresh and active
- Ensure you’re using enough bran
- Confirm temperature isn’t too cold (<15°C / 60°F)
“There’s tons of liquid and it’s overflowing.”
You’re not draining frequently enough, or you’re adding very wet scraps.
Fix: Drain immediately, then drain every 2-3 days instead of every 3-4 days. Before adding very wet scraps (like watermelon rinds or canned food), squeeze out excess liquid first.
“I’m going away for a week. What do I do?”
If bucket is less than half full: Sprinkle extra bran on top, seal tightly, leave it. It’ll be fine.
If bucket is nearly full: Same—seal it and let it ferment while you’re gone. It’s actually ideal timing.
If you’re mid-way through filling and will generate scraps while away: Either finish filling before you leave and start fermentation, or start a new bucket when you return.
Bokashi is very low-maintenance and handles gaps in attention well—better than worm bins (which need regular feeding) or collection bins (which would smell terrible after a week).
My Personal Setup and Routine
I have two Bokashi buckets under my kitchen sink, side by side. At any given time, one is being filled (in use), one is sealed and fermenting.
My countertop ceramic bin sits on the counter near my cutting board.
Daily routine:
- Throughout the day, scraps go in countertop bin
- After dinner (around 7 PM), I open the in-use Bokashi bucket, dump the day’s scraps, sprinkle bran, press down, seal
- Takes 45 seconds
Every 3-4 days:
- I drain Bokashi tea from whichever bucket is currently producing it
- Immediately dilute 1:100 and water plants
- Takes 2-3 minutes
Every 2 weeks:
- One bucket finishes fermenting—I empty it into my garden (details on this in next sections)
- The bucket I’d been filling becomes the new fermenting bucket (sealed for 2 weeks)
- The just-emptied bucket becomes the new filling bucket
- The cycle continues
Time investment:
- Daily: 45 seconds
- Every 3-4 days: 2-3 minutes
- Every 2 weeks: 15 minutes to empty bucket
- Total: ~5 minutes weekly + 15 minutes every 2 weeks
This routine has become so automatic that I don’t think about it. It’s like washing dishes or taking out trash—just part of kitchen maintenance.
The system works because it fits naturally into existing routines. I’m already cleaning up after dinner, so adding the 45-second Bokashi step is effortless. I’m already watering plants periodically, so using Bokashi tea instead of plain water is no extra effort.
If Bokashi required dedicated time blocks or significant disruption to my day, I probably wouldn’t sustain it. But it doesn’t—it’s genuinely low-effort once established.
The Bokashi Process: What Actually Happens
Understanding what’s happening inside your sealed Bokashi bucket helps demystify the process and gives you confidence that it’s working correctly—even when you can’t see inside for two weeks at a time.
Fermentation Timeline: The Two-Week Journey
Let me walk you through what’s happening at the microbial level during those two weeks, based on research and my observations over dozens of buckets.
Days 1-3: Inoculation and establishment
When you first add scraps and Bokashi bran, the effective microorganisms (EM) from the bran begin colonizing the food waste. They’re competing with naturally occurring bacteria on food scraps for resources.
At this stage, fermentation hasn’t really started yet. The EM are multiplying, establishing themselves, and beginning to change the bucket’s internal environment. The pH starts dropping as lactic acid bacteria produce acid.
What you see: Scraps look completely normal—fresh, colorful, unchanged. Minimal smell. Little to no liquid yet.
What’s happening microscopically: EM populations are exploding in number, spreading throughout the scraps, preparing to dominate the environment.
Days 4-7: Active fermentation begins
The EM populations are now dominant. Lactic acid bacteria are producing lactic acid rapidly, lowering pH to around 4.0 or below. This acidic environment inhibits putrefying bacteria (the ones that cause rotting and terrible smells) while allowing fermentation to proceed.
Yeasts and phototrophic bacteria are working alongside lactic acid bacteria, fermenting sugars, breaking down cell walls, and producing enzymes. The scraps are beginning to break down at the cellular level—not decomposing (which requires oxygen and soil organisms), but pre-digesting.
Liquid starts accumulating as fermentation breaks down cell walls and releases moisture from food.
What you see: Scraps near the bottom are starting to look subdued—colors are duller, material is compressed. Surface scraps still look relatively fresh. Pleasant sour smell when you open the bucket. First Bokashi tea to drain.
What’s happening: Active fermentation—microorganisms are metabolizing sugars, proteins, and fats, producing acids, enzymes, and other compounds. The material is being preserved and transformed.
Days 8-14: Peak fermentation
Fermentation is in full swing. The bucket environment is now highly acidic (pH 3.5-4.0), completely dominated by beneficial microorganisms. Any pathogenic bacteria that were present on food scraps have been overwhelmed by the acidic, oxygen-free environment.
The material throughout the bucket is uniformly fermented. Even fresh scraps added today will ferment rapidly because the entire bucket environment is now saturated with active EM.
More liquid continues to be produced as cell walls break down further.
What you see: All scraps have that pickled look—subdued colors, compressed texture. The bucket smells distinctly sour/pickled when opened, but not unpleasant. Regular liquid production. Some white mold may appear on the surface (this is a beneficial fungus, part of the fermentation process).
What’s happening: The material is being transformed into a preserved, pre-composted state. Nutrients are being broken down into more plant-available forms. Beneficial compounds are being produced.
Days 15-28: Sealed fermentation completion
The bucket is now full and sealed. No new material is being added. Fermentation continues but begins to stabilize. The EM have processed most of the readily available sugars and simpler compounds. Activity slows but continues as more complex materials are gradually broken down.
During this period, the fermentation is completing and the material is reaching its final pre-composted state.
What you see (when you finally open it after 2 weeks sealed): Material looks uniformly pickled—recognizable as food scraps but preserved, compressed, with muted colors. Pleasant sour smell. Possible white surface mold (good). The texture is softer than fresh scraps but not slimy or decomposed.
What’s happening: Final transformation into fermented, preserved material ready for burial in soil.
What to Expect: Appearance, Smell, Liquid
Let me be specific about what “normal” looks and smells like, because this is where most people worry unnecessarily.
Normal appearance:
Colors: Vegetables and fruits become duller—bright greens fade to olive, bright reds become brownish-red, oranges become muted. This is normal fermentation. The material looks “tired” or “cooked” but not rotten.
Texture: Everything compresses and softens somewhat. Cucumber slices become limp, apple cores become softer, bread becomes compressed. But structures remain—you can still identify what things were. It’s not a uniform mush (unless you added a lot of already-mushy food).
White mold on surface: Common and beneficial. This is a white, powdery or slightly fuzzy mold (similar to the white bloom on cheese) produced by yeasts and beneficial fungi. It’s part of healthy fermentation. Some buckets develop it, others don’t—both are fine.
Liquid layer at bottom: Normal. You’ll see amber to brown liquid pooling below the grate. This is Bokashi tea—a mix of moisture from scraps plus fermentation byproducts.
Normal smell:
The smell should be sour, pickled, fermented—like sauerkraut, kimchi, sourdough, pickles, or vinegar. It’s tangy, acidic, and somewhat sharp but not unpleasant.
Some people describe it as “sweet-sour” or “fruity-acidic.” I find it smells like very strong pickle brine mixed with a hint of fermenting fruit.
The smell should NOT be putrid, rotting, or garbage-like. If you smell decomposition (that unmistakable “rotting trash” smell), fermentation has failed.
When I open my Bokashi bucket, I get a strong hit of sour/pickled smell for about 2 seconds, then my nose adjusts and it’s mild background odor. My husband describes it as “kind of like sourdough starter but stronger.” Neither of us finds it offensive.
Normal liquid (Bokashi tea):
Color: Ranges from light amber to dark brown, depending on what you’ve been composting. Fruit-heavy buckets produce lighter, more amber liquid. Vegetable-heavy buckets produce darker liquid. Both are fine.
Smell: Sour, vinegary, fermented. It smells similar to the bucket contents but more intense because it’s concentrated. Some people find the undiluted liquid smell unpleasant, but once diluted 1:100, it smells like very mild fermented vinegar.
Consistency: Thin liquid, not thick or slimy. If it’s thick or gloopy, something’s wrong (probably too much liquid wasn’t drained and material is rotting rather than fermenting).
Amount: Highly variable. I typically get 100-300ml (3-10 oz) per drain, and I drain every 3-4 days. Over the course of filling and fermenting one bucket (4 weeks total), I’ll collect maybe 600-1000ml (roughly 1 quart) total.
Fruit-heavy buckets and summer (when I eat more watermelon, tomatoes) produce more liquid. Winter buckets with more bread, cooked foods, and less juicy produce generate less liquid.
Bokashi Tea: Liquid Gold for Plants
This byproduct liquid is one of Bokashi’s bonus benefits. It’s not the reason to do Bokashi, but it’s a valuable side product.
What’s in Bokashi tea:
The liquid contains:
- Nutrients: Nitrogen, phosphorus, potassium, and micronutrients that have leached from fermenting scraps
- Beneficial microorganisms: Live EM from the fermentation process
- Organic acids: Lactic acid and other acids produced during fermentation
- Enzymes: Produced by EM during fermentation
- Plant growth compounds: Some research suggests EM produce plant hormones and growth-promoting substances
How to use it:
For plants (most common use): Dilute 1:100 (1 tablespoon Bokashi tea to 100 tablespoons water, or 10ml to 1 liter, or roughly 1/3 cup to 1 gallon). Use as you would regular water or liquid fertilizer.
I use it on:
- Houseplants (they’ve never looked better—deeper green, faster growth)
- Microgreens (I water with diluted Bokashi tea once weekly)
- Vegetables on my patio (tomatoes, peppers, herbs)
- Flowers in garden beds
Frequency: I use it weekly on most plants, sometimes twice weekly on heavy feeders like tomatoes during growing season. You can’t really overdo it at 1:100 dilution—it’s mild enough for frequent use.
Benefits I’ve observed:
- Noticeably deeper green color in leaves within 2-3 weeks of regular use
- Faster growth, especially in vegetables
- My microgreens seem more vigorous (could be placebo, but I’m convinced it helps)
- Soil seems healthier—earthworms are abundant wherever I use Bokashi tea
For drains: Pour undiluted Bokashi tea down kitchen or bathroom drains. The beneficial microorganisms help break down organic buildup in pipes and can reduce odors. I do this occasionally (maybe once monthly) when I have excess tea and don’t need it for plants.
Don’t do:
- Don’t store undiluted tea for more than 24 hours—it starts to smell foul and may develop problematic bacteria
- Don’t use undiluted on plants (too acidic, can burn roots)
- Don’t drink it (I’ve been asked this—no, it’s not kombucha, it’s not safe to drink)
My routine: Every 3-4 days when I drain my Bokashi bucket, I collect the tea in a 1-liter jar. I immediately fill a watering can, add the Bokashi tea (now diluted roughly 1:100), and water whatever plants need watering that day. The whole process takes 3 minutes and the plants benefit significantly.
I used to view the liquid as a nuisance—something I had to drain to prevent bucket issues. Now I view it as a valuable fertilizer that happens to also solve a maintenance issue. Perspective shift matters.
When It’s Ready: Signs of Successful Fermentation
After two weeks of sealed fermentation (so 4 weeks total from when you started filling the bucket), your Bokashi is ready to use.
How do you know it’s ready?
Time-based: Simply follow the schedule. Two weeks filling, two weeks sealed = ready. You don’t need to guess or test—if you’ve followed the process (added bran, sealed well, drained tea), it’s ready after that time.
Smell test: Open the sealed bucket after two weeks. It should smell strongly pickled/sour but not putrid. If it smells like fermentation (tangy, acidic), it’s ready. If it smells like rot, something went wrong.
Appearance: Material should be uniformly subdued in color, compressed, with that “pickled” look throughout. No pockets of fresh-looking material, no obvious rot.
pH test (optional): If you’re scientifically inclined, you can test pH with litmus paper. Successful Bokashi should be pH 3.5-4.5 (acidic). This isn’t necessary—smell and appearance tell you everything—but some people like confirmation.
What if it doesn’t seem ready?
If you open the bucket after two weeks sealed and it still smells fresh or neutral (not sour), or if there are areas that look unchanged, the fermentation was slow. This can happen in cold conditions (<15°C / 60°F) or with insufficient bran.
Solution: Sprinkle more bran over the top, seal for another week, and check again. The fermentation will continue, just slower than normal.
What if it smells terrible?
If it smells putrid (rotting garbage, not pickles), fermentation failed. This happens rarely but can occur with insufficient bran, poor seal, or contaminated bran.
Solution: The material is now rotting organic waste. You can still use it—bury it deeply in your garden (60cm / 2 feet deep) away from plant roots, and it will decompose, though slowly and smellier than successful Bokashi. Or add it to a traditional compost pile where it will decompose along with other materials.
Then start your next bucket with fresh bran, ensuring you’re using enough and sealing properly.
In two years and 50+ buckets, I’ve had three failures—all due to my mistakes (old bran, didn’t seal lid fully, forgot to add bran to several layers). Once I corrected my technique, success has been consistent.
The Science of Why This Works
I mentioned the science briefly earlier, but let’s go deeper into why Bokashi fermentation works when logic suggests it shouldn’t.
Why doesn’t it smell terrible?
Putrid smells come from putrefying bacteria breaking down proteins anaerobically (without oxygen) into compounds like cadaverine, putrescine, and hydrogen sulfide. These smell terrible—rotting meat, rotting garbage.
But putrefying bacteria need a pH above 4.5 to thrive. Bokashi’s lactic acid bacteria rapidly lower pH to 3.5-4.0, creating an environment where putrefying bacteria can’t function. Instead, fermentation bacteria (which thrive in acidic conditions) dominate.
The result: fermentation instead of putrefaction. Preservation instead of rot. Pickle smell instead of garbage smell.
Why can it handle meat and dairy?
Traditional aerobic composting can’t handle meat/dairy because they decompose very slowly in aerobic conditions and attract pests while doing so. The smell is terrible, flies and animals are attracted, and disease risk increases.
Bokashi doesn’t decompose meat and dairy in the bucket—it pickles them. The fermentation preserves these materials in an acidic, oxygen-free environment where they can’t rot. When you later bury the fermented material in soil, soil microorganisms (different from the EM in the bucket) finish the decomposition rapidly because the material has been pre-processed.
It’s a two-stage system: Stage 1 (bucket) preserves and pre-digests. Stage 2 (soil) completes decomposition.
Why is the end product so nutrient-rich?
Traditional hot composting can volatilize (lose to air) up to 40-60% of nitrogen and other nutrients. The heat and aerobic process causes these nutrients to escape as gases.
Bokashi fermentation is cool and anaerobic. Nutrients aren’t lost—they’re preserved in the fermenting material. When this material breaks down in soil, those nutrients become available to plants with minimal loss.
Additionally, the fermentation process breaks down complex nutrients into simpler forms that plant roots can absorb more easily. The EM produce enzymes that pre-digest proteins, fats, and carbohydrates.
Research comparing finished compost from Bokashi vs traditional composting shows Bokashi-derived compost often has higher nitrogen content and more available phosphorus.
Why does it work so fast in soil after burial?
Fresh food scraps buried directly in soil take 3-6 months to decompose. Fermented Bokashi material takes 2-4 weeks.
The fermentation has already begun breaking down cell walls, proteins, and complex compounds. When you bury it, soil microorganisms don’t have to start from scratch—they’re finishing a process that’s already well underway.
The EM from the bucket may also inoculate the surrounding soil, improving soil microbial diversity and activity.
In my garden, I’ve dug up spots where I buried Bokashi 3-4 weeks prior and found the material completely gone—just dark, rich soil remaining. Earthworms are always abundant in those spots. Traditional compost added to the same garden takes 2-3 months to integrate fully.
Troubleshooting: Common Fermentation Issues
Issue: Black or gray mold (not white)
Cause: Air getting into bucket (poor seal), or wrong types of bacteria/fungi established before EM could dominate.
Solution: Remove the moldy material if it’s just surface layer. Add extra bran to re-establish EM dominance. Ensure lid is sealing properly. If mold is throughout, discard contents and start fresh.
Prevention: Always seal immediately after adding scraps. Press material down firmly to remove air pockets. Use adequate bran.
Issue: Putrid smell instead of pickled smell
Cause: Insufficient bran, old/inactive bran, or too much air exposure.
Solution: If caught early (within first week), add generous amounts of fresh bran, mix it in, and seal tightly. If it’s been rotting for 2+ weeks, it’s probably not salvageable as Bokashi—bury it and start over.
Prevention: Use fresh bran generously. Buy bran from reputable sources and check dates. Don’t skimp on bran to “save money”—it’s false economy.
Issue: Too much liquid, scraps are soggy
Cause: Not draining frequently enough, or adding very liquid-heavy scraps.
Solution: Drain every 2 days instead of every 3-4 days. Before adding very wet scraps (watermelon rinds, canned food), squeeze out excess liquid.
Prevention: Drain regularly. The grate should keep scraps above liquid, but if liquid is above the grate level, drain immediately.
Issue: No liquid at all
Cause: Either very dry scraps (lots of bread, paper), you’re draining so frequently that little accumulates, or fermentation is slow (too cold).
Solution: This isn’t usually a problem. Some buckets naturally produce less liquid. As long as fermentation is proceeding (pickled smell, color change), don’t worry about liquid volume.
Issue: Material looks completely unchanged after 2 weeks
Cause: Fermentation is very slow, likely due to cold temperature (<15°C / 60°F) or insufficient/inactive bran.
Solution: Move bucket to warmer location if possible, add more bran, seal for another 1-2 weeks.
Prevention: Keep bucket in normal room temperature location. Use fresh, active bran.
Issue: Fruit flies around the bucket
Cause: Bucket isn’t sealed properly, or you’re leaving it open too long when adding scraps.
Solution: Ensure lid seals tightly. Minimize time bucket is open—30-60 seconds maximum. If flies are already present, clean the area around the bucket, ensure there are no scraps on bucket exterior, and seal better.
Prevention: Seal immediately after adding scraps. Wipe bucket rim clean before replacing lid to ensure good seal.
I’ve encountered most of these issues at least once. The pattern I noticed: almost every problem traces back to either insufficient bran or poor sealing. Master those two things and Bokashi is remarkably trouble-free.
What to Do With Finished Bokashi (The Final Step)
Your bucket has fermented for two weeks. It’s full of pickled, pre-composted food scraps. Now what?
This is where many beginners get confused, and it’s crucial to understand: Bokashi material straight from the bucket is not finished compost. It’s fermented organic matter that still needs to break down in soil to become compost.
The fermentation process has preserved and pre-digested the material, but it hasn’t turned it into that dark, crumbly, sweet-smelling finished compost you might envision. That transformation happens in the next stage.
The Three Main Options for Finished Bokashi
You have three primary choices for what to do with fermented Bokashi material:
- Bury it directly in garden soil (my primary method)
- Use the soil factory method (for people without in-ground garden space)
- Add it to traditional compost bin (if you have one)
Each has advantages and works in different situations. Let me explain all three in detail.
Option 1: Burying in Garden Soil (Direct Burial Method)
This is the traditional Bokashi disposal method and what I do most often because I have a small garden with planting beds.
How to do it:
Step 1: Choose burial location
Pick a spot in your garden where you’ll be planting in 2-4 weeks (or longer). You don’t want to bury Bokashi right where plants are currently growing—the material needs time to break down fully before plant roots can benefit.
I rotate burial spots around my garden. I have rough mental map: “Buried Bokashi in the left bed corner in early March, so that area will be ready for planting by mid-April. Bury next bucket in the right bed corner.”
Step 2: Dig a trench or hole
Dig a trench approximately 20-30cm (8-12 inches) deep and wide enough to accommodate your bucket’s contents. For a standard 15-20 liter bucket, I typically dig a trench about 30cm wide x 60cm long x 25cm deep (12″ x 24″ x 10″).
Alternatively, dig a single larger hole—roughly 40cm x 40cm x 30cm deep (16″ x 16″ x 12″).
The depth matters: Burying too shallow (less than 15cm / 6 inches of soil cover) means animals might dig it up, and the acidic material might affect surface plants. Burying deeper than necessary just makes more work.
Step 3: Empty Bokashi bucket into trench/hole
Dump the entire contents of your fermented bucket into the trench. It will form a layer at the bottom. Break up any large clumps with a shovel or your hands (wear gloves if you’re squeamish—it’s pickled food, not hazardous, but some people prefer not to touch it).
Step 4: Cover with soil
Shovel the excavated soil back over the Bokashi material, covering it completely with at least 15-20cm (6-8 inches) of soil. Tamp down gently and mark the spot if you want to remember where you buried it (I use a stick or small stone marker).
Step 5: Wait 2-4 weeks
Leave the spot alone for at least 2 weeks, preferably 4 weeks. During this time, soil microorganisms are breaking down the fermented material. You’ll notice:
- In week 1-2: Not much visible change if you dig down (though microbial activity is intense below the surface)
- In week 3-4: Material is significantly broken down, becoming integrated with soil
- By week 4-6: Material has completely disappeared, transformed into dark, rich soil
Step 6: Plant as normal
After 4 weeks (minimum 2 weeks for fast-growing, hardy plants), you can plant in that spot. The material will be fully integrated and soil will be noticeably improved—richer, darker, more crumbly, more earthworm activity.
What I actually do:
I bury a Bokashi bucket every two weeks (matching my filling schedule). I rotate through different areas of my small garden. By the time I’ve buried buckets in all areas and circled back to the first spot, 8-10 weeks have passed—plenty of time for full decomposition.
This system means I’m constantly improving different parts of my garden, and I always have multiple spots “cooking” at various stages of decomposition.
Tips and considerations:
Timing: Bury in fall/winter for spring planting. Bury in spring for summer planting. The longer it sits, the more completely it breaks down, but 4 weeks minimum is usually sufficient.
Location: Avoid burying directly against house foundations or near plant stems/trunks. The acidic material could potentially damage wood or stress plants if in direct contact. I bury in open garden bed areas, at least 30cm (12 inches) away from any existing plants.
Depth: Don’t go crazy deep—you’re making more work for yourself. 20-30cm (8-12 inches) depth provides adequate cover without excessive digging.
Seasonal considerations: In winter, frozen ground makes burial difficult or impossible. I either:
- Bury before ground freezes (late fall)
- Use the soil factory method (described next) during winter months
- In mild climates, bury year-round if ground doesn’t freeze
Smell during burial: The few minutes when material is exposed (emptying bucket, covering with soil) will have that pickled smell. It’s not terrible, but neighbors might notice if they’re nearby. I typically bury in early morning or evening when neighbors aren’t in their gardens.
Animals: I’ve never had issues with animals digging up buried Bokashi (the acidic environment isn’t attractive to them), but if you have persistent diggers (raccoons, dogs), bury deeper (30cm / 12 inches) or cover with hardware cloth temporarily.
Results I’ve seen:
The areas where I’ve buried multiple Bokashi buckets over two years are noticeably superior to areas I haven’t treated:
- Darker, richer soil
- Better drainage and water retention simultaneously (improved soil structure)
- More earthworms (I counted once—buried Bokashi areas had 3-4x more earthworms per shovelful)
- Plants grow more vigorously (tomatoes in Bokashi-treated soil significantly outperformed tomatoes in untreated soil)
- Less need for additional fertilizer (the Bokashi-enriched soil provides nutrients for entire growing season)
The improvement isn’t subtle. After two years of burying Bokashi throughout my small garden, the soil quality has transformed dramatically from the heavy clay I started with to dark, crumbly, rich soil that’s a pleasure to work with.
Option 2: Soil Factory Method (For Limited Space or Containers)
If you don’t have in-ground garden beds—perhaps you only have patio containers, balcony planters, or live in an apartment—the soil factory method lets you process Bokashi without burial access.
What is the soil factory?
It’s essentially creating a contained composting environment where Bokashi material breaks down in soil before use. You’re mimicking the burial method but in a container.
What you need:
- Large container (20-40 liters / 5-10 gallons)—plastic storage tote, large plant pot, bucket with drainage holes
- Regular potting soil or garden soil (enough to fill container)
- Your fermented Bokashi material
How to do it:
Step 1: Layer soil and Bokashi in container
Put 5-10cm (2-4 inches) of soil in the bottom of your container.
Add a layer of Bokashi material—roughly half your bucket.
Cover with 5-10cm (2-4 inches) more soil.
Add the rest of your Bokashi material.
Cover with final layer of soil (10-15cm / 4-6 inches).
The goal is Bokashi material sandwiched between and surrounded by soil, not exposed to air.
Step 2: Store in moderate location
Place the container somewhere with moderate temperature (15-25°C / 60-77°F is ideal). It can be outdoors (on balcony, patio) or indoors (garage, basement, utility room) as long as temperature is reasonable.
Moisture: The soil should be moist but not waterlogged. If it dries out completely, sprinkle water to maintain moisture. If it’s soaking wet, drainage holes should allow excess to escape.
Step 3: Wait 4-6 weeks
During this time, the Bokashi material is breaking down in the soil, just as it would if buried in the ground. You don’t need to turn it, mix it, or do anything—just let it sit.
Step 4: Check for completion
After 4-6 weeks, dig into the container. The Bokashi material should be largely broken down and integrated with the soil. It should smell like rich earth, not pickled anymore.
If pieces of recognizable material remain, give it another 2 weeks.
Step 5: Use the soil
Once material is fully broken down, you have nutrient-rich soil ready for use in containers or planters. Mix it with additional fresh soil if desired (I usually do 50/50 soil factory soil to fresh potting soil), and plant as normal.
Advantages of soil factory:
- Works without garden access
- Can be done year-round regardless of weather
- Produces usable potting soil for containers
- Can process multiple Bokashi buckets by continually adding to the same soil factory container
Disadvantages:
- Requires container and storage space
- Slower than direct burial (needs 4-6 weeks minimum before use)
- You need somewhere to keep a large container of fermenting soil
My experience with soil factory:
I use this method in winter when ground is frozen. I have a large plastic tote (30 liters / 8 gallons) in my garage where I layer Bokashi material and soil. By spring, I have rich soil ready for my patio container plants.
I’ve also used it when I’ve run out of garden burial space temporarily (I buried Bokashi in all available spots and they all needed more time before re-using those spots). The soil factory gave me a place to process Bokashi without waiting.
The resulting soil is excellent—plants in containers filled with soil factory soil grow just as well as plants in garden beds where I’ve buried Bokashi directly.
Option 3: Adding to Traditional Compost Bin
If you have a traditional outdoor compost bin or pile, you can add finished Bokashi material to it. The fermented material will break down much faster in the compost environment than it would if added fresh.
How to do it:
Step 1: Bury Bokashi in center of compost pile
Don’t add Bokashi material to the surface of your compost—bury it in the center. Dig a hole in the compost pile, dump Bokashi material in, cover with existing compost material.
Why bury it: The acidic, pickled Bokashi material could kill some beneficial composting organisms if left on the surface. Burying it in the center allows gradual integration as the material neutralizes and breaks down.
Step 2: Optional—add carbon-rich material
Bokashi material is nitrogen-rich (greens in composting terms). Adding some carbon-rich material (browns—shredded paper, cardboard, dry leaves) helps balance the compost and speeds integration.
I usually throw a layer of shredded leaves or cardboard on top of the buried Bokashi material.
Step 3: Let it break down
In a well-functioning compost pile, Bokashi material breaks down in 2-4 weeks—much faster than fresh food scraps would. The fermentation has done the hard work already.
Advantages:
- No dedicated burial needed
- Works with existing composting system
- Accelerates overall compost production (fermented material adds active microorganisms to compost)
Disadvantages:
- Requires having a traditional compost system
- Takes longer than direct burial (compost pile processes slower than soil)
- Can temporarily affect compost pH (the acidic Bokashi material lowers pH until neutralized)
When this makes sense:
If you’re already composting traditionally (yard waste, some kitchen scraps) but want to compost meat, dairy, and other materials traditional composting can’t handle, Bokashi provides the solution. Ferment the problem materials in Bokashi, then add the fermented material to your regular compost where it integrates quickly.
I don’t use this method often because my traditional compost bin is small and I prefer direct burial. But for people with large, active compost systems, it’s a viable option.
What About Apartment Dwellers With No Outdoor Space At All?
This is the most challenging scenario: you want to do Bokashi but have zero outdoor access—no garden, no balcony, no patio, no compost drop-off.
Options:
1. Soil factory indoors
You can run a soil factory container indoors (utility closet, spare room), though it requires tolerance for having a container of decomposing material in your living space. If well-managed (proper soil moisture, contained system), smell is minimal—earthy, not unpleasant.
2. Community garden plots
Many cities have community gardens where you can rent a small plot. You could bury Bokashi there. Alternatively, some community gardens have shared compost areas that would accept Bokashi material.
3. Offer to neighbors/friends with gardens
Fermented Bokashi material is valuable for gardens. If you have friends, family, or neighbors with gardens, they might be delighted to take your finished Bokashi buckets. I’ve given several buckets to friends who garden—they were thrilled to get free soil amendment.
4. Municipal compost programs
Some cities that offer compost pickup accept Bokashi material. Check your local program guidelines.
5. Switch to vermicomposting
If truly no Bokashi disposal options exist, vermicomposting might be more practical for apartments—the worms process material into finished compost right in the bin, no secondary processing needed.
Honest assessment:
Bokashi in apartments without outdoor access is challenging. The method requires somewhere to bury or compost the fermented material. If you have absolutely no options (no balcony, no community garden access, no friends with gardens, no municipal compost), Bokashi might not be the right choice.
However, before concluding it won’t work, explore options creatively. I’ve heard of people:
- Using Bokashi material in large outdoor planters (public spaces, office buildings) with permission
- Trading Bokashi material to urban farmers or community gardens in exchange for produce
- Running ongoing soil factories and selling the finished soil to gardeners
Where there’s determination, solutions often emerge.
My Personal Routine and Results
Every two weeks, I empty a finished Bokashi bucket. The process takes 15 minutes:
- Grab bucket, shovel, gloves
- Walk to designated burial spot in garden
- Dig trench (5 minutes)
- Dump bucket contents (1 minute)
- Cover with soil, tamp down, mark spot (5 minutes)
- Rinse bucket quickly (2 minutes)
- Bucket is ready to start filling again
Total hands-on time: 15 minutes every two weeks.
In return for this minimal effort, I’ve processed approximately 700-800 kg (1,500-1,700 pounds) of food waste over two years, kept it out of landfill, and transformed my garden soil from poor quality to rich and productive.
My vegetable yields have increased measurably. My tomatoes produce 30-40% more than before I started Bokashi (same varieties, same growing conditions, only variable is soil improvement from Bokashi). My herbs grow more vigorously. My flowers bloom more profusely.
The earthworm population in my garden has exploded—I now see dozens every time I dig, whereas two years ago I’d occasionally see one or two. Earthworms are nature’s indicator of soil health, and their abundance tells me the Bokashi is working.
I’ve also noticed my soil drains better during heavy rain but retains moisture better during dry spells—the improved soil structure from organic matter creates this dual benefit. I water my garden less frequently than I used to, yet plants show less drought stress.
These results aren’t accidental or coincidental. They’re the direct, measurable outcome of consistently adding fermented organic matter to my soil. The 15 minutes every two weeks has generated profound improvements in soil health and garden productivity.
Other Indoor Composting Methods Compared
While Bokashi is my primary method, I’ve tried or researched other indoor composting approaches. Each has merits for specific situations. Let me give you honest assessments based on experience and research.
Vermicomposting (Worm Bins): The Living System
Vermicomposting uses specific composting worms—typically red wigglers (Eisenia fetida) or European nightcrawlers—to process food scraps into worm castings (extremely nutrient-rich compost).
How it works:
Worms live in a bin with bedding material (shredded newspaper, cardboard, coconut coir). You add food scraps regularly (buried in bedding or placed on surface). Worms eat the scraps and bedding, producing castings (worm poop) that accumulate in the bin. After 3-6 months, you harvest castings and use them in gardens or potted plants.
What you need:
- Worm bin (commercial bins are $80-150 / £67-125 / €75-140; DIY bins from plastic storage totes are possible)
- Composting worms (red wigglers, typically 450g / 1 pound to start, $30-40 / £25-35 / €28-38)
- Bedding material (shredded paper, cardboard, coir)
- Food scraps (but limited types—see below)
Advantages:
Finished compost without outdoor space: Unlike Bokashi which requires burial, vermicomposting produces finished compost right in the bin. For apartment dwellers with no outdoor access, this is huge.
Highest quality compost: Worm castings are the gold standard of compost. Research shows they contain more nutrients, more beneficial microorganisms, and better plant growth hormones than any other compost type. Plants absolutely thrive in worm casting-amended soil.
Educational and interesting: Maintaining a worm bin is genuinely fascinating if you’re interested in biology and ecological systems. Watching worms process waste, reproduce, and create compost is engaging, especially for children.
Two products: You get both solid castings and liquid “worm tea” (leachate that drains from the bin), both excellent fertilizers.
Relatively compact: A household worm bin is typically 45-60cm (18-24 inches) long, 30-40cm (12-16 inches) wide, 30-45cm (12-18 inches) tall. Not huge, comparable to a large storage tote.
Disadvantages:
Living creatures require care: Worms are alive. They need proper conditions (temperature, moisture, pH, food) maintained. If conditions are wrong, worms die. This responsibility isn’t for everyone.
Temperature sensitive: Red wigglers thrive at 15-25°C (60-77°F). Below 10°C (50°F), they become sluggish or die. Above 30°C (86°F), they can die. In extreme climates or temperature-variable locations (unheated garage, outdoor shed), maintaining proper temperature is challenging.
Cannot compost meat, dairy, oils, citrus (in quantity): This is the major limitation. Worms can’t process meat or dairy (it rots before they can eat it, smells terrible, attracts pests). Citrus, onions, and garlic are also problematic (too acidic or too strong for worms). If your diet includes these regularly, vermicomposting can only handle a fraction of your waste.
Slower processing: Worms take 3-6 months to turn scraps into finished castings. It’s not instant, and you need patience before harvesting.
Potential for odor and pests: If overfed or improperly maintained, worm bins can smell and attract fruit flies. Proper management prevents this, but it requires attention.
Harvesting is labor-intensive: Separating finished castings from worms and unfinished material is time-consuming. Various methods exist (all involve sorting through wormy compost for an hour or more).
My experience:
I ran a worm bin for four months. I found it fascinating initially—I loved watching the worms work and was impressed by the casting quality. But the limitations frustrated me:
- I couldn’t compost chicken bones, cheese, fish scraps, or leftover meat—all went to trash
- When I traveled for a week, I worried about the worms (were they too hot, too dry, overfed?)
- In a heat wave, worms started dying despite my efforts to cool the bin
- Fruit flies appeared twice when I accidentally overfed them
The final straw was realizing I was composting maybe 40% of my kitchen waste—only the worm-friendly fraction—while the rest still went to trash. I wanted a solution that handled everything.
When I discovered Bokashi could compost literally all food waste, I transitioned. The worms went to a friend who’s an avid gardener and loves vermicomposting (she’s thrived with it for years—it suits her better than it suited me).
Who should choose vermicomposting:
- Apartment dwellers with no outdoor space who want finished compost
- People who don’t eat much meat/dairy or who are okay composting only plant-based scraps
- People interested in caring for living systems (you need to genuinely enjoy this aspect)
- People with stable indoor temperatures year-round
- Patient people who don’t mind the 3-6 month timeline and harvesting labor
Vermicomposting is excellent for the right person in the right situation. I wasn’t that person, but many people love it.
Electric Composters: The Appliance Solution
Electric composters (brands like Lomi, FoodCycler, Vitamix FoodCycler) are countertop appliances that heat, grind, and dehydrate food waste, reducing it to a dry, soil-like material in hours.
How they work:
You place food scraps in the machine’s bucket, press a button, and the machine heats (50-70°C / 120-160°F), grinds, and dehydrates the waste over 3-8 hours depending on model and cycle. The output is dry, crumbly material that looks and smells earthy.
What you need:
- The machine itself ($300-500 / £250-420 / €280-470)
- Electricity (varies by model, typically 0.5-1.5 kWh per cycle)
- Carbon filters (need replacing every 3-6 months, $20-40 / £17-35 / €20-38 for replacements)
Advantages:
Speed is unmatched: Hours, not weeks or months. This is appealing if you want immediate results.
Handles most food waste: Most models accept vegetables, fruits, meat, dairy, bones (small), bread, coffee grounds, eggshells. Similar range to Bokashi.
Minimal effort: Add scraps, press button, come back hours later. No daily maintenance, no monitoring moisture or temperature, no worms to care for.
Compact and clean: Countertop appliance, contained system. No mess, no soil, no digging, no worms.
No outdoor space needed: The output can be added directly to houseplant pots or stored until needed. No burial required.
Disadvantages:
Expensive initial investment: $300-500 is significant. This is 3-5x the cost of Bokashi or vermicomposting setups.
Electricity cost and environmental impact: Every cycle uses 0.5-1.5 kWh. If you run it daily, that’s 15-45 kWh monthly (roughly $2-7 / £1.70-6 / €2-6.50 monthly). Over years, this adds up financially and environmentally.
Noise: Most models are loud during grinding phases—60-70 decibels, comparable to a vacuum cleaner or blender. Cycles often run overnight to avoid disruption, but you can’t run it during quiet hours if noise matters.
Output is NOT finished compost: This is crucial. The output is dehydrated food waste, not true compost. It still needs to break down in soil, which takes 2-4 weeks. It’s essentially pre-processing, similar to Bokashi’s fermentation.
Research shows that material from electric composters needs soil microorganisms to complete decomposition. You can’t use it immediately as finished compost.
Ongoing filter costs: Carbon filters need replacing every 3-6 months at $20-40 per replacement. Over time, this adds up.
Limited capacity: Most models handle 1-3 liters per cycle. For families or heavy cooking, you might need multiple cycles daily.
Reliability concerns: Electric appliances break. I’ve read reviews of units failing after 1-2 years. Repair costs or replacement costs aren’t trivial.
My research (I haven’t personally used one):
I seriously considered buying an electric composter but ultimately decided against it for these reasons:
Cost: $400-500 upfront plus $50-100 annually in electricity and filters seemed steep compared to $90 for a two-bucket Bokashi system with $60 annual bran costs.
Output not finished compost: Since I’d still need to bury or further process the material, it wasn’t eliminating any steps compared to Bokashi—just speeding one stage.
Electricity usage bothered me philosophically: I’m trying to reduce waste and environmental impact. Running an electric appliance consuming 15-45 kWh monthly felt contradictory to composting’s environmental purpose.
Noise: My cottage is small. A loud appliance running 3-8 hours daily (or nightly) would be disruptive.
That said, I know people who love their electric composters. For them, the speed and hands-off convenience justify the cost and drawbacks.
Who should choose electric composters:
- People with high disposable income who prioritize convenience above cost
- People who want speed and don’t mind electricity usage
- People who value appliance-like simplicity (button-press solution)
- People with no outdoor space but who can use the output in houseplants or store it
- People who don’t want to manage living systems (worms) or fermentation processes (Bokashi)
Electric composters are a legitimate option, just not the most economical or environmentally optimal one.
Simple Countertop Collection Bins: The Non-Solution Solution
I covered these earlier, but let’s discuss them explicitly as a composting method—or rather, as NOT a composting method.
What they are:
Attractive containers (ceramic, stainless steel, bamboo) with charcoal filters designed to sit on your countertop and collect food scraps temporarily before you take them somewhere else for actual composting.
What they’re NOT:
They don’t compost anything. They’re just storage. The charcoal filter controls odor for a few days while scraps accumulate, but nothing is processed.
When they make sense:
You have access to outdoor compost: If you have a traditional compost bin in your garden, a collection bin provides convenient staging. Scraps accumulate attractively on your counter, then you transfer them to the outdoor bin every 2-3 days.
You have municipal compost pickup: Some cities offer food waste collection services. Collection bins let you store scraps until pickup day.
You have a community compost drop-off: Many urban areas have community composting programs where you can drop off food scraps weekly. Collection bins store scraps between drop-offs.
When they DON’T make sense:
If you have no destination for the collected scraps—no outdoor compost, no pickup service, no drop-off location—a collection bin is pointless. You’re just storing trash more attractively before it goes to the landfill anyway.
My use:
I use a countertop collection bin as a convenience tool alongside my Bokashi system. Scraps go in the attractive bin on my counter throughout the day, then I transfer the day’s collection to my Bokashi bucket once daily.
This two-stage system (collection bin → Bokashi bucket) is more convenient than walking to the under-sink Bokashi bucket every time I have scraps. But the collection bin alone wouldn’t solve my composting needs.
Comparison Table: Which Method When?
Let me synthesize this with a decision matrix:
Choose Bokashi if:
- You eat varied diet including meat/dairy/oils
- You have some outdoor space (even small) for burial
- You want comprehensive solution (handles everything)
- You prioritize cost-effectiveness
- You’re okay with two-stage process (ferment then bury)
Choose Vermicomposting if:
- You’re vegetarian or plant-based diet
- You have no outdoor space but want finished compost
- You’re interested in caring for worms (genuinely enjoy this)
- You have stable indoor temperatures
- You’re patient with 3-6 month processing time
Choose Electric Composter if:
- Budget isn’t a primary concern
- You want maximum speed (hours not weeks)
- You value appliance-like convenience highly
- You don’t mind electricity usage
- You can use output in houseplants or have small-scale burial options
Choose Collection Bin Only if:
- You already have composting destination (outdoor bin, municipal pickup, drop-off)
- You just need attractive temporary storage
- You don’t want to process scraps yourself
My recommendation for most people:
Start with Bokashi if you have any outdoor access at all (garden, patio, balcony with large pots, access to friend’s garden, community garden plot). It handles the widest range of materials, costs least, requires minimal maintenance, and produces excellent results.
If you’re strictly limited to indoor-only with zero outdoor access, vermicomposting is probably your best bet despite the limitations. The worms produce finished compost you can use immediately in houseplants without needing burial.
Electric composters are a premium convenience option—legitimate if cost isn’t a concern and you highly value speed and simplicity, but not necessary for successful home composting.
Can You Combine Methods?
Absolutely. I know people who:
Run Bokashi + traditional outdoor compost: Bokashi for meat/dairy/problematic items, traditional compost for yard waste and excess vegetable scraps
Run vermicomposting + Bokashi: Worms process vegetable scraps, Bokashi handles meat/dairy
Run collection bin + any processing method: Collection bin for convenience, then transfer to whatever processing method they use
I occasionally use my small outdoor compost bin for garden waste (weeds, plant trimmings, fallen leaves) while Bokashi handles all kitchen waste. They complement each other—different inputs, both producing soil amendments.
The beauty of home composting: you’re not locked into one method forever. Try different approaches, combine methods, or switch as circumstances change. The goal is diverting organic waste from landfill and creating soil amendments—any method that achieves this is valid.
Kitchen Compost Bins: Collection vs Processing
There’s significant confusion about what a “kitchen compost bin” actually means. The term gets used for two completely different types of containers, and understanding the distinction is essential before you buy anything.
The Two Categories Explained
Category 1: Collection Bins (Temporary Storage)
These are containers designed to hold food scraps for a few days before you transfer them to their final composting destination. They don’t do any processing—they’re just attractive, odor-controlled storage.
Characteristics:
- Size: 2-8 liters (0.5-2 gallons) typically
- Features: Charcoal filter for odor control, attractive design, countertop-friendly
- Cost: $15-70 / £12-60 / €15-65
- Function: Temporary holding only
- Emptying frequency: Every 1-3 days
Examples: Ceramic compost crocks, stainless steel countertop bins, bamboo collection containers
Category 2: Processing Systems (Actual Composting)
These containers actively process food scraps into compost or pre-compost through fermentation, decomposition, or other means.
Characteristics:
- Size: 10-30+ liters (2.5-8+ gallons) typically
- Features: Sealing mechanisms, spigots, grates, or worms/microorganisms
- Cost: $25-150+ / £20-125+ / €25-140+
- Function: Active processing of organic matter
- Emptying frequency: Every 2 weeks to 6 months depending on method
Examples: Bokashi buckets, worm bins, electric composters
Why the Distinction Matters
I’ve seen beginners buy a beautiful ceramic countertop bin thinking it will “compost” their scraps, only to be confused when nothing happens. The bin just holds scraps attractively—it doesn’t process them. You still need somewhere to take those scraps for actual composting.
Conversely, I’ve seen people try to use a large, utilitarian Bokashi bucket as their everyday kitchen collection point, which is awkward and disrupts cooking workflow.
The ideal setup for most people: Collection bin (small, attractive, on counter) + Processing system (larger, functional, out of sight)
This two-tier approach gives you convenience during food prep plus effective processing. Scraps go in the convenient counter bin throughout the day, then transfer to the processing system once daily.
That said, you can skip the collection bin entirely if you’re willing to walk to your processing system (Bokashi bucket, worm bin, etc.) every time you have scraps. Some people prefer this single-step approach. I tried it for two weeks and found it too disruptive—I’d end up piling scraps on the counter instead of making constant trips to the under-sink Bokashi bucket.
Best Countertop Collection Bins: Features and Recommendations
If you decide a collection bin makes sense for your workflow, here’s what to look for and what I recommend based on experience and research.
Essential features:
1. Adequate size for your routine
Consider how often you’ll empty it. I empty mine once daily (after dinner cleanup), so a 3-4 liter bin works perfectly.
If you empty twice daily, 2 liters might suffice. If you’ll only empty every 2-3 days, consider 5-6 liters.
Don’t go too large—bigger bins mean scraps sit longer, increasing odor even with filters.
2. Tight-fitting lid with handle
The lid should fit securely so pets or children can’t knock it off, but should be easy to remove with one hand (your other hand might be holding scraps or be wet/dirty from cooking).
A handle on the lid makes lifting it easier. My ceramic bin has a bamboo handle on top—I can lift the lid one-handed while scraping scraps in with the other hand.
3. Charcoal filter (for collection bins used more than daily)
If you’re emptying daily, filters are helpful but not essential. If scraps will sit 2-3 days, filters are important for odor control.
Filters sit in the lid (usually removable) and absorb odors. They need replacing every 3-6 months depending on usage intensity.
4. Easy to clean interior
Smooth interior surfaces with no crevices or textured areas are easiest to clean. You’ll rinse this container every time you empty it (or at least every few times), so cleanability matters.
Wide opening helps—you need to reach inside to wipe it clean.
5. Sturdy construction
The bin will get handled daily, sometimes carelessly. Ceramic is beautiful but can crack if dropped. Stainless steel is nearly indestructible. Bamboo is durable but can be damaged by excessive moisture over time. Plastic is cheap but can stain and absorb odors.
Choose material that matches your handling style and budget.
6. Appropriate aesthetic
This sits on your counter where you see it constantly. If it’s ugly or doesn’t match your kitchen, you’ll hide it away (reducing convenience) or resent its presence.
I spent extra ($45 instead of $20) to get a cream ceramic bin that matches my cottage kitchen. Worth every penny—I’m happy to see it on my counter daily, which means I actually use it consistently.
Recommended options by price point:
Budget ($15-25 / £12-20 / €15-24): Simple stainless steel bin, 3 liters, basic charcoal filter. Available from various brands (OXO makes a reasonable one). Won’t win design awards but functions adequately.
Or skip buying anything and use a large bowl or jar you already own with a plate as a lid. Zero cost, perfectly functional while you decide if composting is something you’ll stick with.
Mid-range ($30-50 / £25-42 / €30-47): Quality ceramic or stainless bin with good charcoal filter system, 3-4 liters, attractive design. This is the sweet spot—good functionality, nice appearance, reasonable cost.
Brands like Epica, Utopia Kitchen, or Full Circle make solid options in this range.
Premium ($50-80+ / £42-67+ / €47-75+): Designer ceramic bins in specific colors/styles, high-end stainless with superior filters, or specialty materials (copper, artisan pottery). These work no better functionally than mid-range options—you’re paying for aesthetics and brand.
Buy these if kitchen aesthetics matter greatly and budget allows, but know you’re paying for appearance, not performance.
What I use and recommend:
I use a 3.8-liter ceramic bin in cream with bamboo handle ($45 two years ago). Charcoal filter in lid, smooth interior, attractive enough that I’m genuinely happy to have it displayed.
If I were advising a friend starting out, I’d say: “Buy something in the $30-40 range that you find attractive, or use a bowl you already have for free. Don’t overthink this—it’s just a container.”
The collection bin is the least important part of a composting system. It’s a convenience tool, nothing more. I’ve successfully composted using a large mason jar with a lid (free, already owned) and using my current ceramic bin ($45). Both worked fine. The ceramic bin is more attractive and slightly more convenient, but the mason jar cost nothing and functioned adequately.
Odor Control Strategies (Beyond Filters)
Even with charcoal filters, collection bins can develop odors if not managed properly. Here’s what actually works:
1. Empty frequently (most important)
This is 80% of odor control. Empty daily if possible, every 2 days maximum. No filter can compensate for week-old rotting scraps.
My routine: Empty after dinner cleanup every evening. Takes 30 seconds. Bin never has time to develop significant odor.
2. Rinse after each emptying
After dumping scraps into your Bokashi bucket (or other destination), rinse the collection bin quickly with hot water. No soap needed—just hot water rinse to remove residue. Takes 15 seconds.
Every few emptyings (I do every 3-4 days), wash with dish soap and water.
3. Drain excess liquid from very wet scraps
Before adding very liquid items (watermelon rinds, cucumber, tomatoes, canned food), squeeze out excess moisture. Liquid accelerates decomposition and odor.
I keep a small strainer in my sink for this purpose—squeeze wet scraps over the strainer, juice goes down drain, drier scraps go in bin.
4. Keep lid on except when adding scraps
This sounds obvious, but I’ve seen people leave collection bins open “for convenience.” Don’t. Keep it closed. The seal contains odors and the filter only works if air is passing through it (which happens when you open and close the lid, not when it sits open).
5. Avoid meat and dairy in collection bins (if possible)
If you’re using a collection bin just for temporary storage (not processing), meat and dairy decompose faster and smell worse than vegetables. If practical, put meat/dairy scraps directly in your Bokashi bucket or processing system rather than in the collection bin.
I do this with fish scraps especially—those go straight to Bokashi, not to my collection bin. Everything else goes in the collection bin.
6. Replace filters on schedule
Charcoal filters gradually saturate with absorbed odors and lose effectiveness. Replace every 3-6 months depending on usage.
I replace mine every 4-5 months ($10 for 3 filters). I set a phone reminder so I don’t forget.
7. Sun-dry the bin occasionally
Once every month or two, after washing your collection bin, set it outside in direct sunlight for a few hours. UV light kills bacteria and eliminates lingering odors. This is especially effective for plastic or bamboo bins that can absorb smells over time.
What if odor persists despite all this?
If you’re emptying daily, rinsing regularly, using filters, and the bin still smells, the problem is likely:
Material absorption: Plastic and bamboo can absorb odors permanently over time. Switch to ceramic or stainless steel.
Crack or crevice harboring bacteria: Inspect the bin carefully. Even small cracks or seams can trap decomposing material. If found, deep clean with vinegar and baking soda, or replace the bin.
Filter isn’t working: Some cheap filters are ineffective. Upgrade to better quality filters or a bin with a better filter system.
Contents are sitting too long: Even 2 days might be too long in hot weather or with certain scraps. Empty daily.
In two years with my ceramic bin, following the practices above, I’ve never had odor be a problem. When I open the bin to add scraps, there’s a mild vegetable/fruit smell—not unpleasant, just “these are food scraps.” No one entering my kitchen would know there’s a compost bin unless they opened it.
Cleaning and Maintenance
Daily/every emptying:
- Hot water rinse (15 seconds)
- Wipe exterior if needed
Weekly:
- Wash with dish soap and hot water (2 minutes)
- Dry thoroughly
Monthly:
- Deep clean with baking soda paste scrub for any stains (5 minutes)
- Check filter condition
- Sun-dry if possible
Every 4-6 months:
- Replace charcoal filter
- Inspect for cracks or damage
Total maintenance time: Maybe 5 minutes weekly. It’s genuinely minimal.
Processing Systems: What You Actually Need
While collection bins are optional convenience items, you absolutely need a processing system—something that actually composts your scraps.
Your options (covered in detail in previous sections):
Bokashi bucket: $25-90 (for one or two buckets), processes everything, requires burial space, ongoing bran cost ~$5-8 monthly
Worm bin: $80-150 setup cost, processes plant-based scraps only, produces finished compost, requires worm care
Electric composter: $300-500, processes most scraps, very fast, high electricity cost, output still needs soil time
Traditional outdoor compost: $30-100 for bin (or free pile), processes yard waste and some kitchen scraps (no meat/dairy), requires outdoor space and maintenance
My setup: Two Bokashi buckets ($90 for the pair, two years ago) + countertop ceramic collection bin ($45).
Total investment: $135. Ongoing costs: ~$8 monthly for Bokashi bran.
This setup processes 100% of my kitchen waste, produces excellent soil amendment, requires maybe 10 minutes weekly of maintenance, and has transformed my garden soil.
For me, the combination of collection bin (convenience) + Bokashi (comprehensive processing) is ideal. Your ideal might be different—single-tier system (processing only, no collection bin), different processing method (worms, electric), or combination of methods.
The key: understand the difference between collection (temporary storage) and processing (actual composting), and ensure you have a solution for both if needed.
What Can You Compost Indoors? Complete Guide
One of the most common questions I get: “Can I compost [specific item]?” Let me give you comprehensive lists for different composting methods, plus explanations for the “why” behind restrictions.
Bokashi: The Yes/No List
Bokashi’s great advantage is how much it accepts. The fermentation process can handle materials other methods can’t.
YES—Compost These in Bokashi:
All fruits and vegetables:
- Peels, cores, stems, leaves (raw or cooked)
- Spoiled or moldy produce
- Citrus peels (unlimited—no restrictions)
- Onions and garlic (unlimited—no restrictions)
- Peppers, including hot peppers
- Corn cobs, avocado pits (will take longer to break down in soil but ferment fine)
All meat and fish:
- Raw meat scraps and trimmings
- Cooked meat
- Small bones (chicken, fish, pork chop bones)
- Large bones work but take much longer in soil—I avoid beef leg bones
- Meat fat and gristle
- Fish skin, bones, heads, guts
- Shellfish shells (break down slowly but work)
All dairy:
- Cheese (including moldy cheese)
- Yogurt, sour cream, cream cheese
- Milk and cream (don’t add huge quantities of liquid, but moderate amounts are fine)
- Butter
- Ice cream
Grains and baked goods:
- Bread, pasta, rice (cooked or uncooked)
- Cereal, oatmeal
- Crackers, cookies, cakes
- Pizza crusts
- Stale baked goods
Other:
- Coffee grounds and filters
- Tea bags (remove staples if present)
- Eggshells (break them up for faster soil breakdown)
- Nut shells (break up hard shells like walnuts)
- Small amounts of paper napkins or paper towels
- Toothpicks, bamboo skewers (they’ll break down in soil)
- Wilted flowers
- Houseplant trimmings
MAYBE—Use Judgment:
Small amounts of oil and grease: A little oil on cooked food is fine. Don’t pour an entire bottle of oil into Bokashi—it would create a layer that prevents fermentation. But normal amounts from cooking are okay.
Pet food: Dry kibble, wet food—yes, fine. I add expired cat food occasionally.
Moldy food: Small amounts are fine. Large amounts of heavily molded food can potentially disrupt fermentation by introducing competing molds. In practice, I’ve added moldy bread, moldy cheese, fuzzy strawberries—all fine. But if you discovered a container of food that’s entirely mold, I’d be cautious.
Paper products: Paper napkins, paper towels (unbleached preferred), paper egg cartons—small amounts are fine. Don’t fill your Bokashi bucket with paper—it’s not efficient use of space. But paper mixed with food scraps is okay.
NO—Don’t Compost These:
Large amounts of liquid: Drain excess liquid from scraps before adding. Too much liquid prevents fermentation (EM need some air space even in anaerobic process—saturation is problematic).
Plastic, metal, glass: Obviously. Not compostable.
Pet waste (dog/cat feces, used cat litter): Bokashi isn’t designed for this. Pet waste contains pathogens that fermentation doesn’t necessarily eliminate. Special composting systems exist for pet waste—use those instead.
Diapers: Nope. Not appropriate for Bokashi.
Heavily treated or processed materials: Glossy paper, chemically treated wood, synthetic fabrics. These don’t break down or may contain harmful chemicals.
Excessive grease/oil: As mentioned, normal cooking amounts are fine, but don’t pour large quantities of fats/oils.
Already decomposed/rotted material: If something has been sitting in your trash rotting for days, don’t add it to Bokashi. The wrong bacteria have already colonized it. Fresh scraps or scraps stored in refrigerator/freezer are ideal.
The pattern: Bokashi handles all actual food waste plus natural paper products and plant materials. It doesn’t handle non-food items, pet waste, or heavily contaminated materials.
Traditional Compost: Yes/No List (For Comparison)
If you have or are considering a traditional outdoor compost bin, here’s what works there—note the much more restricted list:
YES:
Vegetable and fruit scraps:
- Peels, cores, stems (raw only, or small amounts of cooked)
- Spoiled produce
- Limited citrus (too much acidifies compost)
- Limited onions/garlic (too much creates odor and attracts pests)
Coffee grounds and tea bags:
- Unlimited (excellent nitrogen source)
Eggshells:
- Crushed (add calcium to compost)
Yard waste:
- Grass clippings (moderate amounts, mix with browns)
- Leaves (excellent carbon source)
- Small twigs and branches
- Garden plant trimmings
- Weeds (before they’ve gone to seed)
Paper products:
- Shredded newspaper, office paper
- Cardboard (shredded or torn into pieces)
- Paper towels, napkins
- Egg cartons
Other:
- Sawdust from untreated wood
- Wood ash (small amounts, raises pH)
- Hair (human or pet)
- Dryer lint (cotton or natural fibers only)
AVOID:
Meat, dairy, oils, fats: These rot slowly, smell terrible, and attract animals (rats, raccoons, dogs, cats, flies). This is the major limitation of traditional composting.
Diseased plants: Can spread disease to finished compost
Weeds with seeds: Seeds survive composting and you’ll spread weeds when you use the compost
Pet waste: Pathogen concerns
Treated wood products, synthetic materials: Don’t break down or contain chemicals
The pattern: Traditional composting handles plant-based scraps and yard waste well but cannot handle animal products or heavily processed items.
Vermicomposting: Yes/No List (Worm Bins)
Worms are pickier than Bokashi or traditional composting. They have dietary preferences and sensitivities.
YES:
Most fruits and vegetables:
- Non-citrus fruits (apples, berries, melons, bananas)
- Most vegetables (carrots, lettuce, cucumbers, peppers, tomatoes)
- Squash, pumpkin
Coffee grounds and tea bags:
- Worms love these (moderate amounts—too much changes pH)
Eggshells:
- Crushed finely (helps worm digestion, adds grit)
Grains and bread:
- Small amounts (worms eat these but can attract pests if too much)
Paper products:
- Shredded newspaper, cardboard (major component of worm bedding)
- Paper egg cartons
LIMIT OR AVOID:
Citrus fruits: High acidity bothers worms. Very small amounts occasionally are okay, but avoid making citrus a regular addition.
Onions and garlic: Strong compounds irritate worms. Tiny amounts might be okay, but avoid regular addition.
Spicy foods: Capsaicin in hot peppers is problematic for worms.
Salty foods: Excessive salt kills worms.
Meat, dairy, oils, fats: These rot before worms can process them, creating odor and attracting pests (flies, rodents). This is worm composting’s major limitation.
NEVER:
Pet waste: Pathogens
Non-compostable materials: Plastic, metal, glass
Toxic materials: Treated wood, synthetic chemicals
The pattern: Worms handle plant-based scraps (with some restrictions) but cannot handle animal products or strong/acidic foods. They’re more limited than Bokashi or traditional composting.
Common Items: Detailed Answers
Let me address specific items people ask about constantly:
Citrus peels (oranges, lemons, limes, grapefruit):
- Bokashi: YES, unlimited
- Traditional compost: LIMITED (small amounts okay, too much acidifies)
- Worms: AVOID (acidity bothers worms)
Onions and garlic:
- Bokashi: YES, unlimited
- Traditional compost: LIMITED (small amounts, can create odor)
- Worms: AVOID (compounds irritate worms)
Meat scraps:
- Bokashi: YES
- Traditional compost: NO (rot, smell, pests)
- Worms: NO (same problems)
Dairy (cheese, yogurt, milk):
- Bokashi: YES
- Traditional compost: NO
- Worms: NO
Cooked food (leftovers, spoiled meals):
- Bokashi: YES (including oils, sauces, seasonings)
- Traditional compost: LIMITED (plain vegetables maybe, anything with oil/meat/dairy no)
- Worms: VERY LIMITED (plain grains/vegetables in small amounts, nothing with oil/meat/dairy)
Bread, pasta, rice:
- Bokashi: YES
- Traditional compost: LIMITED (attracts pests)
- Worms: LIMITED (small amounts okay, too much attracts pests)
Coffee grounds:
- Bokashi: YES
- Traditional compost: YES
- Worms: YES (worms love them in moderation)
Eggshells:
- Bokashi: YES
- Traditional compost: YES
- Worms: YES (crushed finely)
Bones:
- Bokashi: YES (small bones work well, large bones very slow)
- Traditional compost: NO (don’t break down)
- Worms: NO
Paper towels and napkins:
- Bokashi: YES (small amounts)
- Traditional compost: YES
- Worms: YES (good bedding material)
Houseplant trimmings:
- Bokashi: YES
- Traditional compost: YES
- Worms: YES
Yard waste (grass, leaves):
- Bokashi: TECHNICALLY YES but inefficient (takes up space better used for kitchen waste)
- Traditional compost: YES (ideal use)
- Worms: SOME (dried leaves as bedding yes, fresh grass clippings limited)
Problem Materials and Alternatives
Some items are composting challenges. Here’s how to handle them:
Large bones (beef leg bones, etc.): These take months or years to break down even in Bokashi→soil system. Alternatives:
- Make bone broth first (extract nutrients through cooking), then compost the softened bones
- Dispose in trash
- Save and donate to dog rescues (dogs love raw bones)
Cooking oil and grease: Small amounts on food are fine in Bokashi. Large amounts are problematic in any system. Alternatives:
- Soak up excess with paper towels, compost the towels
- Collect in jar and dispose in trash when full
- Some municipal collection systems accept cooking oil—check locally
Processed/packaged food: Remove from packaging first. Food goes in Bokashi, packaging goes to trash or recycling depending on material.
Produce stickers: Remove these before composting produce. They’re plastic and won’t break down. I now consciously remove stickers as I’m cooking and put them directly in trash.
Tea bags with staples: Remove staples before composting, or buy staple-free tea bags.
Compostable plastics (PLA cups, utensils, bags labeled “compostable”): These need industrial composting conditions (high heat) and won’t break down in Bokashi, worm bins, or home compost. Don’t add them to your system—find industrial composting facility or dispose in trash.
I learned this the hard way—I added “compostable” takeout containers to my compost thinking they’d break down. A year later, they were unchanged. They need 60°C+ (140°F+) and specific bacterial conditions only industrial facilities provide.
My Personal Composting Rate: What Percentage Actually Gets Composted
I track household waste metrics (yes, I’m that person), so I can give you real numbers:
Before composting (2+ years ago):
- Weekly trash: Two 13-gallon bags full
- Composition: ~40% food waste, ~30% packaging, ~20% paper, ~10% misc
After implementing Bokashi:
- Weekly trash: One 13-gallon bag, half to two-thirds full
- Weekly Bokashi: ~3kg (6-7 pounds) food waste
- Reduction: Approximately 40% reduction in total trash volume
What gets composted:
- ~95% of food preparation waste (peels, cores, stems, trimmings)
- ~70% of plate scraps (some goes to our neighbor’s chickens)
- 100% of spoiled produce/food
- Coffee grounds, tea bags, eggshells
- Wilted flowers, dead houseplant leaves
What doesn’t:
- Packaging (plastic, cardboard goes to recycling, some to trash)
- Heavily processed wrappers and containers
- Produce stickers
- Non-food items
Total waste diversion from landfill: I estimate 35-40% of previous trash volume now goes to Bokashi instead of landfill.
This percentage would be higher if I eliminated more packaged foods (working on this) and if municipal recycling accepted more materials.
For households with less cooking/food preparation, the percentage might be lower. For households cooking entirely from scratch with lots of produce, it could be higher (50%+).
The impact is substantial and tangible. I used to take out trash twice weekly. Now I take it out once weekly and the bag isn’t even full. Knowing that 3-4kg of would-be trash is instead becoming garden soil feels deeply satisfying.
Troubleshooting Indoor Composting Problems
Indoor composting isn’t always smooth sailing, even when you’re doing everything supposedly right. I’ve had my share of disasters—bins that smelled so bad I had to move them to the shed, fruit flies that seemed to appear from nowhere, and compost that stayed stubbornly wet for weeks. Here’s what actually goes wrong and how to fix it.
The Smell Problem
Let’s be honest: this is the number one reason people give up on indoor composting. A properly managed indoor compost system should smell earthy or mildly sweet, not like a bin lorry in summer. If your bin stinks, something’s wrong.
The most common cause is too much moisture combined with not enough air flow. When compost gets waterlogged and compacted, it goes anaerobic—meaning the bacteria working in there don’t have oxygen. Anaerobic decomposition creates those horrible rotten egg smells that make you question all your life choices.
The fix depends on your system. For traditional bins, add more brown materials immediately. Shredded cardboard, newspaper, or dry leaves will absorb excess moisture and create air pockets. Mix everything thoroughly with a small hand fork or stick. Do this every time you add food waste, not just when it starts smelling.
For electric composters, check you’re not overloading them. These machines can only handle so much at once. If you’ve stuffed it full of wet vegetable peelings, it can’t dry and grind everything properly. Run a cycle with just carbon materials to dry things out.
For bokashi bins, a sour smell is actually normal—it should smell pickled or fermented, like sauerkraut. If it smells putrid and rotten, the fermentation has failed. This usually happens because the bin wasn’t sealed properly and air got in, or you didn’t use enough bokashi bran. Unfortunately, if bokashi goes wrong, you need to start over. The contents aren’t safe to use.
Fruit Flies Everywhere
Fruit flies appear seemingly from nowhere the moment you start composting food scraps. They’re not actually spawning spontaneously—they’re coming in on your food waste. Fruit and vegetable peelings often have tiny fly eggs already on them that hatch in the warm, moist environment of your compost.
The prevention is simple but requires consistency: never leave food waste exposed. Every single time you add kitchen scraps, cover them completely with brown materials. I keep a container of shredded cardboard right next to my bin specifically for this. Add scraps, cover immediately, every time.
If flies have already moved in, you need to make the environment uninhabitable for them. Stop adding food waste for a few days. Cover the entire surface with a thick layer—I mean thick, like two inches—of dry brown materials. The flies can’t get to the food waste to lay more eggs, and the existing larvae dry out.
For persistent infestations, try this trick: put a layer of newspaper directly on top of your compost, then add your brown material layer on top of that. The newspaper creates a physical barrier that flies can’t penetrate. Replace it each week.
Electric composters and bokashi bins don’t get fruit flies because they’re sealed. If you’re constantly battling flies with a traditional bin, this might be your sign to switch systems.
Compost That Won’t Dry Out
Wet, soggy compost that never seems to dry out is frustrating. You keep adding brown materials but it stays like thick mud. This usually means your brown-to-green ratio is permanently off and you need to reset things.
The first step is stopping all food waste additions immediately. I know this defeats the point of composting, but you need to fix the existing problem before adding more. Add a truly massive amount of brown materials—I’m talking enough to roughly double the volume of what’s in your bin. Mix it thoroughly, breaking up any clumps.
Then wait. Check it every couple of days. Mix it each time you check. It should gradually dry out over one to two weeks. Once it’s reached a consistency like a wrung-out sponge, you can start adding food waste again, but this time maintain a much higher ratio of browns to greens. At least three parts brown to one part green, possibly more depending on what went wrong initially.
If your bin lives somewhere very humid, like next to a kettle or in a damp room, the environment might be working against you. Move it somewhere drier if possible. Also check your bin has adequate drainage. Some bins have collection trays that can overflow, keeping everything wet from below.
Nothing’s Happening At All
You’ve had your compost bin going for weeks and nothing’s decomposing. The food scraps look exactly the same as when you put them in. This is usually a temperature problem combined with a lack of microbial activity.
Indoor compost bins need to stay reasonably warm to work. If your bin is in a cold room, garage, or near a drafty window, decomposition slows to almost nothing. Room temperature is minimum—slightly warmer is better. Move your bin somewhere consistently warm if possible.
The other issue is often that the compost is too dry. Microbes need moisture to work. If your bin feels dusty or dry to touch, add water. Not much—sprinkle it on like you’re watering a plant, mix, and check again in a day. You want damp, not wet.
Sometimes compost just needs a boost of microbes to get going. You can buy compost activator from garden centers, which is basically concentrated beneficial bacteria. Or, if you know someone with an active compost heap, ask for a handful of their finished compost. Mix it into yours. The established microbes will colonize your bin and kick-start decomposition.
Make sure you’re cutting or breaking food waste into small pieces too. Whole vegetables take forever to break down. Smaller pieces have more surface area for microbes to work on.
White Mold or Fuzzy Growth
Seeing white fuzzy stuff growing in your compost is actually a good sign, though it looks alarming. White mold is typically beneficial fungi breaking down organic matter. It shows your compost is active and working.
That said, if the white growth is excessive and your compost is very wet, you might have too much moisture. Add brown materials and mix thoroughly. The mold should calm down once the moisture balance improves.
Blue or black mold is less good. This usually indicates your compost has gone anaerobic or you’ve added something you shouldn’t have, like cooked food with oils or dairy. If you see blue or black mold, remove that section if possible and add lots of brown materials to the rest.
Compost Is Too Dry and Dusty
The opposite problem to soggy compost—everything’s dry as dust and nothing’s breaking down. This typically happens when you’re adding too many brown materials or your bin is somewhere very warm and dry.
The fix is straightforward: add moisture. I use a spray bottle to mist the compost lightly, then mix it through. Check it daily until it reaches that wrung-out sponge consistency. You can also add more green materials to bring moisture in naturally—vegetable peelings, tea bags, coffee grounds.
Once you’ve rehydrated it, adjust your ongoing ratio of greens to browns. You clearly need more greens or less browns than you’ve been using.
Ants in Your Compost
Finding ants in your indoor compost bin is weird because ants usually don’t nest in high-moisture environments. If you’ve got ants, your compost is probably too dry, and they’ve found the environment suitable for setting up home.
The solution is making it less hospitable. Add moisture to your compost until it’s properly damp. Ants won’t stay in wet conditions. You can also add citrus peels, which ants dislike. Mix everything thoroughly to disturb their setup.
Check how the ants are getting in. If there’s a crack or gap in your bin, seal it. Sometimes ants are just traveling through rather than actually nesting, but you still don’t want them there.
Bad Texture or Strange Consistency
Your compost should gradually become crumbly and soil-like. If it’s slimy, clumpy, or has an odd texture, something’s off in your ratios or mixing.
Slimy compost is too wet and too green. Add brown materials and mix.
Clumpy compost hasn’t been mixed enough. The materials aren’t integrating and breaking down evenly. Get in there with a small fork or stick and really break up the clumps. Mix from the bottom up, not just stirring the top layer.
Very compacted compost needs aeration. It’s been compressed over time and the air pockets have closed up. Mix it thoroughly, adding some bulky brown materials like scrunched up cardboard pieces to maintain air gaps.
The Bottom Is Ready But the Top Isn’t
This happens in continuous composting systems. The bottom layer is lovely dark finished compost but the top is still recognizable food scraps. This is actually normal—compost takes time and it happens from bottom to top.
If you need the finished compost, carefully remove just the bottom layer. Use a trowel or small hand fork to scoop out the ready material without disturbing the active compost above too much. The stuff at the top will continue decomposing and eventually work its way down to become the next batch of finished compost.
Some people put a wire mesh divider about two-thirds up their bin to keep the top and bottom layers separate. This makes harvesting the finished compost easier. The mesh lets moisture and microbes through but prevents uncomposted materials from falling down.
Getting Started: Your First Week
You’ve chosen your system, sorted your location, and you’re ready to start. Here’s exactly what to do in your first week to set yourself up for success rather than creating a smelly disaster that makes you give up immediately.
Day One: Setting Up
Set your bin in its chosen location and add your base layer. For traditional bins, this means filling the bottom with about three inches of brown materials—shredded paper, cardboard pieces, dry leaves if you have them. This creates drainage and provides carbon for balance. Fluff it up so there are lots of air pockets.
For electric composters, check the manual for first-use instructions. Many need running empty once to season them. For bokashi, you’re ready to go immediately—no base layer needed.
Days Two to Four: Starting Small
Add small amounts of kitchen waste—vegetable peelings, tea bags, coffee grounds. I mean small. Don’t empty your entire food waste bin from the past week into your new compost system. Start with a couple of handfuls maximum.
For traditional bins, chop or break everything into pieces smaller than your thumb. Add it in a thin layer, then cover completely with brown materials. Use at least twice as much brown as green. Mix it lightly into the top few inches.
For electric composters, follow the manufacturer’s guidance on quantities. Usually you can add up to about 500 grams per day once it’s established, but start smaller initially.
For bokashi, add your scraps, sprinkle generously with bokashi bran—I use about two tablespoons per layer—press down firmly to remove air pockets, then seal the lid immediately.
Days Five to Seven: Establishing Routine
Continue adding small amounts daily. For traditional bins, mix each time you add. For electric composters, let them run their cycle. For bokashi, keep layering, sprinkling, and pressing.
Check your compost daily during this first week. Does it smell okay? Is the moisture level right—damp but not soggy? Are you seeing any fly activity? Catching problems early in week one is much easier than fixing them later.
Make notes if it helps. I tracked what I added and how the compost looked for the first month. It seemed a bit excessive but it helped me understand what ratios and frequencies worked for my specific setup.
What Success Looks Like After Week One
Your traditional bin should smell earthy or slightly sweet, not rotten. The food waste you added on day two should be starting to break down—it won’t look fresh anymore. The whole mass should feel slightly warm to touch if you stick your hand in, showing microbial activity.
Your electric composter should have processed its first few loads without error messages or bad smells. The output should be dry and reduced in volume significantly.
Your bokashi bin should smell sour or pickled but not putrid. The food waste should look largely the same because bokashi ferments rather than decomposes, but there might be white mold, which is good.
What Failure Looks Like After Week One
Bad smells—rotten, sulfurous, like garbage. This means too wet, not enough air, or wrong ratios.
Fruit flies everywhere. This means food waste is exposed or your lid isn’t sealing.
Nothing happening at all. Food waste looks exactly as fresh as when you added it. This means too dry, too cold, or not enough green materials to get microbes active.
If you’re seeing failure signs, don’t give up. Go back to the troubleshooting section and fix the specific problem. Week one is for learning your system, not for perfection.
Long-Term Maintenance and Success
Getting through the first week successfully is brilliant, but indoor composting is a marathon, not a sprint. Here’s how to keep your system working well month after month without it becoming a chore or a source of kitchen guilt.
Developing Your Rhythm
After a month or so, you’ll settle into a natural rhythm with your compost system. For me, it’s adding scraps after I cook dinner, covering with a handful of shredded paper I keep in a box next to the bin, and giving it a quick stir. Takes less than a minute. On Sundays, I do a more thorough mix.
Your rhythm might be different. Some people prefer adding scraps twice a day. Some collect them in a container and add everything at once before bed. Some only compost vegetable prep waste from specific meals. Find what works for your cooking patterns and lifestyle.
The key is making it automatic rather than something you have to remember and motivate yourself to do each time. Once composting becomes part of your routine like washing dishes or taking out the recycling, it stops feeling like a special task.
Adjusting Seasonally
Your compost behaves differently in summer versus winter, especially for traditional bins in unheated spaces. In summer, decomposition speeds up. You’ll need less time to produce finished compost, but you’ll also need to watch moisture more carefully because things dry out faster.
In winter, decomposition slows right down. Your bin might seem to stall. This is normal. Keep adding materials but expect the process to take longer. If your bin is somewhere very cold, consider moving it to a warmer spot or insulating it with cardboard around the outside.
Your ratios might need seasonal adjustment too. In summer when I’m cooking with more fresh vegetables, I need more brown materials to balance all those peelings. In winter when I’m eating more packaged foods, I have fewer scraps and need to be more conscious about keeping the bin active.
Keeping Up With Browns
Running out of brown materials is the most common reason people’s indoor composting starts to fail. You’re consistently generating food waste but you forget to collect browns until suddenly you have none and your bin is turning into a soggy mess.
Make collecting browns part of your regular routine. When you open a cardboard package, shred it immediately and add to your browns container. When you’re reading the newspaper, save a few pages. Fallen leaves in autumn? Collect a bag to use all year.
I keep a large paper sack of shredded browns in my utility room. When it’s half empty, I know I need to collect more. This prevents the panicked situation where I desperately need browns right now and have to start tearing up old phone books or whatever I can find.
When to Harvest
For continuous composting systems, you’ll harvest finished compost from the bottom while continuing to add fresh materials to the top. How often depends on your volume and system, but typically every three to six months.
Finished compost is dark brown or black, crumbly, and smells like earth. You shouldn’t be able to identify what the original materials were. If you can still see recognizable food scraps, it’s not ready.
To harvest, stop adding materials to your bin for a few days. This gives the top layer time to settle. Then carefully scoop out the finished compost from the bottom, leaving the active composting layer at the top undisturbed.
Some people never harvest at all. They just keep adding material and letting the bin fill, then start a new bin when the first is full. After six months or a year, they come back to the first bin and the whole thing has turned to finished compost. This approach requires more space but less active management.
Using Your Finished Compost
Your indoor compost is brilliant for houseplants, small herb gardens, and planters. Mix it into potting soil at about one part compost to three parts soil. Pure compost can be too rich for some plants.
For houseplants, top dress them with a thin layer of compost every few months. This slowly feeds the plant as you water.
For starting seeds, compost should be fully finished and fine-textured. Put it through a sieve if needed to remove any remaining chunks.
Don’t use unfinished or partially finished compost on plants. It can tie up nitrogen as it continues decomposing and actually harm your plants. Be patient and wait for full decomposition.
Knowing When to Stop
Sometimes indoor composting just doesn’t work for your specific situation, and that’s okay. If you’ve tried for three months, adjusted your methods, troubleshooted problems, and it’s still a source of stress rather than satisfaction, it might not be the right fit.
Signs it’s not working: you’re consistently not keeping up with adding browns, the smell bothers you or your family even when you’re doing everything right, fruit flies are a constant battle, you never use the finished compost so it just accumulates, or you dread dealing with it.
If indoor composting isn’t working, you haven’t failed. You’ve learned something about your household and your preferences. Alternative options include finding a local authority food waste collection, community composting schemes, or focusing your environmental efforts on areas that do work for you.
Conclusion
Indoor composting isn’t quite the perfect, problem-free solution that some enthusiasts make it sound. It requires attention, adjustment, and a learning period where you figure out what works for your specific kitchen, cooking habits, and available time.
But when it does work, it’s genuinely satisfying. There’s something quietly pleasing about taking waste that would go in the bin and turning it into something useful. It reduces your rubbish significantly—my household bin went from overflowing weekly to barely filling—and that reduction feels good.
The environmental impact of composting your food waste is real. Food waste in landfills produces methane, a greenhouse gas much worse than carbon dioxide. Composting at home prevents that. You’re also creating a product that enriches soil rather than extracting resources to buy commercial compost in plastic bags.
The best system for you depends entirely on your circumstances. Small kitchen with minimal space? Electric composter or bokashi. Willing to manage a traditional bin and have the room? That’s the most affordable option. Want to avoid smells entirely? Sealed systems like bokashi or electric.
Start small. Choose one system. Try it for a month. Adjust as you learn. If it doesn’t work, try something different. There’s no single right way to compost indoors, just the way that works for your life.
The herbs in my windowsill, the vegetables in my small raised bed on the balcony—they’re all growing in compost I made from vegetable peelings and coffee grounds that would have been in the bin. That feels good. It closes a small loop in my small kitchen garden.
And that’s really the point.