There’s a moment every indoor herb gardener experiences: you’re standing at your kitchen counter, staring at a pile of beautiful basil leaves, and you realize you have absolutely no idea what to do with them all. Again.
That’s the beautiful problem with growing your own herbs indoors: when they’re happy, they really produce. My basil doesn’t care that I only need a few leaves for tonight’s pasta. It’s giving me twenty leaves right now, and another batch will be ready by the weekend.
In a hurry and don’t have time to read the whole article? I have written a quick summary specially for you, linked here: How To Preserve Fresh Herbs – A Quick Summary.
I started Small Kitchen Garden because I was tired of buying those little plastic packets of herbs at the supermarket—shipped from goodness knows where, wrapped in plastic, half-wilted by the time they reached the shelf. Growing my own means zero food miles, no packaging waste, and herbs that are actually fresh fresh.
But here’s the irony: I started growing herbs to reduce waste, only to find myself composting perfectly good harvests because I couldn’t use them fast enough. That felt just as wasteful as buying imported herbs and binning half the packet.
Whether you’re growing herbs on your windowsill like me, or you’ve picked up a bunch from the shop (look, I get it—sometimes you need coriander today and your plant isn’t ready yet), the challenge is the same: how do you preserve fresh herbs so nothing goes to waste?
After years of growing indoors and testing every preservation method I could find, here’s what actually works for real kitchens and small-space gardens.
Who This Guide Is For
This guide is for you if you’re growing herbs indoors like me and they’re producing faster than you can use them. Your basil plant doesn’t understand the concept of ‘just a few leaves, please.’ It’s also for you if you care about reducing waste. Whether you’ve grown it yourself or—let’s be honest—grabbed a bunch from Tesco when you were in a rush, watching fresh herbs turn to slime in your fridge crisper feels terrible.
If you have limited space, this is definitely for you. No massive garden harvests here—just practical solutions for handfuls of herbs at a time. And if you occasionally buy herbs from shops (no judgment!), you probably realize that enormous bunch is way more than you need for one recipe. My readers often tell me they buy herbs while getting their growing setup started, or to supplement their small indoor harvest during winter.
Why I Grow My Own (And Why Preservation Matters)
I’ve been growing herbs indoors in my small kitchen for over three years now. My setup isn’t fancy—mostly windowsill pots and a few small containers under a grow light.
I started growing my own primarily for environmental reasons. Those supermarket herb packets bothered me. They’re shipped hundreds or thousands of miles, creating a significant carbon footprint. They’re wrapped in plastic, adding to our waste problem. And they’re often half-dead by the time they reach you, so you end up binning half anyway. Then there’s the price—£1.50 to £2.50 for a handful of leaves that you could grow yourself for pennies.
Growing my own solved most of these problems. But it created a new one: my herbs don’t produce on my schedule. When my thyme needs harvesting, it needs harvesting now—not next Tuesday when I’m planning to cook with it. If I ignore it, the plant gets woody and bolts to flower. If I harvest it all and can’t use it immediately, I’m right back to wasting fresh herbs. Just homegrown ones this time.
That’s where preservation comes in. It’s the final piece of the puzzle that makes growing your own truly sustainable. No waste, maximum flavor, and you’re eating herbs you nurtured from seedlings. That feels good.
What You’ll Learn
In this guide, I’m sharing ten preservation methods that work brilliantly for small harvests. You’ll learn which methods take just five minutes, perfect when you’re harvesting after work. I’ll show you how to preserve tiny amounts, just two or three stems, without wasting effort. You’ll discover what to do when one plant suddenly produces loads all at once. I’ll explain the safest ways to preserve herbs, because I learned some of these lessons the hard way. And you’ll see how to match the method to your actual cooking style.
No special equipment required. No massive harvests needed. Just practical solutions that respect the hard work you put into growing your herbs—or help you avoid wasting shop-bought ones while you get your own garden established.
Understanding Herb Preservation Basics
The Small Kitchen Gardener’s Dilemma
Here’s what nobody tells you when you start growing herbs indoors: you can’t control when they’re ready. Shop-bought herbs arrive when you decide to buy them. Homegrown herbs are ready when they decide to grow.
My basil doesn’t care that I’m away for the weekend. It’s producing leaves now. My thyme doesn’t know I already used thyme yesterday—it’s getting woody and needs trimming today.
When I first started my indoor garden, I’d harvest what I needed and leave the rest. Bad idea. The plant would bolt to flower, or the leaves would get tough and bitter, or they’d start yellowing. I was wasting my own growing efforts by not preserving the excess at peak freshness.
Then I’d overcompensate and cut too much, leaving the poor plant stressed and struggling to recover.
The solution? Learn to preserve small amounts quickly, so you can harvest when the plant needs it—not just when you need it for cooking.
Two Situations, Same Techniques
If you’re growing herbs indoors like me, this is exactly why I started growing my own in the first place. Those little plastic packets at the supermarket—shipped who knows how far, wrapped in plastic, half-wilted by the time they arrive—it never sat right with me. Growing my own means zero food miles, no packaging waste, and herbs that are actually fresh fresh.
But it also means dealing with nature’s schedule, not mine. You need methods that handle continuous small harvests. Not harvest everything at once methods, but add to your freezer stash every few days approaches. Your herbs arrive in a steady trickle, not all at once.
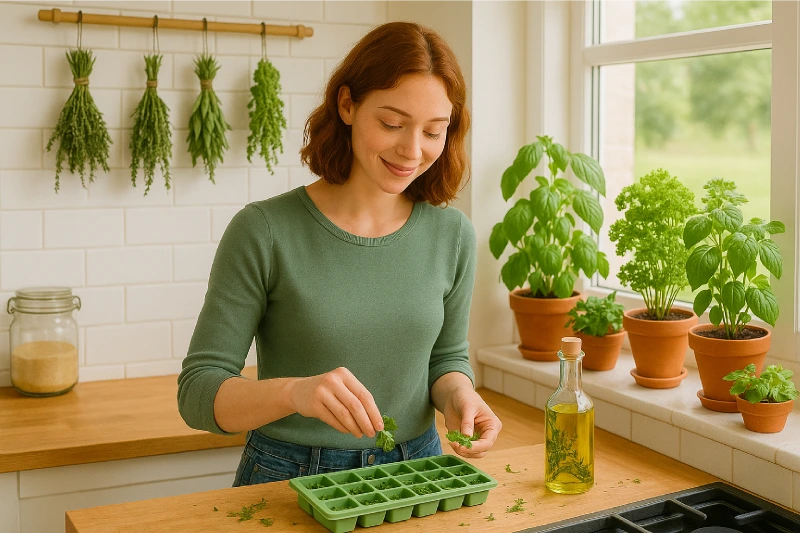
I keep ice cube trays in my freezer specifically for this. When I harvest a handful of basil on Monday, I chop it, pop it in a few compartments with oil, and freeze. Wednesday’s parsley harvest? Same process. By the end of the month, I’ve built up a proper collection without ever spending more than five minutes at a time.
If you’re still buying from shops, look, I get it. Not everyone has the space or time to grow herbs yet. Maybe you’re just starting out and reading Small Kitchen Garden to learn, or maybe you needed coriander today and your seedlings aren’t ready. No judgment here—we’ve all grabbed herbs from the shop when life gets busy.
The important thing is not wasting what you’ve got. Whether that herb traveled two meters from your windowsill or two thousand miles from Spain, letting it rot in the fridge does nobody any favors.
You often face a different challenge than growers—too much at once. That massive bunch of coriander needs dealing with now, not in small batches over two weeks. The good news? Most of these methods work brilliantly for both scenarios.
Why Herbs Spoil So Quickly
Understanding why herbs go bad helps you preserve them better. Fresh herbs are delicate little things. They have high moisture content, which encourages bacterial growth. They have thin cell walls, which break down quickly. They have active enzymes that keep working after harvest, breaking down flavor compounds. And they have large surface area, providing lots of exposure to air and bacteria.
The moment you harvest from your indoor garden—or the moment those shop herbs were picked days ago—the clock starts ticking. Within three to five days, most fresh herbs in your fridge will start declining. Some, like basil and coriander, go even faster.
Preservation works by either removing moisture through drying, stopping enzyme activity by freezing, creating a hostile environment for bacteria with salt or vinegar or oil, or combining herbs with natural preservatives like honey or alcohol. You don’t need to understand the science perfectly—just know that fresh herbs will spoil, and preservation gives them a fighting chance.
When to Harvest for Maximum Flavor
This section is specifically for those growing their own. If you’re buying from shops, you can skip ahead, but this might help you spot the best quality when choosing bunches.
The best time to harvest from your indoor garden is in the morning, after any dew has dried. Essential oils are most concentrated in the morning. Always harvest before the plant flowers—once a herb flowers, energy goes to the bloom and leaves lose flavor. And make sure to harvest when leaves are dry. Never harvest wet leaves if you’re preserving immediately.
From my indoor garden, I usually harvest in the morning before work if I’m planning to preserve that evening. The herbs sit in a jar of water on my counter during the day, like a bouquet, staying fresh until I get home.
For shop buyers, what should you look for? Vibrant, uniform color with no yellowing or dark spots. The herbs should have a fresh, strong aroma and crisp leaves, not wilted. Check for sliminess or moisture in the package. Ideally, herbs are still attached to stems because they last longer than pre-chopped. And obviously, check the use-by date.
The Critical First Step: Washing and Drying
I cannot stress this enough: your herbs must be completely dry before preserving.
This was my biggest rookie error. I’d rinse my basil, give it a quick shake, and throw it straight into oil. Within a week, I’d see mold. In the case of my first and only batch of fresh garlic oil, I actually risked giving myself botulism. Not my finest moment.
My washing and drying process has four steps. First, rinse under cold water. Even homegrown herbs can have dust, and shop herbs definitely need washing—you don’t know what’s been sprayed on them. Second, spin them in a salad spinner, which gets rid of most water. Best ten quid I ever spent for my kitchen. Third, lay them on clean kitchen towels, pat gently, then leave for thirty to sixty minutes. Finally, check by touch. Leaves should feel completely dry, not cool or damp.
Can you skip washing? If you’ve grown the herbs yourself indoors and they’re pristine, technically yes. I still give mine a quick rinse because even indoor herbs can have the odd bit of dust or—I’m not joking—a tiny spider that hitched a ride on my watering can.
For shop-bought herbs? Always, always wash. You have no idea what’s been sprayed on them, who’s handled them, or what they’ve been through on their journey to your kitchen.
The test is simple. Touch a leaf to your cheek. If it feels cool or damp, it’s not ready. If it feels dry and papery, you’re good to go.
Quick Reference: Choosing Your Method
Before we dive into the detailed instructions, here’s how to quickly pick the right preservation method for your situation. Some methods suit certain herbs better, some fit particular cooking styles, and some work better for continuous small harvests versus one big batch.
Choose ice cube freezing if you want the fastest option at just five minutes. This works brilliantly if you’ll use herbs in soups, stews, or sauces. It’s perfect for tender herbs like coriander, parsley, and mint, and it’s ideal for building up a stash from continuous small harvests.
Choose drying if you want the longest shelf life at one to two years. This is brilliant for woody herbs like rosemary, thyme, and oregano. It’s perfect if you have minimal freezer space and want that concentrated, intense herb flavor.
Choose herb butter if you’re feeling fancy or want something gift-worthy. This method is gorgeous if you love finishing dishes with butter and you have ten minutes plus butter in the fridge.
Choose pesto if your basil plant has gone absolutely mad. You’ll need a food processor and you should actually eat pesto regularly—be honest with yourself here. This creates something ready-to-use that makes weeknight dinners easy.
Choose herb oil if you make lots of salad dressings and you’re willing to follow safety rules strictly. This makes impressive-looking gifts, but you must use it within one to two weeks and keep it refrigerated.
Choose herb vinegar if you love pickles and tangy flavors. This is foolproof preservation that needs no fridge, making it perfect if you’re into making your own dressings.
Choose herb salt if you want intensely flavored seasoning. You’ll need a food processor and you should love the idea of fancy finishing salts. More importantly, you’ll actually remember to use it.
Choose herb honey if you’re dealing with medicinal herbs like thyme for coughs. This lasts forever and works brilliantly if you drink lots of herbal tea, though you’ll need to wait two to six weeks for infusion.
Choose herb broth cubes if you make lots of soups and want pre-seasoned cooking shortcuts. This is perfect for harvesting tiny amounts regularly, and you’ll need vegetable or chicken stock on hand.
Full Comparison: All 10 Methods at a Glance
Here’s every method broken down by what matters most. This assumes you’re working with a standard shop bunch, about thirty grams or one ounce, or a small indoor garden harvest of five to fifteen stems.
Ice Cubes with Water
Time: 5 minutes | Cost: Under £1 | Shelf Life: 6-12 months
Best for: Soups, stews, sauces | Difficulty: Easy | My rating: ⭐⭐⭐⭐⭐
Ice Cubes with Oil
Time: 10 minutes | Cost: £2-3 | Shelf Life: 6-12 months
Best for: Sautéing, roasting | Difficulty: Easy | My rating: ⭐⭐⭐⭐⭐
Air-Dried (Hanging)
Time: 5 min prep + 1-3 weeks drying | Cost: Under £1 | Shelf Life: 1-2 years
Best for: Long-term storage, woody herbs | Difficulty: Easy | My rating: ⭐⭐⭐⭐
Oven-Dried
Time: 3-4 hours | Cost: Under £1 | Shelf Life: 1-2 years
Best for: Quick drying when you can’t wait weeks | Difficulty: Medium | My rating: ⭐⭐⭐⭐
Herb Butter
Time: 10 minutes | Cost: £2-4 | Shelf Life: 6 months frozen
Best for: Finishing dishes, feeling fancy | Difficulty: Easy | My rating: ⭐⭐⭐⭐⭐
Herb Oil (Fresh)
Time: 15 minutes | Cost: £3-5 | Shelf Life: 1-2 weeks ⚠️
Best for: Dressings, drizzling | Difficulty: Medium (safety warnings) | My rating: ⭐⭐⭐
Herb Vinegar
Time: 5 minutes | Cost: £2-3 | Shelf Life: 6 months
Best for: Pickles, salad dressings | Difficulty: Easy | My rating: ⭐⭐⭐⭐
Herb Salt
Time: 10 minutes | Cost: £1-2 | Shelf Life: 6 months
Best for: Everyday seasoning, finishing salt | Difficulty: Easy | My rating: ⭐⭐⭐⭐
Pesto
Time: 15 minutes | Cost: £3-5 | Shelf Life: 3-6 months frozen
Best for: Pasta, sandwiches, when basil goes mad | Difficulty: Medium | My rating: ⭐⭐⭐⭐⭐
Herb Broth Cubes
Time: 10 minutes | Cost: £1-2 | Shelf Life: 6-12 months
Best for: Soups, instant flavor | Difficulty: Easy | My rating: ⭐⭐⭐⭐
My ratings reflect how often I actually use each method in my own kitchen. The five-star methods are ones I reach for constantly. Three and four stars are brilliant but I use them less frequently for various reasons.
How I Actually Choose
When I’m standing in my kitchen with freshly harvested herbs from my windowsill, here’s my actual decision process.
If I’m tired and it’s a weeknight, ice cubes every time. Five minutes and done. No thinking required.
If it’s woody herbs like rosemary, thyme, or oregano, I air-dry them. They’re perfect for it and I genuinely love how they look hanging in my kitchen. It adds character.
If it’s tender herbs like basil, coriander, or parsley, I make ice cubes with oil or water, depending on how I’ll use them. Water cubes for soups, oil cubes for everything else.
If my basil has gone absolutely mad and I’m drowning in leaves, it’s pesto time. I’ll make a big batch and freeze it in portions. This turns twenty minutes of work into months of easy dinners.
If I’m meal prepping on a Sunday and feeling organized, I make herb butter or herb salt. Something that makes weeknight cooking easier and makes me feel like a proper grown-up.
If I want gifts or something special for a dinner party, I’ll make vinegar or honey. They look gorgeous in jars and people are always impressed.
The methods I use most? Ice cubes with oil and herb butter. They’re fast, foolproof, and I genuinely reach for them when cooking. That’s what matters—not what looks prettiest on Instagram, but what you’ll actually use three months from now when you’re tired and just want dinner on the table.
The 10 Preservation Methods
Now let’s get into the detailed instructions for each method. I’ve tested all of these with herbs from my indoor garden, so I’m sharing exactly what works and what doesn’t.
Method One: Freezing Herbs in Ice Cubes
This is my absolute go-to method. Five stars, no question.
When I harvest a handful of coriander from my windowsill on a Tuesday evening, this is what I do. It takes five minutes, uses equipment you already have, and works with almost any herb. Six months later, I’m still pulling out perfectly preserved herb cubes for weeknight cooking.
I keep empty ice cube trays in my freezer specifically for this purpose. The moment I harvest herbs, I know exactly what to do with them. No standing around wondering, no guilt about potential waste. Just quick, simple preservation.
This method is perfect for continuous small harvests from indoor gardens, which is my primary use. It also works brilliantly for shop-bought bunches that are too much for one recipe. The herbs get added to cooked dishes—soups, stews, sauces, curries. And over time, you build up a lovely variety stash.
There are two approaches I use regularly, and the choice depends entirely on how I’ll cook with the herbs later.
Approach A: Ice Cubes with Water
This is perfect when you’re going to add the herbs to something liquid anyway. The ice melts into your dish and you get perfectly preserved herb flavor.
The process is straightforward. I harvest my herbs, or if I’ve bought them I remove them from packaging. Then I wash and completely dry them—this drying step is crucial. I chop the herbs roughly, not fussing too much, just rough pieces. Then I pack ice cube tray compartments about three-quarters full with chopped herbs and top up with water until herbs are just covered. The tray goes in the freezer overnight. Next morning, or whenever they’re solid, I pop the ice cubes out and store them in a labeled freezer bag with the date.
Each ice cube equals roughly one to two tablespoons of fresh herbs. I freeze coriander this way most often because I use it in curries constantly. Parsley goes in for soups and stews. Mint makes brilliant cubes for Moroccan dishes and mint tea. Chives are perfect for baked potatoes and soups. Dill works beautifully for fish dishes.
Approach B: Ice Cubes with Oil
This is my favorite for woody herbs and anything I’m going to cook with oil anyway. You’re essentially making a ready-to-cook herb starter.
The process starts the same—harvest, wash, dry completely, chop. Then I pack ice cube tray compartments three-quarters full with herbs and top with olive oil, or whatever cooking oil I prefer. The herbs must be completely submerged in oil. Then I freeze overnight and pop out the cubes to store in a labeled freezer bag.
Each ice cube equals roughly one tablespoon of herbs plus one tablespoon of oil. This is genuinely genius for weeknight cooking. I just drop a frozen herb cube into my pan, let it melt, and I’ve instantly got herb-infused oil ready to cook with. The flavor is gorgeous and it saves so much time.
I freeze basil this way most often because it’s perfect for pasta and tomato dishes. Oregano is an Italian cooking staple. Thyme makes incredible roast chicken. Rosemary is brilliant for roasted vegetables. Sage works especially well with butter for pasta dishes.
Tips from Experience
Label immediately. This cannot be overstated. Frozen basil looks identical to frozen parsley once it’s in a bag. I use a permanent marker directly on the freezer bag and write something like ‘Basil in oil, harvested October 2024.’
Don’t overfill the compartments. Three-quarters full is perfect. If you overfill, you get massive ice cubes that are awkward to use and don’t melt as nicely in cooking.
If you have silicone ice cube trays, use them because the cubes pop out so much easier. Regular plastic trays work absolutely fine though—just twist them to release the cubes.
Once the ice cubes are solid, freeze flat in bags to save space. I transfer them to freezer bags, squeeze out the air, and lay them flat in the freezer. This is much more space-efficient than having bulky ice cube trays taking up room permanently.
Consider your ice cube size for how you actually cook. I have small trays that make half-tablespoon cubes for delicate dishes, and standard trays that make one-tablespoon cubes for regular cooking.
Build your stash gradually. This is the real beauty of this method for indoor gardeners. Monday’s basil harvest goes in three compartments. Wednesday’s parsley goes in two more compartments. By the end of the month, you’ve got a lovely variety without ever spending more than five minutes at any one time.
What Works Well:
- Genuinely takes just 5 minutes
- Perfect for continuous small harvests
- Excellent flavor retention (90-95%)
- No special equipment needed
- Portion control—grab what you need
- Zero waste—every leaf gets used
What Doesn’t:
- Takes up freezer space
- Texture becomes limp when thawed (fine for cooking, not garnish)
- Water cubes can slightly dilute sauces
- Must remember to label everything
The shelf life is six to twelve months in the freezer. After that, they’re still safe to eat but start losing flavor potency.
Method Two: Drying Herbs
I give this method four stars. It’s brilliant for the right herbs, but it doesn’t work for everything.
Drying is the traditional method and it gives you the longest shelf life—one to two years if stored properly. But here’s the crucial thing to understand: it only works well for woody, Mediterranean-style herbs. Tender, delicate herbs like basil and coriander? They lose too much flavor and often turn an unappetizing brown-black color when dried.
That said, when I dry rosemary or thyme from my indoor garden, the concentrated flavor is absolutely gorgeous. A little pinch of dried thyme has so much more punch than the same amount of fresh. It’s a different flavor profile entirely—more concentrated, more intense, earthier.
This method is perfect for woody herbs like rosemary, thyme, oregano, and sage. It’s ideal for long-term storage without using freezer space, which matters if your freezer is small or already packed. Choose this when you want that concentrated, intense herb flavor. And dried herbs in pretty jars make lovely gifts.
Method A: Air-Drying
This is the classic herbs hanging in bunches method. It takes the longest but requires almost no effort and honestly looks beautiful in your kitchen.
I harvest herbs with stems attached, or if I’ve bought a big bunch this works too. I wash if needed, then dry them completely. This is even more critical for drying than it is for freezing. Any moisture left on the herbs and they’ll mold instead of dry.
I remove any damaged or yellowing leaves, then bundle five to eight stems together with kitchen string or an elastic band. The bundle gets hung upside down in a dark, dry, well-ventilated spot. Then I wait. One to three weeks depending on humidity and how thick the herb stems are. I test by crushing a leaf—if it crumbles easily, it’s ready. Then I strip the leaves from stems and store in airtight jars.
Where I hang mine makes a difference to the results. I have a little rail in my pantry away from direct light. I’ve also used the back of a kitchen cabinet door and a coat hanger in my boiler cupboard, which is warm and dry. Just avoid anywhere steamy or humid—so not above the kettle or near the shower, and definitely not in the actual bathroom even if it looks pretty there.
The best herbs for air-drying from my indoor garden are rosemary, which dries beautifully and keeps its color. Thyme is my most common—I always have bunches hanging somewhere. Oregano intensifies in flavor when dried, which is lovely. Sage dries quickly. And bay leaves take absolutely ages but they’re worth it.
Method B: Oven-Drying
This is what I use when I need dried herbs but don’t want to wait two weeks. It’s faster but requires more attention and you need to actually be home and checking on it.
I harvest, wash and dry herbs completely. Then I remove the leaves from stems and spread them in a single layer on a baking sheet lined with parchment paper. I set my oven to its lowest temperature, ideally fifty to eighty degrees Celsius or one twenty to one seventy-five Fahrenheit. Then I prop the oven door open slightly with a wooden spoon. This lets moisture escape, which is the whole point.
The herbs dry for two to four hours. I check every thirty minutes because timing varies wildly depending on the herb and the oven. They’re done when they crumble easily. Then I let them cool completely before storing.
Here’s a tip that saved me after I learned the hard way: if your oven doesn’t go low enough, just turn it on for ten minutes, then switch it off and let herbs dry in the residual heat. Repeat this process if needed. It takes longer but works perfectly and you’re less likely to burn anything.
Watch out for the fact that herbs can go from perfectly dried to burnt in minutes. I learned this the hard way with an entire batch of oregano from my indoor garden. Such a waste of weeks of growing. Set a timer and actually respond when it goes off.
Method C: Using a Dehydrator
I don’t own a dehydrator myself, but several of my readers swear by them for herbs. If you’re drying herbs regularly or growing lots indoors, it might be worth the investment. They typically cost thirty to eighty pounds.
The basic process, based on reader feedback, is to harvest, wash and dry herbs, then spread them on dehydrator trays. Set the temperature to thirty-five to forty-five degrees Celsius or ninety-five to one fifteen Fahrenheit. Dry for one to four hours depending on the herb and your particular dehydrator. Store when completely dry and cool.
Dehydrators give the most consistent results and are apparently brilliant if you’re doing large batches regularly. The temperature control is much better than an oven.
How to Store Dried Herbs
This matters more than you’d think. Badly stored dried herbs lose flavor within months, which completely defeats the point of preserving them.
Keep the leaves whole until you actually use them. Crushing releases the oils, which then degrade faster in storage. Use airtight glass jars—Mason jars, old jam jars that you’ve properly cleaned, anything with a tight seal. I save jars from shop-bought preserves and reuse them, which reduces waste.
Store in a dark place because light degrades herbs. My spice cupboard is away from the window. Label everything with the date because you’ll forget when you dried them. Trust me on this. And crush herbs just before cooking—rub them between your fingers to release the oils right when you need them.
Properly stored dried herbs last one to two years for woody herbs. After that, they’re still safe to eat but the flavor fades significantly. I do a sniff test. If there’s no aroma when I crush a bit between my fingers, I compost it—back to the soil—and dry a fresh batch.
What Works Well:
- Longest shelf life (1-2 years)
- No freezer space needed
- Concentrated, intense flavor
- Beautiful hanging bunches
- Very low cost
- Works for small or large harvests
What Doesn’t:
- Doesn’t work for tender herbs
- Time-consuming (1-3 weeks for air-drying)
- Needs dry, dark storage space
- Less ‘fresh’ flavor than frozen
- Can fail in humid climates
The shelf life is one to two years in proper storage.
Method Three: Herb Butter
Five stars from me. This is absolutely gorgeous and easier than you’d think.
Herb butter feels fancy but it’s genuinely one of the easiest preservation methods. It takes about ten minutes, uses up small amounts of herbs perfectly—which is brilliant when you’ve just harvested a few sprigs from your windowsill—and makes any meal feel special.
I keep a log of herb butter in my freezer and slice off medallions whenever I need them. Honestly? Herb butter on a jacket potato or melted over a steak makes me feel like I’ve got my life together, even on the messiest weeknight when everything else has gone wrong.
This method is perfect for small harvests. If you’ve got five to ten stems from your indoor garden, this is ideal. It makes brilliant gifts that look impressive. It’s gorgeous for finishing dishes beautifully. And you can make it when you want to feel fancy without much effort. Plus it’s brilliant for using up odds and ends of different herbs together—whatever you’ve got becomes herb butter.
What You’ll Need:
- 250g butter (salted or unsalted)
- 4-6 tablespoons finely chopped fresh herbs (about one good handful)
- Optional: squeeze of lemon juice, minced garlic, or sea salt flakes
The method is straightforward. Take butter out of the fridge and let it soften at room temperature for thirty to sixty minutes. Don’t microwave it—it goes too soft and oily and the texture is wrong. Meanwhile, harvest and prepare your herbs. Wash them, dry completely, remove stems, and chop finely.
Once the butter is soft, put it in a bowl and mash it with a fork until it’s smooth and malleable. Add the chopped herbs and any optional extras. Mix thoroughly until the herbs are evenly distributed throughout the butter. This takes a minute or two of proper mixing.
Scrape the mixture onto a piece of parchment or greaseproof paper. Shape it into a log, like a sausage, by rolling the paper around it. Twist the ends like a Christmas cracker so the butter is properly sealed inside. Chill in the fridge for at least one hour until firm.
Once it’s firm, you can slice off medallions as needed, or freeze the whole log for longer storage. To freeze, wrap the chilled log in foil or pop it in a freezer bag. Label with the herbs used and the date. You can slice off what you need while it’s still frozen—actually, it’s easier to cut when frozen solid.
My Favorite Combinations
Classic garlic and parsley butter uses loads of parsley, two to three cloves of minced garlic, and a squeeze of lemon juice. It’s perfect for garlic bread, steak, and mussels. This is the one people expect and always love.
Italian herb butter combines basil and oregano from my windowsill with a pinch of dried chili flakes. It’s gorgeous on pasta, brushed on pizza crust, or spread on bruschetta.
Rosemary and thyme butter uses equal parts rosemary and thyme with black pepper. This is incredible on roast chicken, lamb chops, or roasted vegetables. The woody herbs hold up beautifully to high-temperature cooking.
My mixed herb butter is what I call my ‘use everything up’ version. It’s whatever I’ve just harvested—parsley, chives, a bit of thyme, maybe some sage. This works brilliantly on jacket potatoes or stirred through mashed potatoes. No two batches are the same but it’s always good.
Chive butter is just chives and a bit of sea salt, but it’s lovely. Perfect for baked potatoes, grilled fish, or scrambled eggs. Simple but effective.
How I Actually Use It
The creative ways to use herb butter are endless. I melt it over grilled meat or fish for instantly restaurant-quality results. I toss it with hot pasta where the butter melts into a simple sauce. I spread it on warm bread, which is better than any restaurant’s fancy butter.
It transforms baked potatoes completely. I stir it into risotto or mashed potatoes to add instant depth of flavor. I put it under chicken skin before roasting, which keeps the meat moist and adds incredible flavor. I stir it into scrambled eggs to elevate a simple breakfast. I melt it over grilled vegetables like courgettes, asparagus, or corn on the cob. And obviously, I make garlic bread—slice a baguette, slather with herb butter, wrap in foil, and bake.
Storage matters for getting the most from your herb butter. In the fridge, it keeps for about two weeks in an airtight container. In the freezer, wrapped well—I double-wrap with parchment then foil—herb butter lasts six months easily. I slice off medallions as needed straight from frozen. They’re actually easier to slice when frozen solid.
For gift presentation, wrap the log in pretty parchment paper, tie with twine, and add a handwritten label with the herbs used and serving suggestions. It looks gorgeous, costs pennies to make, and tastes incredible.
What Works Well:
- Takes just 10 minutes
- Perfect for small harvests
- Feels fancy, impresses guests
- Versatile—works with any herb combination
- Makes weeknight meals special
- Brilliant for gifts
What Doesn’t:
- Higher in saturated fat (if that concerns you)
- Shorter fridge life (2 weeks)
- Needs freezer space for long-term storage
- Not suitable if you don’t cook with butter
The shelf life is two weeks refrigerated, six months frozen.
Method Four: Herb-Infused Oil
I give this three stars. Beautiful but it comes with serious safety warnings that you absolutely must follow.
Right, I need to be completely honest here: this is the one preservation method that scared me when I first learned about botulism risk. I made a batch of garlic and herb oil, left it on my counter looking gorgeous in a jar, and then did some research. Turned out I’d created the perfect environment for potentially deadly bacteria.
I binned the whole batch.
Herb-infused oil can be done safely, but you absolutely must follow the rules. No shortcuts. This isn’t me being dramatic—this is genuinely about food safety.
This method is best for salad dressings, drizzling over finished dishes, dipping bread, marinades, and gifts if you include proper safety instructions.
THE CRITICAL SAFETY WARNING
Fresh herbs plus oil plus room temperature equals potential botulism risk. Botulism bacteria thrive in low-oxygen, low-acid, room-temperature environments. Fresh herbs in oil create exactly that environment. The bacteria produce toxins that can cause serious illness or death.
The rules you must follow:
- Fresh herb oil MUST be refrigerated immediately
- Use within 1-2 weeks maximum
- Never store fresh herb oil at room temperature
- Never add fresh garlic to oil (garlic is particularly high-risk)
- If making oil for gifts, include clear storage instructions
- For longer-term storage, freeze the oil
- When in doubt, throw it out
If oil looks cloudy, smells off, or you’re unsure how long it’s been there, bin it. Not worth the risk.
For safer room-temperature storage, use completely dried herbs instead of fresh. Dried herbs have no moisture, so bacteria can’t grow. These oils can be stored at room temperature for two to three months.
Method for Fresh Herb Oil (Short-Term, Refrigerated Only)
This is what I do when I want fresh herb flavor in oil. I use one cup of fresh herbs—basil, rosemary, or thyme work well—and one cup of good quality oil, usually olive oil. I need a clean, dry jar with a tight lid.
I harvest and wash herbs thoroughly, then dry them completely. Even more critical here than other methods—any water increases risk dramatically. I roughly chop the herbs and pack them into a clean, dry jar. Then I pour oil over herbs until they’re completely covered. I seal the jar and label it prominently with the date and ‘KEEP REFRIGERATED’ in big letters. It goes in the fridge immediately and I use it within one to two weeks.
To use the oil, I strain out the herbs before using, or leave them in and strain as I pour. The longer herbs sit in oil, the stronger the flavor becomes.
Method for Dried Herb Oil (Safer for Longer Storage)
If you want herb oil that can sit on your counter for a few months, use completely dried herbs. Fill a jar about one-third full with dried herbs, cover with oil, seal and store in a cool, dark place. Let it infuse for two to four weeks, shaking occasionally. Strain out herbs before using. Use within two to three months.
There’s also a freezing option that gives you fresh flavor without the safety risks. Pour fresh herb oil into ice cube trays and freeze. Pop out cubes as needed. This is actually genius and I wish more people knew about it.
Best Combinations I’ve Tried
Italian herb oil uses basil, oregano, and dried chili flakes with extra virgin olive oil. It’s perfect for pizza, pasta, and bruschetta.
For a safer rosemary and garlic oil, I use fresh rosemary but garlic-infused oil that I buy pre-made, or dried garlic powder—never fresh garlic. This works beautifully for roast potatoes and focaccia.
Mediterranean herb oil uses dried thyme, oregano, and bay leaf with light olive oil. Perfect for marinades and roasted vegetables.
Signs Your Herb Oil Has Gone Bad
Bin it immediately if you notice cloudy appearance when fresh oil should be clear. Off smell or rancid odor is another red flag. Mold on the surface, obviously. Bubbles forming indicate bacterial activity. If you can’t remember when you made it, throw it out. And if it’s been longer than two weeks for fresh herb oil or three months for dried, it needs to go.
What Works Well:
- Beautiful presentation
- Adds instant flavor to dishes
- Lovely for gifts (with proper instructions)
- Versatile in cooking
What Doesn’t:
- Serious safety concerns if not handled properly
- Very short shelf life for fresh herb oil (1-2 weeks refrigerated)
- Higher cost (quality oil isn’t cheap)
- Requires vigilance about storage and dating
- Can’t use fresh garlic safely
The shelf life is one to two weeks refrigerated for fresh herb oil, or two to three months at room temperature for dried herb oil stored in a dark cupboard.
Method Five: Herb Vinegar
Four stars from me. Foolproof, safe, and surprisingly versatile.
After the stress of herb oil and its safety warnings, herb vinegar is wonderfully relaxing. Vinegar is naturally acidic, which means bacteria can’t grow in it. You can leave herb vinegar sitting on your counter for months without worry.
It’s also one of the prettiest preservation methods—herbs suspended in vinegar look gorgeous in glass bottles. I make these as gifts regularly and people absolutely love them.
This method is perfect for salad dressings, pickling vegetables, marinades, adding tang to sauces, deglazing pans, and making shrubs, which are drinking vinegars.
The Basic Method
This couldn’t be simpler. I use fresh herbs, about two to three stems or one cup loosely packed leaves, with two cups of vinegar. I need a clean jar or bottle with a non-metal lid because vinegar corrodes metal.
I harvest and wash herbs if needed, then dry them completely, though vinegar is more forgiving than oil. I bruise the herbs slightly by crushing them in my hands—this releases flavor. Then I pack herbs into the jar until it’s about one-third to one-half full.
I pour vinegar over herbs until they’re completely covered. Then I seal with a non-reactive lid. That’s plastic, cork, or I put parchment paper under a metal lid as a barrier. I label with herb type and date, then store in a cool, dark place. I shake it every few days.
After two to four weeks, I taste it. When it’s flavorful enough for me, I strain out the herbs. Then I pour into a clean bottle and add a fresh herb sprig for looks if I like. No refrigeration needed. Just keep it in a cupboard away from heat and light.
Choosing the Right Vinegar
The vinegar you choose affects the final flavor significantly. White wine vinegar is my most-used option. It’s mild and slightly fruity, best with tarragon, chives, basil, and mild herbs. Good for delicate salad dressings.
Red wine vinegar is robust and slightly sharp. Best with rosemary, oregano, thyme, and robust herbs. Good for marinades and heartier dressings.
Apple cider vinegar is slightly sweet and mellow. Best with most herbs—very versatile. Good for all-purpose use and drinking vinegars.
Champagne vinegar is very delicate but expensive. Best with delicate herbs like chervil. Good for special occasion dressings.
I avoid distilled white vinegar for culinary use—it’s too harsh. Save it for cleaning.
My Favorite Combinations
Tarragon vinegar is the classic French version. Just tarragon and white wine vinegar. Use it in béarnaise sauce, chicken salad, and vinaigrettes. This is the classic herb vinegar that restaurants use.
Basil-garlic vinegar uses basil and a few garlic cloves, which are safe in vinegar unlike in oil. I use red wine vinegar. Perfect for Italian dressings and caprese salad.
My mixed herb garden vinegar is whatever I’ve just harvested—thyme, rosemary, sage, maybe a bay leaf—with red wine vinegar. Use it in marinades and with roast vegetables.
Chive blossom vinegar is so pretty. Just the purple chive flowers with white wine vinegar. It turns a beautiful pink color. Use anywhere you want mild onion flavor and that gorgeous color.
How I Use Herb Vinegar
For a simple vinaigrette, I use one part herb vinegar to three parts olive oil with a pinch of salt. Just whisk together.
For quick pickled onions, I slice a red onion thinly, pack it in a jar, cover with herb vinegar, and leave for thirty minutes. Perfect for burgers, tacos, and salads.
For deglazing, after cooking meat I pour in a splash of herb vinegar and scrape up the brown bits. Instant pan sauce.
For a shrub or drinking vinegar, I mix two tablespoons of herb vinegar with honey, then top with sparkling water. It’s a refreshing summer drink that’s quite trendy now.
Storage and Shelf Life
Store in a cool, dark cupboard. Not the fridge—no need, and cold can make some vinegars cloudy. The shelf life is six months easily, often up to a year. The vinegar preserves itself.
When should you toss it? If you see mold on top, which is rare but possible if herbs weren’t covered completely. Or if it smells wrong—vinegar should smell like vinegar, not off or strange.
For Gifts
Herb vinegar makes brilliant gifts. Use a pretty glass bottle—charity shops often have lovely ones. Strain your infused vinegar into the bottle. Add a fresh sprig of the same herb for identification and looks. Cork or cap it. Make a label listing the herbs and suggested uses. Optional: dip the cork or cap in melted wax for a sealed look.
Cost to make: about two to three pounds. Looks like it cost: fifteen pounds or more from a fancy shop. Worth when someone actually uses and appreciates it: priceless.
What Works Well:
- Completely safe—no botulism risk
- No refrigeration needed
- Beautiful presentation
- Long shelf life (6-12 months)
- Can use fresh garlic safely
- Versatile in cooking
- Perfect for gifts
- Adds bright, tangy flavor
What Doesn’t:
- Strong, acidic flavor (not for everything)
- Takes 2-4 weeks to infuse fully
- Needs non-metal lids
- Some people just don’t like vinegar
The shelf life is six to twelve months in a cool, dark cupboard.
Method Six: Herb Salt
Four stars. This is underrated and absolutely brilliant.
Herb salt is one of those preservation methods that sounds fancier than it actually is. It takes about ten minutes, costs almost nothing, and creates intensely flavored seasoning that makes everything taste better.
I keep herb salt by my cooker and reach for it constantly—a pinch on scrambled eggs, roasted vegetables, grilled meat. It’s become one of my most-used preservations without me even really noticing.
This method is perfect for everyday seasoning, finishing salt for dishes, rimming cocktail glasses, seasoning popcorn, rubbing on meat before cooking, and gifts in small jars.
What You’ll Need:
- 1 cup fresh herbs (loosely packed)
- 3-4 cups coarse sea salt or kosher salt
- Food processor or very sharp knife and patience
The method is straightforward. I harvest and wash herbs thoroughly, then dry them completely. This is important. I remove any tough stems, though tender stems are fine to include. Then I put herbs and salt in the food processor and pulse until finely chopped and evenly mixed.
I spread the mixture on a baking sheet lined with parchment and leave at room temperature for thirty to sixty minutes to dry slightly. Then I transfer to a clean jar and store in the refrigerator.
Why refrigerate? The herbs aren’t completely dried, so refrigeration keeps them fresh and maintains that vibrant green color. Room temperature storage works but the color fades to grey-brown within weeks.
The Right Salt Matters
Coarse sea salt is my preference. The irregular crystals look rustic and appealing. Best for finishing salt and general use.
Kosher salt is affordable and has good texture. Best for making large batches and everyday use.
Maldon sea salt flakes are expensive but gorgeous with delicate flakes. Best for special finishing salt and gifts.
Avoid table salt. It’s too fine, has too much iodine flavor, and you can’t see the herbs mixed through it.
Ratio Guidance
For everyday cooking salt, use one part fresh herbs to three to four parts salt. This gives a very herby flavor. For delicate finishing salt, use one part fresh herbs to six to eight parts salt. This provides subtle herb flavor with salt forward.
Test your ratio by making a small batch first. Too herby? Add more salt. Not enough flavor? Add more herbs next time.
My Favorite Combinations
Rosemary and lemon salt uses fresh rosemary with the zest of one lemon and sea salt. Use on roast chicken, lamb chops, and roasted potatoes.
Chive salt is just chives and salt but it turns the most beautiful green color. Use on eggs, baked potatoes, and buttered vegetables.
Italian herb salt combines basil, oregano, and thyme with coarse salt. Use in pasta water, on tomato dishes, and on pizza crust.
Coriander-lime salt uses fresh coriander with lime zest and sea salt. Use on tacos, grilled fish, and for margarita rims.
My mixed garden salt is whatever herbs I’ve just harvested—usually parsley, chives, a bit of sage, maybe some thyme. Use on everything.
How I Use Herb Salt
For everyday cooking, I season vegetables before roasting, salt pasta water with it, season meat before cooking, and finish dishes just before serving.
For impressive finishing, I sprinkle it over fresh tomatoes, use it to rim cocktail glasses—especially good with coriander-lime salt on margaritas—top soft-boiled eggs with it, and finish soups.
For baking, I mix it into focaccia dough, sprinkle on bread before baking, and use it for seasoning savory scones.
Storage and Shelf Life
Store in an airtight glass jar in the refrigerator. The fridge keeps the color vibrant—bright green versus brown—maintains moisture, and prevents any mold.
The shelf life is six months easily in the fridge. Signs it’s gone off include mold, which is rare, off smell, or if it’s completely dried out and grey, which means it’s still safe but not nice to use.
For Gifts
Herb salt makes brilliant small gifts. Use small jars, about four ounces or one hundred twenty milliliters. Layer the salt so you can see the green herbs distributed through it. Label with herb type and suggested uses. Optional extras include tying with twine and adding a small wooden spoon.
Cost to make: under a quid. Looks: professional and thoughtful.
I make these in batches and keep them for last-minute gifts. Everyone loves them and actually uses them, which is the best compliment.
What Works Well:
- Takes just 10 minutes
- Uses small amounts of herbs perfectly
- Incredibly flavorful
- Beautiful green color in the fridge
- Versatile—works on almost anything
- Perfect for gifts
- Very affordable
What Doesn’t:
- Must refrigerate for best color
- Can be too salty if not careful
- Needs a food processor for best results
- Color fades to grey-brown at room temperature
The shelf life is six months refrigerated.
Method Seven: Pesto
Five stars. When your basil goes mad, this is the answer.
Pesto is technically a recipe, not just a preservation method, but it’s such a brilliant way to use up a massive basil harvest that it absolutely deserves its place here. When my windowsill basil plant decides to produce twenty leaves a day, pesto is what saves me. I make a big batch, freeze it in portions, and I’ve got ready-made deliciousness for months.
This method is perfect for when you have loads of one herb, especially basil. It creates ready-to-use meals, makes quick weeknight dinners possible, uses up odds and ends of different herbs, and freezes brilliantly in portions.
Classic Basil Pesto
The traditional recipe is traditional for a reason—it’s gorgeous. For a proper batch, you’ll need:
- 2 large cups fresh basil leaves (about 60g), packed
- 50g Parmesan cheese, grated
- 50g pine nuts
- 2-3 garlic cloves
- 120-150ml extra virgin olive oil
- Squeeze of lemon juice
- Salt to taste
The method is straightforward. I harvest just the basil leaves and remove stems because they go bitter. Wash and dry completely. Toast the pine nuts in a dry pan for two to three minutes—watch them like a hawk because they go from golden to burnt in seconds. Let them cool.
Put basil, Parmesan, pine nuts, and garlic in the food processor and pulse a few times to break everything down. With the processor running, slowly drizzle in olive oil until you reach your preferred consistency. I like mine fairly smooth, but some people prefer it chunkier. Add lemon juice and salt to taste, then pulse once more to combine.
The key is going slowly with the oil. You can always add more, but you can’t take it away. Pesto should be spreadable but not runny—think thick hummus consistency.
Beyond Basil: Alternative Pestos
Here’s something most people don’t realize: pesto isn’t just for basil. You can make it with almost any herb or leafy green from your indoor garden.
When I’ve got loads of parsley taking over my windowsill, I make parsley-walnut pesto. It’s much cheaper than the classic version because walnuts are half the price of pine nuts, and it’s still absolutely delicious on pasta or roasted vegetables.
Coriander makes brilliant pesto, especially if you add pepitas—that’s pumpkin seeds—and a squeeze of lime for a Mexican-inspired version. This is gorgeous on tacos, grilled fish, or quesadillas.
My mixed herb pesto uses whatever herbs I’ve got—parsley, basil, a bit of mint, some coriander. I use any nuts or seeds I have in the cupboard. It works beautifully as a marinade or on pasta.
Rocket pesto, which Americans call arugula pesto, is gorgeously peppery. Use almonds or walnuts, add extra lemon, and serve on pasta or pizza.
Mint pesto is unusual but lovely. Use walnuts and feta cheese instead of Parmesan. It’s incredible on lamb, roasted vegetables, or couscous.
Pine Nut Substitutes
Pine nuts are traditional but cost a fortune. These work just as well and I use them more often than actual pine nuts.
Walnuts are my go-to substitute. They add a slight bitterness that I actually quite like. Almonds create a milder flavor with lovely texture. Sunflower seeds are the budget option and work brilliantly. Cashews make creamier pesto. Pepitas, or pumpkin seeds, add interesting flavor. Or use mixed nuts—whatever’s in your cupboard.
Always toast your nuts or seeds first regardless of which you choose. It makes a massive difference to the flavor.
Freezing Pesto Perfectly
This is where pesto really shines as a preservation method. The ice cube tray method is my favorite. Spoon pesto into ice cube compartments and freeze until solid. Pop out cubes and store in a freezer bag. Each cube equals about two tablespoons. Grab cubes as needed—they defrost in minutes.
The jar method works for larger portions. Spoon pesto into small jars and pour a thin layer of olive oil on top, which prevents browning. Leave one centimeter headspace, seal and freeze. Defrost in the fridge overnight when needed.
The flat bag method is most space-saving. Spoon pesto into freezer bags, flatten into a thin layer, and freeze flat. Break off pieces as needed.
I freeze in four-tablespoon portions, which is enough for two servings of pasta. Adjust to match your typical usage.
Using Frozen Pesto
Don’t thaw it in most cases. Drop a frozen pesto cube directly into hot pasta and toss—it melts instantly. Add frozen pesto to hot soup. Spread on warm bread or pizza bases and it melts beautifully. Stir into risotto during the last minute of cooking. Mix into scrambled eggs while they’re still in the pan.
The only time I thaw pesto first is for salad dressings or dips where I need it at room temperature.
What Works Well:
- Uses large amounts of herbs efficiently
- Creates ready-to-use meals
- Freezes beautifully in portions
- Versatile—works with many herbs
- Makes weeknight dinners easy
- Can substitute expensive ingredients
- Impressive to serve
What Doesn’t:
- Needs a food processor
- Ingredients can be pricey (cheese, nuts, oil)
- Takes 15-20 minutes
- Basil oxidizes and darkens (still tastes fine)
- Need to actually like pesto
The shelf life is three to six months frozen, or about one week in the fridge with oil layer on top.
Method Eight: Herb Honey
Four stars. Gorgeous for medicinal herbs and lasts forever.
Herb honey is one of the more unusual preservation methods, but it’s absolutely lovely for certain herbs. This works particularly well with medicinal herbs like thyme, which is brilliant for sore throats and coughs. The honey preserves the herbs and also extracts some of their beneficial properties over time.
This method is perfect for medicinal herbs like thyme for coughs, herbs you’ll use in tea, creating interesting flavors for drizzling, gifts that last forever, and when you’re willing to wait two to six weeks for infusion.
The Basic Method
I use fresh or dried herbs, about one cup loosely packed, with two cups of good quality honey. Raw honey is best if you can get it. I need a clean jar with a tight lid.
For fresh herbs, I wash and dry them completely, then bruise them slightly by crushing in my hands to release flavor. For dried herbs, I use them as is. I pack herbs into a clean jar until it’s about one-third full, then pour honey over herbs until completely covered. The herbs will float at first, which is normal.
I seal the jar and label with herb type and date. Then I store in a cool, dark place and turn the jar upside down every few days for the first week. This helps distribute the herbs through the honey.
After two to six weeks, I strain out the herbs if I want clear honey, or leave them in for a more rustic look. The honey will keep for years.
Best Herbs for Honey
Thyme is my most common choice. Thyme honey is incredible for sore throats and coughs. Just a spoonful in hot water creates a soothing drink that actually helps.
Lavender makes gorgeously floral honey. Use it sparingly because lavender can be quite strong. Drizzle over vanilla ice cream or stir into tea.
Rosemary creates interesting, savory-sweet honey. Use it on cheese boards, drizzled over roasted vegetables, or in marinades for lamb.
Mint makes refreshing honey that’s lovely in iced tea or drizzled over fruit salad.
Sage produces earthy honey that pairs beautifully with pork dishes or sharp cheeses.
How I Use Herb Honey
For medicinal purposes, I stir a spoonful of thyme honey into hot water when I have a cough or sore throat. It’s genuinely soothing and tastes much better than cough syrup.
In tea, I use herb honey instead of regular honey. It adds an extra flavor dimension that’s quite special.
For cooking, I use it in marinades for meat, especially rosemary honey with lamb or pork. I drizzle it over roasted vegetables just before serving. I use it in salad dressings with vinegar and mustard for something a bit different.
For cheese boards, herb honey is absolutely brilliant. Drizzle over strong cheeses like blue cheese or aged cheddar. It’s become my signature contribution to dinner parties.
Storage and Shelf Life
Store in a cool, dark place. The cupboard is fine. Honey is naturally antimicrobial, so it doesn’t spoil. Properly made herb honey lasts for years, literally.
If your honey crystallizes, which is natural, just warm the jar gently in a bowl of hot water. It’ll return to liquid form.
What Works Well:
- Lasts forever (years)
- Beautiful for gifts
- Medicinal properties
- No special equipment needed
- Works with fresh or dried herbs
- Versatile uses
What Doesn’t:
- Takes 2-6 weeks to infuse
- Honey is expensive if buying in quantity
- Not suitable for vegans
- Strong herbs can overpower
- Some people just don’t use honey much
The shelf life is essentially indefinite if stored properly.
Method Nine: Herb Broth Cubes
Four stars. Brilliant for soups and incredibly practical.
This is one of those preservation methods that sounds simple because it is simple, but it makes such a difference to everyday cooking. Herb broth cubes are essentially pre-seasoned stock cubes that you’ve made yourself with your fresh herbs.
When I’m harvesting tiny amounts regularly—like three sprigs of thyme one day, a handful of parsley the next—this method lets me preserve them without fuss. Drop the herbs into stock, freeze in ice cube trays, and suddenly I’ve got instant flavor bombs for soups and sauces.
This method is perfect for making lots of soups, wanting pre-seasoned cooking shortcuts, harvesting tiny amounts regularly that aren’t enough for other methods, and when you have vegetable or chicken stock on hand.
What You’ll Need:
- Fresh herbs (any amount from a few sprigs upward)
- Vegetable or chicken stock (homemade or shop-bought)
- Ice cube trays
- Freezer bags for storage
The method couldn’t be simpler. I harvest and wash my herbs, then chop them roughly. There’s no need to dry them because they’re going into liquid anyway. I pack ice cube tray compartments about half full with chopped herbs—less than for regular ice cubes because the stock adds volume.
Then I pour stock over the herbs until compartments are full. I freeze overnight, pop out the cubes next morning, and store in labeled freezer bags. Each cube is essentially one portion of pre-seasoned stock.
Best Herb and Stock Combinations
For vegetable stock, I use parsley, thyme, and a bay leaf. This creates an all-purpose vegetable broth cube that works in almost any soup or stew.
For chicken stock, I combine parsley, sage, and thyme. Classic poultry herbs that make chicken soup taste incredible.
For beef stock, I use rosemary, thyme, and a bit of sage. These robust herbs stand up to beef’s strong flavor.
For Asian-inspired stock, I use coriander with a bit of ginger if I have it. These cubes are brilliant for quick Asian soups and stir-fries.
My mixed herb version uses whatever I’ve just harvested in whatever stock I have open. No two batches are the same but they’re all useful.
How I Use Herb Broth Cubes
The beauty of this method is how effortless it makes cooking. When I’m making soup, I just drop two or three herb broth cubes into the pot instead of adding plain stock. When I’m making risotto, I add broth cubes one at a time as the rice cooks. For quick sauces, I melt a broth cube in the pan after cooking meat. For cooking grains like rice or quinoa, I add a broth cube to the cooking water for extra flavor.
I also use them for steaming vegetables. Drop a cube in the steamer water and the vegetables pick up lovely herb flavor. And for deglazing pans, a broth cube melted in the pan creates instant sauce.
Tips for Best Results
Use good quality stock because the flavor really comes through. Homemade is best, but decent shop-bought works fine. I avoid those cheap stock cubes full of salt because you’re adding herbs, not making it from scratch.
Don’t overfill with herbs. Half full is plenty because you want the cube to be mostly liquid that melts easily. Too many herbs and it becomes a herb lump rather than a liquid cube.
Label clearly with the type of stock used. Vegetable broth cubes look identical to chicken broth cubes once frozen. Trust me, you don’t want to grab chicken stock cubes when you’re making vegetarian soup.
Match herbs to how you’ll use the stock. If you rarely make Asian food, don’t make coriander-ginger cubes. Make what you’ll actually reach for.
Storage Tips
Store in clearly labeled freezer bags with the type of stock and herbs written on them. I also note the date, though these get used quickly enough that it rarely matters.
Keep different types separate. I have one bag for vegetable broth cubes, one for chicken, and so on. Makes grabbing what I need much faster.
What Works Well:
- Takes just 10 minutes
- Perfect for tiny herb amounts
- Creates instant flavor shortcuts
- No waste—uses every herb
- Brilliant for weeknight cooking
- Works with any herbs
- You control the salt levels
What Doesn’t:
- Needs freezer space
- Requires stock on hand
- Less versatile than plain stock
- Must remember what’s in each cube
- Not suitable if you don’t make soups often
The shelf life is six to twelve months in the freezer.
Method Ten: Vacuum Sealing
Three stars. Brilliant if you have the equipment, not worth buying it specially.
Vacuum sealing is the preservation method I use least often, partly because I only got a vacuum sealer last year and partly because most other methods work just as well for small-scale herb preservation. But if you already own a vacuum sealer for other reasons, it’s worth knowing it works beautifully for herbs.
Vacuum sealing removes air from around the herbs, which dramatically slows down degradation. The herbs stay vibrant green and fresh-tasting much longer than other methods. But the equipment is expensive—typically fifty to two hundred pounds—so I wouldn’t buy a vacuum sealer just for herbs.
This method is perfect for if you already own a vacuum sealer, when you’re preserving large batches, for extending refrigerator storage of fresh herbs, and when you want the freshest possible flavor and color.
How Vacuum Sealing Works for Herbs
The process is straightforward. I harvest and wash herbs, then dry them completely. This is crucial because any moisture can promote bacterial growth even in vacuum-sealed bags. I arrange herbs in a single layer on a vacuum sealing bag or between two paper towels if I’m worried about them getting crushed.
Then I vacuum seal according to my machine’s instructions. The key is using a gentle vacuum setting if your machine has one. Full vacuum pressure can crush delicate herb leaves, which isn’t the end of the world but it’s not ideal for presentation.
Once sealed, I store the bags in the fridge for short-term use or freeze for longer storage. In the fridge, vacuum-sealed fresh herbs last two to three weeks versus three to five days for regular storage. In the freezer, they last twelve to eighteen months while maintaining excellent quality.
Best Herbs for Vacuum Sealing
Heartier herbs handle vacuum sealing better than delicate ones. Rosemary, thyme, sage, and oregano all vacuum seal beautifully. They’re sturdy enough not to get crushed and they benefit from the extended storage time.
Parsley and coriander work reasonably well. Use a gentler vacuum setting and they come out fine. They won’t be as perky as fresh, but they’re better than ice cube frozen herbs for garnishing.
Basil is tricky. It bruises easily and tends to turn black even when vacuum sealed. I still use other methods for basil mostly.
Chives can work but they’re so delicate that I personally prefer ice cube freezing. Your mileage may vary.
Using Vacuum-Sealed Herbs
For herbs stored in the fridge, I just open the bag and use as fresh. They’re remarkably fresh-tasting even after two weeks, which is impressive.
For frozen vacuum-sealed herbs, I can either thaw them in the fridge overnight for garnishing and fresh use, or crumble them directly into cooking while still frozen. They crumble beautifully when frozen, almost like dried herbs but with better flavor.
Some people vacuum seal herbs with a small amount of oil, creating essentially frozen herb oil packets. I’ve tried this and it works, but I prefer regular ice cube freezing for oil-based preservation.
Why I Don’t Use This Method More
Honestly? It’s usually overkill for my small-scale indoor garden harvests. By the time I’ve got the vacuum sealer out, found the right size bags, sealed everything, and cleaned up, I could have made five batches of ice cubes or hung herbs to dry.
The vacuum sealer lives in a cupboard and comes out for preserving larger quantities of things like meat or bulk-bought vegetables. For my handful of basil leaves, it’s just not worth the effort.
But if you’re vacuum sealing other foods regularly and the machine is already sitting on your counter, absolutely use it for herbs too. The results are genuinely excellent.
What Works Well:
- Excellent quality preservation
- Extended fridge life (2-3 weeks)
- Herbs stay vibrant green
- Works for fresh or frozen storage
- Can store flat, saving space
- No added water or oil needed
What Doesn’t:
- Expensive equipment (£50-200)
- Not worth buying just for herbs
- Requires special bags
- Can crush delicate herbs
- More cleanup than simple methods
- Overkill for small amounts
The shelf life is two to three weeks refrigerated or twelve to eighteen months frozen.
Herb-Specific Preservation Guide
Not all herbs preserve equally well with all methods. Some herbs are brilliant dried, others turn into brown mush. Some freeze beautifully, others lose all their flavor. Here’s what actually works for the herbs you’re most likely to be growing or buying.
Basil
Basil is simultaneously the most rewarding and most frustrating herb to preserve. It grows prolifically indoors, which is wonderful, but it also hates almost every preservation method. Basil turns black when dried, bruises if you look at it wrong, and generally behaves like a prima donna.
The best preservation method for basil is ice cubes with oil. The oil prevents the basil from turning black and the flavor stays brilliant. I use these cubes constantly in pasta sauces and tomato dishes.
Pesto is obviously perfect for basil. When my plant is producing faster than I can make ice cubes, I make a massive batch of pesto and freeze it in portions. This is genuinely the best use for abundant basil.
Herb butter works beautifully if you’re making it within a day of harvesting. The butter seems to protect the basil from oxidizing as badly as it does in air.
What doesn’t work is drying. Dried basil loses about ninety percent of its flavor and turns an unappetizing brown-black. Don’t bother. And vacuum sealing is hit-and-miss because basil bruises so easily.
Parsley
Parsley is wonderfully cooperative and preserves well with almost any method. It’s the opposite of basil in terms of ease.
Ice cubes work brilliantly, both with water and oil. I make parsley ice cubes constantly and use them in everything from soups to pasta sauces.
Drying works surprisingly well for parsley, though you lose some of the bright, fresh flavor. Dried parsley is better than no parsley, but it’s not as good as frozen.
Herb butter is gorgeous with parsley, especially combined with garlic for classic garlic butter.
Herb salt made with parsley stays vibrant green and adds lovely flavor to everything.
Parsley is just easy. Whatever method you choose will probably work fine.
Coriander (Cilantro)
Coriander divides people dramatically—you either love it or think it tastes like soap. If you’re in the love camp, you’ll be pleased to know it preserves reasonably well.
Ice cubes with water are my go-to for coriander. I use these cubes in curries and Asian dishes constantly. The flavor holds up beautifully.
Pesto made with coriander, lime, and pepitas is absolutely gorgeous. Mexican-inspired and brilliant on everything from tacos to grilled fish.
What doesn’t work is drying. Dried coriander loses almost all its flavor and isn’t worth the effort. Fresh or frozen only for this herb.
Thyme
Thyme is one of the easiest herbs to preserve and it works with almost every method beautifully.
Drying is probably the best method for thyme. Dried thyme is arguably better than fresh for many dishes because the flavor is more concentrated. I always have bunches of thyme hanging in my kitchen.
Ice cubes with oil work brilliantly if you prefer frozen. These are great for roasting vegetables or making quick pan sauces.
Herb vinegar with thyme is lovely, especially combined with other herbs.
Thyme is genuinely hard to mess up. Choose whatever method fits your cooking style.
Rosemary
Rosemary is another brilliantly cooperative herb that preserves beautifully.
Drying works gorgeously. Dried rosemary keeps its flavor for years and is perfect for roasts and stews. The woody stems make it very easy to hang and dry.
Ice cubes with oil are excellent for rosemary. These cubes are brilliant for roasted potatoes—just toss frozen cubes with cut potatoes and roast.
Herb butter with rosemary is incredible on lamb or chicken.
Herb oil is safe with rosemary because it’s a dried, woody herb. The oil takes on a beautiful flavor.
Rosemary basically succeeds at everything you try.
Mint
Mint is interesting because it grows like an absolute weed, which means you often have loads of it, but it’s tricky to preserve well.
Ice cubes with water work best for mint. I use these in Moroccan dishes, mint tea, and occasionally in desserts.
Herb vinegar with mint is surprisingly good. Mint vinegar is lovely in dressings for grain salads.
Herb honey with mint is refreshing and nice in iced tea.
What doesn’t work well is drying. Dried mint loses a lot of its fresh, bright flavor and can taste a bit dusty.
Chives
Chives are the most delicate herb I grow regularly, which affects preservation options.
Ice cubes work brilliantly. I use chive ice cubes in soups, on baked potatoes, and in scrambled eggs.
Herb butter with chives is classic and lovely.
Herb salt with chives stays bright green and looks gorgeous.
What doesn’t work is drying. Chives are too delicate and lose their flavor almost completely when dried.
Sage
Sage is wonderfully forgiving and preserves well with most methods.
Drying works beautifully. Dried sage is actually traditional in many recipes and the flavor concentrates nicely.
Ice cubes with oil or butter are excellent. Sage butter is classic with pasta and absolutely delicious.
Herb butter on its own with sage is gorgeous.
Sage basically cooperates with whatever you choose.
Oregano
Oregano is possibly the easiest herb to preserve because it improves with almost every method.
Drying is probably best for oregano. Dried oregano actually tastes better than fresh in many dishes. The flavor concentrates and deepens.
Ice cubes work if you prefer frozen, though I rarely bother because dried oregano is so good.
Herb oil with oregano is lovely for Italian dishes.
Oregano is genuinely foolproof.
Dill
Dill is delicate and needs gentle handling, but it preserves reasonably well.
Ice cubes with water are best for dill. Use these in fish dishes, potato salad, and creamy sauces.
Herb butter with dill is lovely on fish.
What doesn’t work well is drying. Dill loses too much flavor when dried and isn’t worth it.
Common Mistakes and How to Avoid Them
After three years of preserving herbs from my indoor garden, I’ve made every mistake possible. Some were minor annoyances. Some were genuinely dangerous. Here’s what to avoid so you don’t have to learn these lessons the hard way like I did.
Mistake One: Not Drying Herbs Completely Before Preserving
This was my first and biggest mistake. I’d rinse herbs, give them a quick shake, and throw them into oil or pack them for freezing while they were still damp. Within days, I’d see mold. In oil, this created a potential botulism risk that I didn’t understand at the time.
The solution is simple but requires patience. After washing herbs, spin them in a salad spinner, then lay them on kitchen towels for thirty to sixty minutes. Touch them to your cheek—if they feel cool or damp, they’re not ready. If they feel dry and papery, you’re good to go.
This step feels tedious when you’re in a hurry, but it’s absolutely crucial for food safety and preservation quality.
Mistake Two: Not Labeling Everything
Frozen basil looks identical to frozen parsley once it’s in a freezer bag. Dried oregano looks identical to dried thyme. Herb butter with rosemary looks identical to herb butter with sage.
I cannot tell you how many times I’ve grabbed what I thought was one herb and discovered mid-cooking that it was something completely different. It’s led to some interesting meals, not all of them good.
The solution is to label everything immediately. Not tomorrow. Not later tonight. Right now, as soon as you’ve made it. Use a permanent marker on freezer bags or labels on jars. Include the herb name, the preservation method if relevant, and the date.
This sounds obvious but it’s so easy to think you’ll remember, and then three months later you’re standing in front of your freezer with four identical bags of mystery herbs.
Mistake Three: Making Fresh Herb Oil and Leaving It at Room Temperature
This is the one that genuinely scared me when I learned what I’d done. I made a beautiful jar of garlic and herb oil, left it on my counter because it looked gorgeous, and thought I was being very sophisticated.
Then I read about botulism. Botulism bacteria thrive in low-oxygen, low-acid, room-temperature environments. Fresh herbs or garlic in oil create exactly that environment. The bacteria produce toxins that can cause serious illness or death.
I binned the entire batch immediately.
The solution is to always refrigerate fresh herb oil and use it within one to two weeks maximum. Better yet, freeze herb oil in ice cube trays. Or use completely dried herbs for room-temperature oil, because dried herbs have no moisture for bacteria to grow.
This isn’t me being dramatic about food safety. This is genuinely dangerous if you get it wrong.
Mistake Four: Overfilling Ice Cube Trays
When I first started making herb ice cubes, I’d pack the compartments completely full, thinking more herbs meant more flavor. I’d end up with massive ice cubes that were awkward to use and didn’t melt nicely in cooking.
The solution is to fill compartments only three-quarters full with herbs, then top with water or oil. This creates a reasonable sized cube that actually melts when you add it to hot food.
It seems like a small thing but it makes a real difference to how useful your herb cubes actually are.
Mistake Five: Using Too-High Heat When Oven-Drying
I once decided to speed up herb drying by cranking my oven up to a hundred and fifty degrees Celsius. I thought I’d check on them in an hour. I checked in thirty minutes and they were completely burnt. An entire harvest of oregano, gone.
The solution is to use the lowest possible oven temperature, ideally fifty to eighty degrees Celsius, and check every thirty minutes. It’s slow but it works. If your oven doesn’t go that low, turn it on for ten minutes, then switch it off and let herbs dry in residual heat. Repeat as needed.
Patience is genuinely required for oven-drying. There are no shortcuts that work.
Mistake Six: Not Considering How You’ll Actually Cook
I spent a summer making elaborate herb vinegars because they looked beautiful in jars. I made six different varieties. A year later, I still had five and a half jars because I just don’t use that much vinegar in my cooking.
The solution is to be honest about your cooking style before choosing preservation methods. If you never make salad dressing, don’t make herb vinegar. If you don’t cook with butter, don’t make herb butter. If you hate the taste of dried herbs, don’t dry them.
Make what you’ll actually use, not what looks prettiest or most impressive. The best preservation method is the one you actually reach for three months later.
Mistake Seven: Mixing Herbs Without Thinking
I once combined mint and basil in the same ice cubes because they were ready at the same time and I was feeling efficient. Mint-basil ice cubes sounded interesting. They tasted terrible. Mint is so strong it overwhelmed the basil completely, and the combination didn’t work in any dish I tried.
The solution is to think about how you’ll use the herbs before combining them. Some combinations are classics for a reason—parsley, sage, rosemary, and thyme all play nicely together. Basil, oregano, and thyme make sense for Italian dishes. But random combinations often don’t work.
When in doubt, keep herbs separate and combine them when you’re actually cooking.
Mistake Eight: Storing Dried Herbs in Clear Glass Jars on Open Shelves
This looks beautiful in food magazines and on Instagram. Those aesthetic spice racks with matching clear jars arranged by color. I set this up in my first year, feeling very pleased with myself.
Six months later, my herbs had all faded to pale shadows of their former selves. The flavor was mostly gone. Light degrades herbs rapidly.
The solution is to store dried herbs in a dark cupboard away from light. If you want them visible, use dark glass jars or put them in a closed cupboard. Aesthetic comes second to preservation quality.
Mistake Nine: Forgetting to Check Dates
I found a bag of frozen herb cubes at the back of my freezer last month. No label, no idea what herbs they were or when I made them. They could have been six months old or two years old. I binned them.
The solution is to actually use the dates you’ve written on labels. Every few months, have a quick check through your frozen herbs, your dried herbs, your preserved herbs. Use the oldest first. Throw out anything questionable.
This prevents waste and means you’re always using herbs while they’re still at their best.
Mistake Ten: Trying to Preserve Herbs That Have Already Started Declining
Sometimes I’d look at herbs in my fridge that were starting to yellow or wilt and think I could still preserve them. The preservation method can’t resurrect herbs that are already past their best. They just become preserved mediocre herbs.
The solution is to preserve herbs when they’re at peak freshness. If your indoor plant needs harvesting, do it today and preserve today. If you’ve bought herbs from the shop, preserve them the same day if possible, definitely within two days.
The quality of your starting material determines the quality of your preserved herbs. You can’t preserve your way out of starting with subpar herbs.
Storage Practices and Shelf Life
Proper storage makes the difference between herbs that last months and herbs that go off in weeks. Here’s what actually matters for each preservation method.
Ice Cube Storage
Once your herb ice cubes are solid, don’t leave them in the ice cube trays forever. They’ll pick up freezer smells and take up valuable space. Pop them out and transfer to properly labeled freezer bags.
Squeeze as much air out of the bags as possible before sealing. Air in the bag leads to freezer burn, which makes the herbs taste off and look unappetizing.
Store the bags flat if you can. They stack much better than bulky, lumpy bags and you can see at a glance what you have.
Herb ice cubes last six to twelve months in the freezer. After that, they’re still safe to eat but the flavor starts degrading noticeably.
Dried Herb Storage
Dried herbs need three things: darkness, air-tight containers, and cool temperature.
Light is the enemy of dried herbs. Store jars in a cupboard, not on an open shelf no matter how pretty it looks. If you must have them visible, use dark glass or ceramic containers.
Air-tight is crucial. Mason jars with proper seals, old jam jars with tight lids, anything that actually seals properly. Not those decorative jars with cork stoppers that look lovely but let air in.
Cool temperature helps but isn’t as critical as darkness and air-tight storage. A kitchen cupboard away from the oven is fine. You don’t need special climate control.
Keep leaves whole until you’re ready to use them. Crushing releases the oils, which then degrade. Crush just before adding to food.
Dried herbs last one to two years for woody herbs like thyme and rosemary. Six to twelve months for more delicate dried herbs like parsley. After that, they’re safe but flavorless.
Herb Butter Storage
In the fridge, herb butter lasts about two weeks in an airtight container. It’ll start picking up fridge smells after that even if it’s technically still safe.
For longer storage, freeze it. Wrap the butter log tightly in parchment paper, then wrap again in foil. This double wrapping prevents freezer burn and protects against freezer smells.
Label clearly because all herb butter looks the same when frozen.
Frozen herb butter lasts six months easily. After that, it’s still safe but the flavor intensity decreases.
You can slice off medallions while the butter is still frozen, which is actually easier than slicing room-temperature butter. Let the medallion sit for a minute or two to soften before using.
Herb Oil Storage
Fresh herb oil must be refrigerated immediately and used within one to two weeks. No exceptions for food safety.
Store in a clean glass bottle or jar with a tight lid. Label prominently with the date and ‘Keep Refrigerated’ in big letters so nobody accidentally leaves it out.
Check it before each use. If it looks cloudy, smells off, or shows any signs of mold, bin it immediately. Don’t taste it to check. Just throw it out.
Dried herb oil can be stored at room temperature in a cool, dark cupboard for two to three months. After that, it won’t make you ill but the flavor fades significantly.
Herb Vinegar Storage
This is wonderfully low-maintenance. Store in a cool, dark cupboard. No refrigeration needed. The vinegar preserves itself.
Use a non-metal lid or put parchment paper under a metal lid. Vinegar corrodes metal over time and can pick up metallic flavors.
Herb vinegar lasts six to twelve months easily. It might last even longer but the flavor gradually becomes less vibrant after about a year.
If you see mold on top, which is rare, throw it out. If it smells wrong—not like vinegar but like something off—throw it out. Otherwise, it’s probably fine.
Herb Salt Storage
Store herb salt in the fridge in an airtight glass jar. The refrigeration keeps the color bright green instead of fading to grey-brown.
The salt won’t spoil at room temperature, but it’ll lose its visual appeal quickly. Since part of herb salt’s charm is that gorgeous green color, refrigeration is worth it.
Herb salt lasts six months refrigerated. After that, the color has usually faded significantly and the herb flavor is less pronounced.
If you see any mold, which is very rare because salt inhibits bacterial growth, throw it out immediately.
Pesto Storage
In the fridge, pesto lasts about one week. Pour a thin layer of olive oil on top before storing to prevent the surface from oxidizing and turning brown.
For freezing, I prefer ice cube trays or small jars. Each cube or jar is one portion, which is more practical than a massive container.
If using jars, leave about one centimeter headspace because pesto expands slightly when frozen.
Frozen pesto lasts three to six months. After that, it’s safe but the flavor mellows considerably and the color may darken.
Thaw pesto in the fridge overnight if you need it at room temperature, or use directly from frozen in hot dishes.
Herb Honey Storage
Store in a cool, dark place. The cupboard is perfect. Honey doesn’t need refrigeration and actually becomes difficult to pour if it’s too cold.
Herb honey lasts for years. Literally years. Honey is naturally antimicrobial and doesn’t spoil if stored properly.
If it crystallizes, which is natural, just warm the jar gently in hot water. It’ll return to liquid form without any quality loss.
Herb Broth Cubes Storage
Store in labeled freezer bags, squeezed to remove excess air. Keep different types—vegetable, chicken, beef—in separate bags so you can grab what you need quickly.
Herb broth cubes last six to twelve months in the freezer. They’re usually used up well before that.
Signs Your Preserved Herbs Have Gone Bad
For frozen herbs, severe freezer burn shows as grayish, dried-out patches. Off smell when thawed is another sign. Massive ice crystals throughout the package suggest the herbs have been frozen, thawed, and refrozen, which degrades quality.
For dried herbs, loss of all aroma when crushed means they’re past their best. Faded color from green to grey or brown suggests age. Musty smell instead of herby smell means they’re too old or have been stored badly. Visible mold means throw them out immediately.
For herb oil, cloudy appearance when it should be clear is bad. Off or rancid smell is bad. Mold on the surface means bin it. Bubbles forming indicate bacterial activity and you should throw it away immediately.
For herb vinegar, mold on the surface is rare but possible. Dramatic color change—not the expected mellowing but something strange—is concerning. Fermented smell that’s different from normal vinegar smell means something’s wrong.
For herb butter, discoloration beyond the herbs themselves is bad. Off smell, sour taste, or any mold means throw it out.
The general rule for all preserved herbs is simple: when in doubt, throw it out. Preserved herbs aren’t expensive to remake and they’re not worth getting ill over.
Using Preserved Herbs in Cooking
Preserved herbs don’t always work exactly like fresh herbs in recipes. Understanding the differences helps you get the best results and avoid disappointment.
Converting Fresh to Preserved Herb Amounts
The general rule when substituting dried herbs for fresh is to use one-third the amount. Fresh herbs have more water content and less concentrated flavor. Dried herbs are much more potent.
If a recipe calls for one tablespoon of fresh thyme, use one teaspoon of dried thyme. Start with less and add more if needed—you can always add more but you can’t take it away.
For frozen herbs in ice cubes, it depends on how you made them. My standard ice cubes contain one to two tablespoons of fresh herbs, so one cube roughly equals one to two tablespoons fresh. Your cubes might be different, so keep notes when you make them.
Herb butter and pesto don’t really have direct conversions because they’re different products entirely. Use them to taste.
When to Add Preserved Herbs to Cooking
Dried herbs need time to rehydrate and release their flavor. Add them early in cooking—at the beginning when you’re sautéing onions, or at the start of a long simmer. This gives them time to soften and distribute their flavor throughout the dish.
Frozen herb ice cubes can go in at any point. I usually add them midway through cooking so they have time to melt and distribute but don’t cook so long that the flavor weakens.
Herb butter and herb salt work best added at the end of cooking or right before serving. They’re finishing touches that add a burst of fresh flavor.
Herb vinegar can go in early for marinades or at the end for dressings and finishing touches.
Adjusting for Flavor Intensity
Dried herbs are more concentrated than fresh, which means it’s easy to over-season if you’re not careful. Start with less than you think you need. Taste. Add more if needed. This approach prevents that awful moment when your dish tastes overwhelmingly of one herb.
Frozen herbs are closer in intensity to fresh herbs but still slightly more concentrated because the freezing process breaks down cell walls and releases flavor more readily. Again, start with less and add more.
Herb butter and herb salt are very concentrated. A little goes a long way. It’s better to pass extra at the table than to over-salt or over-butter a dish.
Best Dishes for Each Preservation Method
Ice cubes with water work brilliantly in soups, stews, curries, and anything with liquid that needs herb flavor.
Ice cubes with oil are perfect for pasta sauces, stir-fries, sautéed vegetables, and pan sauces.
Dried herbs excel in slow-cooked dishes like roasts, braises, marinades, and anything that cooks for more than thirty minutes.
Herb butter is gorgeous melted over grilled meat or fish, tossed with hot pasta, spread on bread, stirred into mashed potatoes, or melted over steamed vegetables. It’s a finishing touch that makes simple food feel special.
Herb oil works beautifully in salad dressings, drizzled over finished dishes, as a dipping oil for bread, or whisked into pasta just before serving.
Herb vinegar shines in salad dressings, marinades for meat, quick pickles, and deglazing pans after cooking meat.
Herb salt is perfect as a finishing salt sprinkled over dishes just before serving, for seasoning meat before cooking, in pasta water, or on popcorn and roasted nuts.
Pesto is obviously brilliant on pasta, but it’s also gorgeous spread on sandwiches, stirred into soups, dolloped on pizza, mixed into mayonnaise for a quick sauce, or tossed with roasted vegetables.
Herb honey works in tea, drizzled over cheese, whisked into salad dressings, used in marinades for pork or chicken, or drizzled over roasted root vegetables.
Herb broth cubes go into soups obviously, but also risotto, cooking grains like rice or quinoa, steaming vegetables, or making quick pan sauces.
Combining Different Preserved Herbs
Sometimes the best approach is using multiple preservation methods in one dish. I might add a dried herb at the start of cooking for depth, then finish with herb butter for brightness. Or start with an herb broth cube for the base, then add fresh garnish at the end.
Layering different herb preparations creates more complex, interesting flavor than just using one type. The dried herbs provide the foundation, the frozen or fresh herbs add brightness, and the herb butter or salt provides a finishing flourish.
This approach works particularly well for soups and stews where you’re building flavor over time. Start with dried woody herbs like thyme or rosemary when you begin cooking. Add frozen herb cubes like parsley or coriander midway through. Finish with a drizzle of herb oil or a pat of herb butter just before serving.
What Doesn’t Work
Some substitutions just don’t work and it’s better to know that upfront rather than discovering it when your dish is half-cooked.
Don’t use dried basil as a substitute for fresh in pesto or caprese salad. Dried basil has virtually no flavor and the texture is all wrong. If you don’t have fresh basil, make something else.
Don’t use herb ice cubes as a garnish. They’re limp when thawed and look unappealing. Frozen herbs are for cooking into dishes, not for topping them.
Don’t substitute herb butter for regular butter in baking. The herbs will taste strange in cakes and biscuits. Herb butter is for savory cooking only.
Don’t add herb salt early in cooking and then add more regular salt later. You’ll over-salt your dish. Choose one or the other.
Don’t try to rehydrate dried herbs in cold water and use them as fresh. They’ll never regain their fresh texture. Use them as dried herbs or don’t use them at all.
Rescuing Over-Herbed Dishes
We’ve all been there. You got carried away with the dried herbs and now your dish tastes overwhelmingly of oregano or rosemary. What can you do?
Dilution is the most effective solution. Add more of the other ingredients—more tomatoes, more stock, more vegetables—whatever makes sense for your dish. This dilutes the herb concentration and brings the flavor back into balance.
Adding acid helps. A squeeze of lemon juice or a splash of vinegar can cut through heavy herb flavor and brighten everything up.
Adding fat works too. A drizzle of olive oil, a pat of butter, or a splash of cream can mellow harsh herb flavors.
Adding sweetness sometimes helps, particularly with tomato-based dishes. A pinch of sugar can balance out over-herbed tomato sauce.
In extreme cases, you might need to start over with the base and add your over-herbed portion gradually until the flavor is right. It’s annoying but it works.
The best solution, obviously, is not to over-herb in the first place. Start with less. Taste. Add more if needed. This approach has saved me countless times.
Frequently Asked Questions
After writing about herbs for three years and talking to hundreds of readers, these are the questions that come up repeatedly. Here’s what people actually want to know.
Can you freeze herbs without water or oil?
Yes, you can freeze herbs directly without any liquid, but the results are mixed. The herbs will freeze but they’ll get freezer burn much faster, usually within a month or two. The texture becomes very limp and the color often turns dark or black.
I’ve tried this multiple times with basil in particular, thinking I could save the effort of making ice cubes. The basil turned black within weeks and the texture was unpleasant even for cooking.
Water or oil protects the herbs from freezer burn and preserves the color and texture much better. The extra minute it takes to add liquid is worth it for the improved results.
If you really want to freeze herbs without liquid, vacuum sealing is your best option. The removed air prevents freezer burn and maintains quality much better than just throwing herbs in a freezer bag.
How long do herbs last in the fridge before they need preserving?
Most fresh herbs last three to five days in the fridge before they start declining noticeably. Some herbs are better than others.
Woody herbs like rosemary, thyme, and sage last longer—often up to a week or even slightly more if stored properly. They’re tougher and more resilient.
Tender herbs like basil, coriander, and parsley start wilting and yellowing within three to four days. Basil is particularly quick to decline and often shows damage within two to three days.
Chives last reasonably well, about five days. Mint lasts four to five days. Dill is quite delicate and starts looking sad within three to four days.
The best way to extend fridge life is storing herbs like flowers. Trim the stems, put them in a jar of water, loosely cover the top with a plastic bag, and keep in the fridge. This can add a few extra days.
But honestly? If you’re not going to use herbs within three days, just preserve them immediately. Don’t wait for them to start declining and then try to save them. Preserve them at peak freshness for best results.
What’s the best way to preserve basil specifically?
Basil is the most difficult common herb to preserve, which is frustrating because it’s also one of the most prolific growers.
Ice cubes with oil are my top choice for basil. The oil prevents the basil from turning black and the flavor stays brilliant for months. I use these cubes constantly.
Pesto is the other excellent option for basil. When your plant is producing faster than you can eat, make a big batch of pesto and freeze it. This turns abundant basil into something genuinely useful.
Herb butter with basil works if you use it quickly. The butter slows oxidation but doesn’t prevent it entirely.
What doesn’t work for basil is drying. Dried basil loses almost all its flavor and turns an unappetizing brown-black. It’s not worth the effort.
Vacuum sealing fresh basil works if you’re very gentle and use the lowest vacuum setting. But it still tends to bruise and darken, so I don’t think it’s worth the hassle.
My honest advice? Make ice cubes with oil or make pesto. Those are the two methods that actually work well for basil.
Can you preserve herbs that are flowering?
Yes, you can preserve herbs that are flowering, but the flavor will be affected. Once herbs flower, their energy goes into reproduction rather than producing the flavorful oils we want. The leaves become less potent and sometimes bitter.
That said, herb flowers themselves are often edible and can be preserved. Chive blossoms make beautiful herb vinegar that turns pink. Basil flowers can go into pesto. Thyme flowers are lovely in honey.
If your herbs are just starting to flower, pinch off the flowers and preserve the leaves as normal. The leaves are still usable, just slightly less flavorful than pre-flowering leaves.
If your herbs are fully flowering and setting seed, honestly, the leaves aren’t worth preserving. They’ll have lost too much flavor. Let the plant finish its cycle, collect seeds if you want to grow more, and start fresh.
Regular harvesting before flowering is the best approach. This keeps the plant producing flavorful leaves rather than putting energy into flowers.
What’s the safest preservation method?
If you’re worried about food safety, herb vinegar is the safest preservation method. Vinegar is naturally acidic and inhospitable to bacteria. You can leave it at room temperature without worry.
Drying is also very safe because removing all moisture prevents bacterial growth. Just make sure herbs are completely dry before storing.
Freezing is safe because frozen temperatures prevent bacterial growth. The risk comes from contamination before freezing, so make sure herbs are clean.
Herb salt is safe because salt inhibits bacterial growth. The only risk is if herbs weren’t dried properly before mixing with salt.
The risky preservation method is fresh herb oil. This absolutely must be refrigerated and used within two weeks. Fresh garlic in oil is particularly dangerous and I don’t recommend it at all.
Herb butter is reasonably safe if you follow basic food safety—keep it refrigerated, use clean utensils, don’t leave it at room temperature for hours.
If food safety worries you, stick with drying, vinegar, or freezing. These methods are virtually foolproof if you follow basic guidelines.
Do preserved herbs have the same nutritional value as fresh?
Preserved herbs retain most of their nutritional value, though exact amounts vary by method.
Frozen herbs retain about ninety to ninety-five percent of their nutrients. Freezing preserves nutrients very well because it stops degradation processes. This is the closest you’ll get to fresh.
Dried herbs retain most of their nutrients but in concentrated form because water is removed. A teaspoon of dried herbs might have similar nutrients to a tablespoon of fresh because it’s more concentrated.
Herbs preserved in oil, butter, or honey retain nutrients reasonably well, though some water-soluble vitamins may leach into the preserving medium. You’re still getting the benefits when you eat the whole thing.
Herbs in vinegar retain most nutrients because vinegar is a good preservative.
The biggest nutritional loss comes from improper storage after preservation. Dried herbs stored in light lose nutrients. Frozen herbs with severe freezer burn have degraded. Fresh herb oil left too long goes rancid and loses benefits.
Honestly though? We don’t eat herbs in quantities large enough for their nutritional content to matter dramatically. We eat them for flavor. The fact that they have some vitamins and antioxidants is a bonus, not the main point.
Can you mix different preservation liquids?
Technically yes, but it often doesn’t work well. Mixing oil and water creates an emulsion that separates. Mixing vinegar and oil is literally vinaigrette, which is fine but won’t stay combined without an emulsifier.
Honey and vinegar can be mixed for shrubs or drinking vinegars. This actually works quite well.
Oil and butter can be combined, though I’m not sure why you’d want to for preservation purposes.
The simpler approach is keeping preservation methods separate. Make herb oil in one batch, herb vinegar in another batch, and use them separately in cooking.
If you want complex flavors, mix different preserved herbs rather than different preserving mediums. Use herb oil with herb salt, or herb vinegar with herb butter. This gives you more control over the final flavor.
How do you know when dried herbs have lost their flavor?
The sniff test is the most reliable method. Take a pinch of dried herbs and crush them between your fingers. Then smell them. If there’s a strong, pleasant aroma, they’re still good. If there’s barely any smell or a dusty, stale smell, they’ve lost their potency.
Visual signs include extreme fading from green to grey or brown. Some color loss is normal over time, but dramatic fading suggests the herbs are past their prime.
Taste is another indicator. If you’re making a dish with dried herbs and it tastes bland despite using the amount the recipe calls for, your herbs may have lost their flavor.
Age is a factor too. Dried herbs stored properly last one to two years for woody herbs, six to twelve months for others. If your herbs are older than this, they’ve probably lost significant flavor even if they look and smell okay.
When dried herbs have lost their flavor, don’t just use more of them. They won’t have the flavor you want no matter how much you add. Compost them and start fresh.
Can you revive herbs that have wilted in the fridge?
Sometimes, yes. If herbs have just wilted from dehydration but aren’t yellowing or slimy, you can often revive them.
Trim the stems and put them in a glass of cold water, like cut flowers. Let them sit at room temperature for thirty minutes to an hour. They’ll often perk up dramatically.
Another method is shocking them in ice water. Fill a bowl with ice water, submerge the wilted herbs for ten to fifteen minutes, then pat dry. This can revive limp herbs impressively well.
But this only works if the herbs are wilted, not if they’re actually going bad. If they’re yellowing, slimy, black, or smelly, they’re past saving. Just compost them and move on.
Reviving is a short-term fix. Use revived herbs immediately or within a day. They’ll wilt again quickly. If you know you won’t use them right away, revive them and then preserve them immediately using your preferred method.
Is it worth preserving small amounts like just a few sprigs?
Yes, absolutely. This is exactly the situation indoor gardeners face constantly. Your windowsill thyme needs trimming but it’s only five sprigs. That’s perfect for preservation.
Ice cubes are brilliant for small amounts. Three sprigs of thyme will fill one or two ice cube compartments. Save them. Next week’s parsley harvest adds a few more cubes. Within a month, you’ve built up a useful collection without ever dealing with large amounts at once.
Herb butter works beautifully for small amounts. Five sprigs of mixed herbs make gorgeous herb butter.
Herb salt is perfect for odds and ends. Whatever you’ve harvested today, chop it up with salt.
Don’t feel like preservation is only worth doing for large harvests. Small amounts add up over time. The key is choosing methods that work for small batches—ice cubes, butter, salt—rather than methods that require quantity like pesto or large batches of oil.
What should you do with herb stems?
This depends on the herb and the preservation method you’re using.
For tender herbs like parsley, coriander, and basil, the tender upper stems can be preserved along with the leaves. They have good flavor. The thick lower stems are best composted—they’re tough and don’t add much.
For woody herbs like rosemary, thyme, and oregano, always strip leaves from stems before most preservation methods. The stems are too woody to be pleasant in food. Exception: when making herb broth, throw the whole stems in for flavor, then strain them out.
Herb stems can make excellent additions to stock or broth. Save them in a freezer bag and throw them in next time you’re making stock. They add flavor without any effort.
Some people make stem pesto, blending tender stems with oil, garlic, and nuts. I’ve tried this and it works reasonably well, though the texture is a bit more fibrous than regular pesto.
Don’t feel guilty about composting stems. They’re returning nutrients to the soil. That’s not waste, it’s a cycle. Use the leaves, compost the stems, grow more herbs. It all works together.
Conclusion: Making Preservation Work for Your Kitchen
After walking you through ten different preservation methods, numerous herb-specific guides, common mistakes, and frequently asked questions, I want to bring this back to what actually matters: making preservation work in your real kitchen with your actual habits.
The truth is, there’s no single best preservation method. The best method is the one you’ll actually use three months from now when you need herbs and can’t be bothered going to the shop or waiting for your plant to grow more.
For me, that’s ice cubes with oil and herb butter. They’re my five-star methods because I genuinely reach for them constantly. They suit how I cook, they fit my available time, and they use up the small continuous harvests from my indoor garden without fuss.
Your five-star methods might be completely different. If you make soup every week, herb broth cubes might be your hero. If you love drying things and have good storage space, drying might be perfect. If you’re all about that concentrated flavor, herb salt might be your answer.
The key is being honest with yourself about your cooking style and your available time. Don’t make elaborate herb vinegars if you never use vinegar. Don’t dry herbs if you prefer the fresh flavor of frozen. Don’t make pesto if you’ll forget it’s in your freezer.
Start with one method that appeals to you. Just one. Try it with your next harvest or your next shop-bought bunch. See if you actually use it. If you do, brilliant—you’ve found a preservation method that works for your life. If you don’t, try a different method next time.
The goal isn’t to become an expert herb preserver with every method mastered. The goal is to stop wasting herbs. Whether you achieve that with ice cubes, drying, butter, or any other method doesn’t matter. What matters is that those herbs you grew or bought get used instead of going into the bin.
For me personally, starting Small Kitchen Garden to avoid the environmental cost of shop-bought herbs, preservation completed the circle. Growing herbs reduces waste from packaging and transport. Preserving them reduces waste from my own harvests. Nothing goes in the bin. Everything gets used. That feels good.
It doesn’t have to be complicated. It doesn’t have to be Instagram-perfect. It just has to work for you.
So pick a method. Try it. Use it. Then come back and try another if you’re keen. Build up a little collection of preserved herbs over time. Before you know it, you’ll have a freezer stash of herb cubes in five different flavors, a few jars of dried herbs in your cupboard, and maybe a log of herb butter waiting for Sunday’s roast.
That’s when you’ll know preservation is actually working for your kitchen—when you reach for preserved herbs without thinking about it, when they’re just part of how you cook, when waste becomes something that used to happen but doesn’t anymore.
And that windowsill plant producing twenty basil leaves? No longer a problem. It’s next month’s pasta dinners, already sorted.